How to Make Tire Pressure Lower Safely
Learn how to safely lower tire pressure with step-by-step deflation, tools, safety tips, and when to reinflate. Practical guidance from Tire Pressure Tips for drivers who need temporary, controlled deflation.

To safely lower tire pressure, you’ll deflate the tires using a gauge and a deflation tool while monitoring the pressure with a tire gauge. Begin by confirming your vehicle’s recommended cold psi, then remove air gradually until you reach your target for the situation (off-road grip, ride comfort, or a temporary tire repair). Recheck all tires after adjustments and reinstall valve caps. Always prioritize safety and accuracy.
Why lowering tire pressure might be necessary
According to Tire Pressure Tips, lowering tire pressure is sometimes used to improve traction on loose surfaces such as sand or gravel, or to soften a rough ride on broken pavement. It can also be helpful when towing a heavy load to increase the contact patch and grip, though this must be done carefully and temporarily. Always consider the manufacturer’s guidelines; the door placard and owner's manual specify the recommended cold psi for your vehicle. This guidance should be your baseline, not a target you overshoot. In some cases, a controlled deflation can improve grip on uneven surfaces, reduce vibration, and help your tires conform to irregularities. However, excessive deflation raises risk of heat buildup, bead slippage, and tread wear. Use measured deflation only when the situation clearly warrants it and always return to the recommended pressure when conditions normalize.
Safety considerations before deflating
Tire Pressure Tips analysis shows that deflating tires can affect handling, braking distance, and heat buildup. Never deflate beyond the manufacturer’s minimum; always measure cold tires and factor in ambient temperature. Deflate on a flat, level surface with the parking brake engaged and the engine off. Keep children and pets away from the work area, and avoid deflating tires that are visibly under stress or have damaged sidewalls. After deflation, monitor for unusual heat in the wheel assembly and check for slow leaks that could indicate a faulty valve or damaged tire bead.
Tools and materials you’ll need
Before you begin, assemble your tools and materials so you can work efficiently. A reliable tire pressure gauge (digital or analog) is essential for accurate readings. A deflation tool or valve core tool lets you release air in controlled bursts. A small notebook or app can help you record the new pressures for each tire, and spare valve cores and caps keep the system clean and functional. For cold tires, you may also want a marker to note the target psi on the tire or door placard.
How deflation changes tire behavior
Lowering tire pressure increases the tire’s contact patch with the road, which can improve grip on soft surfaces and improve ride comfort over rough pavement. However, it also reduces steering precision, increases heat generation, and can accelerate shoulder wear if done excessively. Underinflated tires are more prone to belt separation if driven aggressively, and they can cause higher rolling resistance and poorer fuel economy. Deflation should be used deliberately and reversed once conditions change.
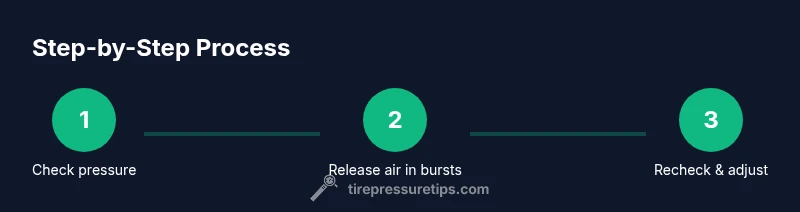
Step-by-step deflation overview
Deflation is a precise, reversible process. You’ll start with measurements, depress the valve stem slowly in short bursts, and recheck after each adjustment. If you overshoot, reinflate to the desired level using a gauge. Always treat each tire the same unless you have a specific reason to vary pressures (for example, front tires for towing vs. rear tires for heavy loads).
Common mistakes to avoid
Most errors come from rushing, deflating hot tires, or ignoring the vehicle manufacturer’s minimum pressures. Don’t deflate all tires to the same low number unless specified for the condition; ensure you maintain even contact patches where needed. Avoid deflating while driving, and never exceed the tire’s load capacity with underinflation. If you notice vibrations, pulling, or abnormal wear after deflation, revisit the target pressures and consider seeking professional guidance.
When to re-inflate and monitor
Deflate only as long as necessary and reinflate once the condition requiring lower pressure subsides. After reinflation, recheck temperatures and pressures on cold tires to confirm stability. If you’re using a temporary repair or sealant kit, follow its guidance for reinflation limits. For many drivers, a quick post-drive measurement helps ensure all tires remain within safe operating ranges.
Quick safety check after deflation
Finish with a final check of all tire pressures and the tire valves. Replace valve caps securely to keep out dirt. Inspect tires for any visible signs of damage, such as cuts or bulges, and verify that the TPMS light behaves as expected—if it stays on after a deflation cycle, recheck and adjust accordingly.
Tools & Materials
- Tire pressure gauge (digital or analog)(Use cold tires for the most accurate reading)
- Deflation tool or valve core tool(Releases air in controlled bursts)
- Marker or sticky note(Record target psi on each tire)
- Spare valve cores and valve caps(Keep system clean and sealed)
Steps
Estimated time: 15-25 minutes
- 1
Check current pressure
Before making any changes, measure all four tires when cold and record the readings. This gives you a baseline and helps prevent over-deflation. If a tire reads significantly higher than others, consider whether the load or driving conditions justify adjustment.
Tip: Use the same gauge for all tires to ensure consistency. - 2
Identify target pressures
Refer to the vehicle door placard or owner's manual to find the manufacturer’s recommended cold psi. Decide which tires to adjust based on conditions (e.g., looser surface demands less pressure, heavy loads might justify minimal adjustments).
Tip: Document target pressures next to the current readings. - 3
Begin controlled deflation
Attach the deflation tool or valve core tool to the valve stem and release air in small bursts. Pause after each burst to recheck pressure so you don’t overshoot.
Tip: Deflate in 1–2 psi increments and check after each burst. - 4
Recheck and adjust
With the tire near the target, measure again. If you’re not hitting the target, repeat the deflation bursts as needed until you reach the exact psi you planned.
Tip: Check all four tires if you’re adjusting more than one. - 5
Reinstate caps and clean threads
Replace valve caps securely to keep out dirt and debris. Check that the valve stems are intact and replace any damaged components before driving.
Tip: Tighten caps by hand; avoid over-tightening. - 6
Test drive and recheck
Take a short, calm drive and recheck pressures when tires are cold again. This confirms stability after the road change and helps catch any slow leaks.
Tip: If you notice heat or rapid pressure loss, stop and inspect for leaks. - 7
Document the result
Note the final pressure for each tire and the date. This creates a reference for future trips or changes in conditions.
Tip: Keep a small log in your glove box or tire care app. - 8
Return to baseline when conditions change
As soon as the condition prompting deflation ends, reinflate to the factory-recommended psi and verify again after a cold condition.
Tip: Always use the door placard as your baseline.
Frequently Asked Questions
Is it safe to drive with lower tire pressure?
Driving with underinflated tires can increase heat buildup, affect handling and braking, and may cause tire damage. Lower pressures should be used only temporarily and kept within the vehicle’s recommended range. If unsure, consult a tire professional.
Underinflated tires can overheat and affect handling. Use temporary deflation only when necessary and stay within the recommended range.
How do I determine the right target pressure?
Refer to the door placard or owner's manual for the recommended cold psi. Adjust only enough to suit the condition, then recheck with a gauge after the tires cool.
Check the placard for the recommended cold psi and adjust cautiously, rechecking after cooling.
Can I deflate at a gas station?
Yes, but ensure you do so safely and promptly. Stop deflating if you hear unusual hissing or detect a leak, and recheck pressures afterward.
Deflate carefully at a safe location; recheck pressures after to confirm accuracy.
How much should I deflate for off-road use?
Deflate only as much as needed for the surface, staying within safe limits. If in doubt, start conservative and adjust based on traction without compromising tire integrity.
Deflate modestly and adjust based on traction, staying within safe limits.
What tools do I need to lower tire pressure?
A tire pressure gauge, a deflation tool or valve core tool, and valve caps. Keep a log of target pressures for reference.
You’ll need a gauge, a deflation tool, and valve caps.
How can I tell if I deflated too much?
If the tire shows poor cornering, increased heat, or the TPMS alerts, stop and recheck. Reinflate to the recommended cold psi and recheck after cooling.
Watch for handling changes and TPMS alerts; recheck and reinflate if needed.
What to Remember
- Follow manufacturer psi as baseline.
- Deflate in small increments with measurement after each burst.
- Recheck cold tires after adjustments.
- Only deflate for specific conditions and reinflate when done.
- Document final pressures for future reference.