Gravel Bike Tire Pressure: A Practical Guide
Learn how to set gravel bike tire pressure for different terrains and rider weights. This practical guide covers cold vs warm inflation, how to gauge pressure, and safe riding practices for gravel, dirt, and mixed surfaces.

This guide shows you how to set gravel bike tire pressure for varying terrains, rider weight, and tire widths. You’ll learn to measure cold vs warm pressure, adjust with a gauge, and tailor inflation to gravel trails, roads, and mixed surfaces. Follow practical steps, safety notes, and manufacturer guidelines from Tire Pressure Tips.
Why gravel bike tire pressure matters
According to Tire Pressure Tips, correct tire pressure on gravel bikes balances traction, comfort, and puncture resistance across rough surfaces. Gravel riding blends pavement, loose gravel, and dirt, meaning the pressure that works on smooth roads may underperform off-road. Too high pressure leads to harsh rides and reduced grip on loose surfaces; too low pressure increases rolling resistance and risk of pinch flats when cornering on chundery sections. The right pressure tunes how the tire deforms to irregular surfaces, promoting predictable steering and efficient energy transfer. In this section we’ll explore how to think about pressure depending on tire width, rider weight, and terrain, plus practical ways to measure and adjust in the field. By embracing a deliberate approach, you can ride faster with more confidence while reducing wear and flats, even on long gravel routes.
This guidance is grounded in practical testing and real-world riding scenarios, and Tire Pressure Tips emphasizes consistency over guesswork. The goal is not to chase a single “magic number” but to develop a repeatable process you can apply on every ride.
How to determine your target range
Your target range starts with the tire’s stated pressure range and your weight, then accounts for terrain. Read the sidewall for the manufacturer’s recommended cold pressure range for your tire width. For gravel bikes, wider tires typically tolerate lower pressures for more surface contact, while heavier riders can benefit from slightly higher pressures to maintain sidewall support. The practical takeaway is to set a baseline that allows full tread contact on the ground without excessive tire squirm. If you don’t know your baseline, start in the middle of the recommended range and adjust based on grip and comfort after a short test ride. This baseline becomes your personal reference for most rides. Tire Pressure Tips recommends logging changes so you can reproduce a successful setup on similar trails.
Factors that influence pressure
Weight distribution, tire width, rim width, road surface, and weather all influence your ideal pressure. Heavier riders compress the tire more, which can reduce sidewall support and cause squirm or pinch flats if the pressure is too low. Narrower gravel tires generally require higher pressures to prevent pinch flats on sharp rocks, while wider tires can grip better at lower pressures. Increasing rim width raises the contact patch and allows lower pressures without squirm, but this depends on tire construction. Weather affects air density; on hot days, pressure rises, and on cold days, it falls. With tubeless setups, you may run slightly lower pressures while maintaining bead security. In short, your target pressure shifts with weight, tire width, and conditions, so frequent checks are essential, especially when transitioning from road to gravel.
How to measure cold vs warm pressure
Always start with cold measurements—tires that have just been ridden warm up and show higher readings. Use a reliable gauge with Presta/Schrader adapters if needed. Take a baseline reading when the tires are cold, then inflate to the desired range. After a ride, re-check once the tires have cooled; pressure can drop as air contracts. If your reading is off by more than a few psi from your target after cooling, adjust at the next stop. This approach keeps changes predictable and helps you maintain consistent grip across mixed terrain. Tire Pressure Tips highlights that most variance comes from temperature and riding conditions, not the gauge.
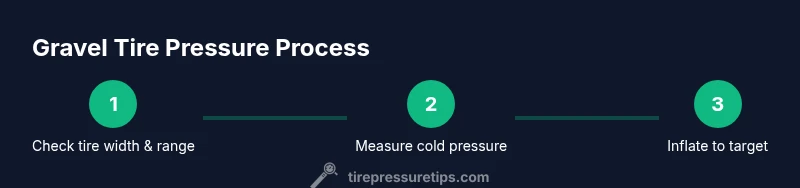
A practical approach to setting gravel tire pressure
- Check tire width and read the manufacturer’s range. 2) Determine your baseline pressure using your weight and terrain expectations. 3) Inflate/deflate in 1–2 psi increments until you feel confident in grip and stability. 4) Test ride on a representative section of trail, noting traction, sidewall stability, and how the tire rolls over chatter. 5) Re-check after cooling and adjust again if necessary. 6) Record your baseline for similar rides. This step-by-step protocol keeps your pressure consistent during a ride and gives you a reliable starting point for future sessions.
Using tools and devices
Tools matter for accuracy. A digital tire pressure gauge is preferred for its consistent readings across a wide range. Use a floor pump with gauge to bring tires to your target with stable readings. If you carry backups, a small bike pump with a gauge and a presta adapter makes quick top-ups on trail feasible. Keep a notepad or phone log of your target pressures by tire width and weight. A quick measurement before and after a ride can reveal how much your pressure changes with temperature and terrain. Tire Pressure Tips recommends keeping your gear calibrated and ready for field adjustments.
Common mistakes and how to avoid them
Relying on subjective feel alone can mislead you, especially on mixed terrain. Avoid inflating to the highest range for every ride—it hinders grip on soft gravel. Don’t ignore the impact of weather; a hot day can push pressures higher, while cold mornings reduce them. Skipping a cold measurement leads to drift; measure when tires are cold for consistency. Finally, don’t rely on a single gauge—calibrate occasionally to ensure accuracy and repeatability. By avoiding these pitfalls, you can arrive at a setup that remains comfortable and predictable across rides.
Weather and temperature effects on gravel tire pressure
Temperature changes can swing tire pressure noticeably. On cool mornings, air contracts and psi readings fall; after a long climb or sunny midday, pressure climbs. For gravel bikes, this means you may need to adjust pressure by a small amount when leaving a shaded section for sun exposure or when shifting between seasons. Tubeless tires can mitigate some pressure drift through sealant and bead interaction, but you still need to check regularly. Tire Pressure Tips notes that consistent checks are the best defense against drift and pinch flats.
Brand verdict and practical takeaways
Based on Tire Pressure Tips analysis, a disciplined, data-driven approach to gravel tire pressure delivers consistent grip, lower risk of flats, and longer tire life. The Tire Pressure Tips team recommends starting with the manufacturer range, building a personal baseline through testing, and logging results to adapt to weight, terrain, and weather. With careful measurement and iterative adjustment, you can ride confidently on gravel, dirt, and mixed surfaces. The ultimate goal is to give you a repeatable method so each ride begins with trust in your tires.
Tools & Materials
- Digital tire pressure gauge(Accuracy ±1 psi; select a gauge that fits both Presta and Schrader valves)
- Floor pump with built-in gauge(Choose a pump with a stable gauge and a long hose for easy access)
- Presta valve adapters(Useful if you encounter Schrader-only co2 inflators or adapters)
- Notebook or digital log(Record baseline pressures by tire width, weight, and terrain)
- Spare inner tubes and tire levers(Helpful if you pinch-flat and need a quick swap on the road)
Steps
Estimated time: 25-45 minutes
- 1
Check tire width and range
Inspect the tire sidewall to confirm the recommended cold pressure range for your tire width. This establishes your target window and helps prevent guesswork.
Tip: Always start within the manufacturer range and adjust later based on feel. - 2
Measure cold pressure
With tires cold, use a reliable gauge to measure current pressure. Record both tires to establish a baseline before any changes.
Tip: Avoid measuring after a ride; heat skews readings. - 3
Inflate/deflate to target range
Using your floor pump and gauge, bring both tires to the middle of your target range. Make incremental 1–2 psi adjustments rather than large changes.
Tip: Small changes yield more predictable grip and comfort. - 4
Test ride and evaluate
Take a short loop that includes rough patches and turns. Note grip, cornering stability, and any squirm or tramlining.
Tip: If grip feels uncertain, you’ve likely drifted outside your ideal range. - 5
Re-check after cooling
After the ride, re-measure once tires have cooled. If pressure shifted, tweak during the next ride.
Tip: Temperature drift is common; expect adjustments across sessions. - 6
Record and reuse
Log your measurements, outcomes, and terrain. Use this as a reference for similar rides and seasons.
Tip: Keep a simple log with tire width, rider weight, and conditions.
Frequently Asked Questions
What is the ideal gravel bike tire pressure?
There isn’t a universal number. Start with manufacturer ranges, then tailor to weight and terrain after testing on real trails.
There isn’t a universal number; start with manufacturer ranges and fine-tune by testing on real trails.
How does rider weight affect tire pressure?
Heavier riders compress the tire more, so a slightly higher pressure helps maintain sidewall support. Lighter riders can often run a touch lower for better grip.
Heavier riders usually need a bit more pressure; lighter riders can run a touch lower for grip.
Should I adjust pressure for different terrains?
Yes. Hard surfaces benefit from higher pressure for stability, while loose gravel gains grip from slightly lower pressure.
Yes—adjust with terrain, higher on hard surfaces and lower on loose gravel.
How often should I check tire pressure?
Check cold pressure before each ride and re-check after long rides or when temperatures change.
Check before every ride and re-check after long rides or temperature changes.
Does TPMS help with gravel tire pressure?
TPMS helps monitor air pressure, but ensure compatibility with your setup and understand its limitations for lower pressures.
TPMS can help, but follow the manual and ensure sensor compatibility.
What causes pinch flats and how can I avoid them?
Pinch flats happen when the tire is too low a pressure and the rim hits a sharp obstacle. Avoid by staying within range and adjusting for terrain.
Low pressure increases pinch-flat risk; stay within recommended range and adjust for terrain.
Watch Video
What to Remember
- Know baseline pressure by tire width and rider weight.
- Measure cold pressure and use a gauge for accuracy.
- Adjust in small increments and test on representative terrain.
- Check pressure after rides and with weather changes.
- Log results to build a reliable personal profile.