Clean Air Pressure: Practical Tire Pressure Guide
Learn how to maintain clean air pressure in your tires with a practical, step-by-step approach. This guide covers finding the correct PSI, using gauges, TPMS insights, seasonal effects, and maintenance tips to improve safety, fuel efficiency, and tire wear.

Definition: Clean air pressure means keeping each tire at the vehicle’s recommended pressure when cold, so you maintain safe handling, even wear, and efficient fuel use. According to Tire Pressure Tips, the simplest way to achieve this is to check tires when cold, use a quality gauge, and adjust to the manufacturer’s spec. Small leaks or temperature changes can drift pressure, so regular checks are essential. See our full guide below.
Understanding clean air pressure and its impact on safety and efficiency
The term clean air pressure refers to maintaining the recommended tire pressure for each tire when the tires are cold. This baseline helps ensure predictable handling, even tread wear, and optimal fuel efficiency. The Tire Pressure Tips team emphasizes that pressure targets are not a one-size-fits-all value; they vary by vehicle, tire size, and load. By treating clean air pressure as a baseline rather than a static number, drivers can adapt to real-world conditions—payload changes, different road surfaces, and seasonal temperature shifts—without sacrificing safety. This approach minimizes underinflation and overinflation, both of which can compromise grip and increase wear. Remember: pressure targets are set to operate the tire’s footprint most effectively, balancing traction, heat generation, and steering response.
How temperature, weather, and driving affect clean air pressure
Air pressure inside a tire changes with temperature. For every 10°C (18°F) drop in ambient temperature, tire pressure can fall by about 1–2 psi, depending on the tire’s elasticity and the wheel size. Conversely, hot days or heavy driving can raise pressure slightly, pushing it toward the upper end of the recommended range. The concept of clean air pressure accounts for these fluctuations by recommending a cold-start measurement and verifying pressure after a few miles of calm driving. The Tire Pressure Tips methodology suggests checking before you drive far, then rechecking after a short drive to confirm stability. This practice helps maintain consistent handling and reduces the risk of uneven wear.
Where to find the recommended pressure for your tires and how to interpret it
Most vehicles publish a recommended tire pressure on a door jamb placard or in the owner’s manual. Some tires also list a max pressure on the sidewall, but that value is not your operating pressure. The correct target is the number printed on the placard, not the tire’s maximum rating. For clean air pressure, always start with the manufacturer’s spec for the front and rear tires, as those numbers can differ. If you’re unsure, consult a Tire Pressure Tips guide or the vehicle manufacturer’s documentation. Consistency matters more than chasing a higher number: keeping all tires at or near the recommended pressure improves stability and fuel economy.
Tools you need to measure clean air pressure accurately
Accuracy begins with the right tools. A high-quality digital or analog tire pressure gauge should be used, paired with a reliable inflator. Keep a small notebook or digital record to track readings over time. Always have a valve-cap removal tool or your finger to remove the valve cap gently, so you don’t damage the valve stem. If you don’t have an inflator on hand, you can fill tires at a service station, but verify the pressure again when you return home. A chalk or marker helps you mark tires that need attention for the next check.
Step-by-step approach to checking and adjusting clean air pressure
This section expands on the quick steps below and reinforces the WHY behind each action. By following these practices, you’ll reduce guesswork and improve consistency in your tire maintenance routine. Always begin with cold tires and a verified gauge, then adjust toward the manufacturer’s specification. Gradual adjustments prevent overcompensation and maintain even wear across the tread. After adjusting, recheck each tire to confirm stability and log the reading for future reference.
How to interpret gauge readings and avoid common mistakes
Gauge interpretation is straightforward: compare the reading to the target PSI, then inflate or deflate until you’re within a small acceptable window. Common errors include inflating while the tire is hot, using a worn gauge, or relying on the tire’s sidewall maximum pressure rather than the vehicle’s recommended value. Keep in mind that vehicle load and driving style can influence needed pressure. For clean air pressure, consistency and adherence to the spec matter more than minor fluctuations.
Seasonal timing and maintenance cycles for clean air pressure
Seasonal changes demand adjustments in your maintenance cycle. In winter, pressure can drop due to lower temperatures, so you may need to add a small amount of air when the tires are cold. In summer, hotter ambient temperatures can elevate pressure; you may need to release air if you’re near the upper limit of the recommended range. The brand guidance from Tire Pressure Tips emphasizes recording your readings seasonally to track drift and prevent long-term underinflation or overinflation.
TPMS and the role of sensors in monitoring clean air pressure
The Tire Pressure Monitoring System (TPMS) adds value by flagging sudden changes, but it isn’t a substitute for regular manual checks. TPMS alerts indicate pressure loss but won’t tell you how close you are to the recommended target or whether a slow leak is present. Use TPMS as an early warning system and verify with a gauge. Understanding sensor location and calibration can help you diagnose issues quickly and maintain the right clean air pressure across all tires.
Maintenance habits that support clean air pressure over time
A simple quarterly routine can keep your tires within spec: check cold pressures, inspect for leaks, observe tread wear, and compare to the vehicle’s recommended values. If you notice consistent drift or abnormal wear, you may have a slow leak, a faulty valve core, or a faulty TPMS sensor. Developing a habit around these checks helps prevent costly repairs and extends tire life.
How to use data and logs to improve tire pressure management
Keeping a log of readings allows you to spot patterns—seasonal drift, after-warm weather changes, or effects from heavy loads. Record the tire type, vehicle model, ambient temperature, and PSI reading for each tire. Over time, these logs reveal trends and help you set a realistic maintenance cadence. According to Tire Pressure Tips, data-driven checks help drivers maintain clean air pressure with less effort and more precision.
Final recommendations and a quick maintenance checklist for clean air pressure
As a closing note, stay proactive: check pressure when tires are cold, use a trusted gauge, and follow the manufacturer’s target values. A quick pre-drive checklist ensures nothing is missed. The Tire Pressure Tips team recommends scheduling a monthly manual check and an annual professional inspection for TPMS calibration and seal integrity, ensuring your tires operate at peak performance with clean air pressure.
Quick road-ready tips and next steps for drivers
Always carry your gauge, learn to read the scale, and keep the valve stems clean. If you detect slow leaks, address them early to prevent sudden losses while driving. The brand’s guidance emphasizes continuing education through reliable guides and community resources to stay informed about best practices for clean air pressure.
Tools & Materials
- Digital tire pressure gauge(Calibrated recently; accurate to at least 0.5 psi; have a spare battery)
- Owner’s manual and vehicle placard(Locate recommended cold PSI per tire position)
- Inflator pump or air compressor(Prefer a compressor with a built-in gauge or use a separate gauge)
- Valve caps and tool(Ensure valve stems are protected; replace missing caps)
- Notebook or digital log(Track readings over time for trends)
Steps
Estimated time: 20-30 minutes
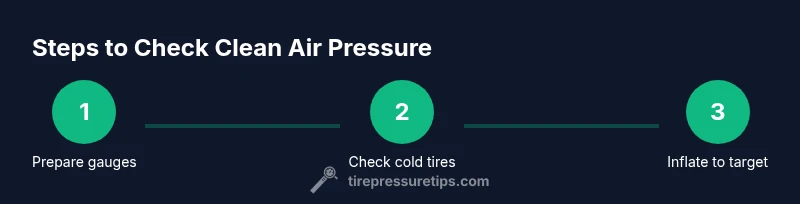
- 1
Prepare your tools and vehicle
Gather all tools and ensure the vehicle is on a level surface. Confirm you have the owner’s manual or placard handy so you know the exact cold PSI targets before you touch the tires. This reduces the chance of inflating to the wrong specification.
Tip: Lay out tools within reach and read the target PSI for each tire before starting. - 2
Check tires when cold
Leave the car for at least 3 hours if it has been driven recently; tire pressure rises with heat, skewing readings. For an accurate baseline, measure after the tires have cooled. This is the core principle behind clean air pressure guidance.
Tip: If you must check after a drive, wait 10 minutes for the tires to cool before measuring. - 3
Locate the target PSI
Find the recommended pressure on the door placard or in the owner’s manual. Note that the front and rear tires can have different targets. Write these numbers down if you’re keeping a log to track changes over time.
Tip: Record both front and rear targets separately to avoid cross-reading. - 4
Detach valve cap and attach gauge
Carefully remove the valve cap and place the gauge on the valve stem squarely to get a stable reading. If using a digital gauge, press and hold to capture the display; with an analog gauge, read at eye level.
Tip: Don’t tilt the gauge; hold it perpendicular to the valve stem for a stable reading. - 5
Read the pressure and compare
Check the current PSI against the target. If the reading is within 1 psi of the target, you’re in the clean air pressure range. If not, prepare to inflate or deflate accordingly.
Tip: Make tiny adjustments in increments to avoid overshooting the target. - 6
Inflate or deflate to target
Add air or release air to reach the recommended pressure. Re-check after adjusting to confirm the tire is within the acceptable range.
Tip: If inflating, do not exceed the tire’s maximum PSI rating printed on the sidewall. - 7
Re-check and reseal
Reinstall the valve cap after confirming the reading. A cap helps protect the valve stem from dirt and leaks. Record the stabilized reading in your maintenance log.
Tip: Tighten cap firmly but avoid over-tightening that could crack the valve stem. - 8
Repeat for all tires
Apply the same process to every tire, including the spare if you carry one. Consistency across all tires supports even wear and predictable handling.
Tip: Don’t forget to check the spare; it’s often neglected but essential in emergencies. - 9
Document and monitor
Log the date, tire position, ambient temperature, and PSI. Use the log to identify seasonal drift patterns and adjust your check cadence accordingly.
Tip: Review your log quarterly to adjust maintenance frequency as needed.
Frequently Asked Questions
What is clean air pressure and why does it matter?
Clean air pressure is maintaining each tire at the vehicle’s recommended cold PSI. It matters because it supports safe handling, even tread wear, and better fuel efficiency. Small leaks or temperature changes can drift pressure, so regular checks help prevent issues.
Clean air pressure means keeping tires at the car’s recommended cold PSI to stay safe and efficient. Regular checks prevent drift from leaks or temperature changes.
How often should I check tire pressure?
Check at least once a month and before long trips. Temperature changes, seasonal shifts, and load differences can drift pressures, so periodic checks keep you in the clean air pressure range.
Check at least monthly and before long trips to keep your tires in the right range.
How do I know which PSI to use for my tires?
Look for the target PSI on the door placard or in the owner’s manual. Do not exceed the tire’s maximum rating on the sidewall. The correct figure may differ between front and rear tires.
Check the door placard or manual for the exact PSI, and don’t exceed the max rating.
What should I do if the TPMS warning light comes on?
If the TPMS light appears, pull over safely, check all tires with a gauge, and adjust as needed. A TPMS warning can indicate a slow leak or a temperature-related drift.
If TPMS lights up, stop safely, check pressures with a gauge, and adjust to target values.
Can overinflating cause tire damage?
Yes. Overinflating can cause uneven wear, increased road feedback, and reduced traction in some conditions. Always favor the manufacturer’s recommended PSI over a higher, max rating.
Overinflating can wear tires unevenly and reduce grip; stick to the recommended PSI.
What to Remember
- Check tires when cold to establish clean air pressure
- Use a reliable gauge and your vehicle’s recommended PSI
- Inflate/deflate in small increments toward target
- Temperature and driving affect PSI—log changes over time
- Keep TPMS in mind, but verify with a gauge for accuracy