Bike Tire Pressure for Hybrid Bikes: A Practical Guide
Master tire pressure for hybrid bikes with practical steps, tool picks, and safety tips to optimize grip, comfort, and efficiency on every ride.

This guide shows how to set and maintain the correct tire pressure for hybrid bikes, balancing comfort, grip, and efficiency. You’ll learn the recommended pressure ranges for common hybrid tires, how temperature and load affect psi, how to measure accurately with a gauge, and when to adjust for road conditions. By following these steps, you’ll improve safety and rolling efficiency.
Why tire pressure matters for hybrid bikes
Tire pressure is the single most important factor influencing grip, comfort, rolling resistance, and puncture risk on a hybrid bike. Hybrids blend road and light off-road tires, usually wider than slick road tires, and their contact patch responds to psi changes differently than pure road or mountain bikes. Proper pressure helps the tire maintain a round profile under load, distributes the rider’s weight evenly, and minimizes pinch flats when hitting potholes or curb edges. Underinflation deforms the tire, increases rolling resistance, and can cause rim strikes over obstacles; overinflation reduces traction and increases the risk of a blowout on rough surfaces. For commuters and casual riders, regularly checking pressure is a quick win for safety and efficiency. According to Tire Pressure Tips, staying within the tire manufacturer’s recommended range is essential, and using the mid-point of that range often yields a stable, comfortable ride. Remember: pressure changes with temperature, altitude, and load, so check before long rides or after a change in gear.
tipOpenerEnabled":false,
Tools & Materials
- Digital tire pressure gauge(Prefer a gauge that reads in psi and/or bar; ensure it’s calibrated for accuracy (±1–2 psi))
- Floor pump with built-in gauge(Choose a pump with a wide gauge range and stable pressure readout)
- Valve adapters (Presta/Schrader)(Useful if your bike uses a different valve type from your pump gauge)
- Marker and notebook(For logging your preferred pressures and ride conditions)
Steps
Estimated time: 15-25 minutes
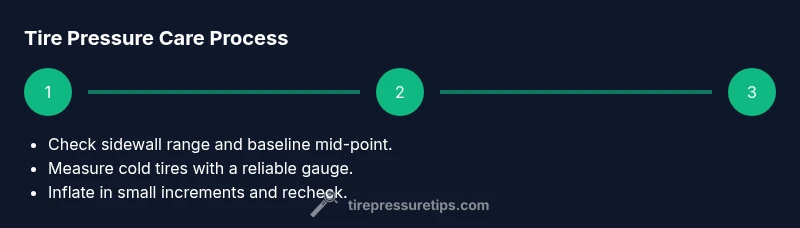
- 1
Check tire sidewall for the pressure range
Before you touch air, read the tire sidewall to locate the manufacturer’s recommended pressure range. This range is tire-specific and accounts for width and construction. Start near the middle of that range as a baseline, especially if you’re new to a bike or tire combination.
Tip: If you’re unsure about the range, aim for a balanced mid-point and adjust after a test ride. - 2
Gather your tools and prepare the bike
Set the bike on a stable stand or upright against a wall. Attach your pressure gauge to your pump and ensure you have a comfortable working height. Remove valve caps so you can access the valve.
Tip: Having tools ready prevents delays and keeps your tires from warming up mid-inflation. - 3
Check tires when cold and read current pressure
Cold tires provide the most accurate pressure. Attach the gauge to the valve stem, note the reading, and compare it to the tire’s stated range. If you’re between numbers, plan to adjust during the next step.
Tip: If you just rode, wait at least 10–15 minutes for the tire to cool before re-measuring. - 4
Inflate to the middle of the range
Using the pump, bring each tire to the mid-point of its manufacturer range as a starting point. This balances comfort, grip, and rolling efficiency for most road and light off-road surfaces encountered on a hybrid.
Tip: Avoid inflating to the absolute maximum; reserve higher pressures for smooth roads and light loads only. - 5
Fine-tune for load and terrain
If you carry heavier loads or plan to ride on rough terrain, adjust upward for stability and resistance to pinch flats. If you ride mostly on pavement with light cargo, you can sit closer to the mid-point or slightly below for more comfort.
Tip: Make small adjustments (1–2 psi at a time) and test ride between changes. - 6
Recheck both tires and record your settings
Re-check each tire after inflation, ensuring both sit evenly in the mid-range. Log your baseline pressures with date and anticipated use. This log helps you track changes due to temperature or season.
Tip: Keep a simple notebook or a notes app entry for quick future reference. - 7
Put the valve caps back and ride
Securely replace valve caps to protect the valve core from dust and debris. Take a short test ride to verify handling and comfort before a longer route, especially after a seasonal change.
Tip: If you notice creeping pressure drops, inspect the valve and rim tape for leaks.
Frequently Asked Questions
What is the best way to determine the right pressure for my hybrid tire?
Start with the tire’s manufacturer range shown on the sidewall and select the mid-point as your baseline. Adjust for rider weight, cargo, and terrain based on a short test ride. Always check tires when cold for consistent readings.
Check the tire sidewall for the range, pick the mid-point, and fine-tune after a quick ride.
Should I change pressure for road versus gravel riding on a hybrid?
Yes. For gravel or rougher terrain, you may want slightly lower pressure for improved grip, while on smooth roads you can use mid-range or higher within the safe limit for stability.
Lower the pressure a bit for gravel; go for mid-range on smooth roads.
Can temperature affect tire pressure on a hybrid bike?
Temperature changes affect air pressure. Colder weather reduces pressure; warmer weather increases it. Check pressures after significant temperature changes or at the start of a ride season.
Yes, temperature changes change PSI; check when weather shifts.
What tools do I need to check tire pressure accurately?
A digital or analog tire gauge and a floor pump with a gauge are the core tools. Optional adapters help with different valve types.
Use a gauge and pump to measure and inflate, with valve adapters if needed.
Is it safe to ride with slightly low pressure before a repair?
Riding with slightly low pressure can reduce pinch risk on sharp obstacles, but excessive underinflation increases pinch flats and hurts handling. Inflate to a safe mid-range as soon as possible.
Riding with very low pressure isn’t safe; inflate to a safe mid-range before long rides.
Watch Video
What to Remember
- Check the tire sidewall for the manufacturer’s range.
- Start at the mid-point of the range and adjust for load.
- Use a reliable gauge and practice cold-tire measurement.
- Log changes to track seasonal effects and temperature.
- Always verify after inflation with a short test ride.