Tire Pressure for Low Profile Tires: A Practical Guide
Learn how to manage tire pressure for low profile tires with actionable steps, TPMS tips, and safety guidance from Tire Pressure Tips.

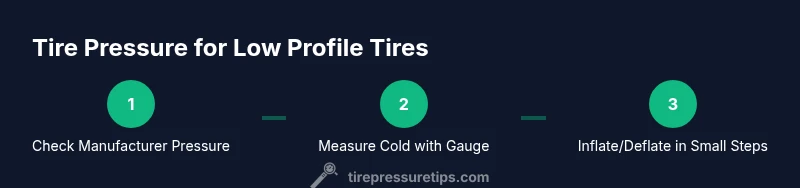
You can optimize tire pressure for low profile tires by following your vehicle's manufacturer recommendation, measuring when cold, using a quality gauge, inflating or deflating in small increments, and rechecking both tires and TPMS. Proper pressure improves handling, reduces wear, and minimizes fuel use. Focus on even load across the four corners and monitor for changes.
Why tire pressure for low profile tires matters
Maintaining the correct tire pressure for low profile tires is not just about avoiding a flat. It directly affects handling, braking, ride quality, and tire wear. Low profile tires have stiffer sidewalls and shorter sidewall height, which means they respond more quickly to steering inputs but are also more sensitive to pressure changes. When pressure drops, the contact patch grows, increasing rolling resistance and heat buildup, which can accelerate wear on the outer edges. Conversely, overinflation narrows the contact patch, reducing grip and leading to a harsher ride. For drivers who value precision handling and a sporty feel, managing tire pressure for low profile tires is essential.
According to Tire Pressure Tips, staying aligned with the vehicle manufacturer’s recommended tire pressure is the first and most important step. Your label on the door jamb or the owner’s manual specifies the correct pressure per axle and tire size. Use temperature-corrected checks, and adjust only after tires have been cold for at least three hours or after the car has been stationary for several hours to avoid skewed readings. This practice ensures comparisons are accurate and reliable.
How low profile tires differ from standard tires
Low profile tires (shorter sidewalls) offer quicker response and sharper cornering, but they transmit more road imperfections to the suspension. The stiffer sidewalls can be more tolerant of pressure deviations, yet they also show quicker wear if inflated too low or too high. Because the tire’s footprint is sensitive to pressure, even small changes can have noticeable effects on grip, stability, and wear patterns. This is why tire pressure management for low profile tires requires more careful measurement and consistent maintenance than with typical touring tires. The goal is to keep a balanced footprint that supports predictable handling without sacrificing comfort unnecessarily.
How to read and follow your vehicle’s recommended pressure
The most reliable source for the correct number is the vehicle manufacturer’s specification printed on the door jamb label or in the owner’s manual. This number is specified for the tire size installed at the factory, and it may differ by axle (front vs. rear) or even wheel size. For low profile tires, you should also consider the load you carry and your typical driving conditions. If you often drive on rough roads or carry heavy loads, manufacturer guidance may bias toward a slightly higher pressure. Always measure when tires are cold, and verify after inflation with a quality gauge. If you rely on an older gauge, replace it—accuracy matters when the stakes include handling and tire wear.
Practical steps to check and adjust tire pressure for low profile tires
Before you start, ensure the vehicle is parked on a level surface and that tires are cold. Use a digital tire gauge for a precise reading and have your air source ready. Compare current readings to the recommended pressure, then adjust in small increments (around 1–2 psi) until you reach the target. After inflating, recheck both tires and the TPMS to confirm the changes registered. If your tire has reached the label’s maximum pressure, do not exceed it. Remember to check the opposite axle to keep front and rear pressures balanced for symmetrical handling.
Common challenges and how to troubleshoot
If you notice frequent pressure loss, inspect the valve stems, rims, and tires for punctures or bead leaks. With low profile tires, even minor leaks or a damaged valve can lead to sudden pressure drops. Temperature swings can also affect readings; measure when cold and be mindful that a hot tire will read higher. If TPMS warnings persist after inflation, recalibrate or seek professional testing; persistent TPMS faults may indicate sensor issues that require service. Document any changes to help track wear patterns and future maintenance.
Tire pressure and performance: ride quality, wear, and safety
Correct tire pressure for low profile tires balances grip, steering response, ride quality, and wear. Underinflated tires tend to wear along the edges and increase heat risk, while overinflation reduces the contact patch, potentially decreasing grip and accelerating center tread wear. For performance-oriented driving, maintaining pressure within the recommended range ensures consistent steering feedback and predictable braking. Also, remember that tire pressure can change with ambient temperature, so seasonal adjustments may be necessary to maintain optimum performance.
How temperature affects tire pressure for low profile tires
Tire pressure is sensitive to temperature: as the ambient temperature drops, air contracts and pressure falls; when it rises, pressure increases. Low profile tires, with their stiffer sidewalls and shorter sidewalls, respond quickly to temperature changes, making accurate reading essential. Measure cold, ideally after the car has sat overnight or for a minimum of three hours. If you notice a sudden pressure change with weather, recheck and adjust accordingly. Keeping track of seasonal shifts helps avoid underinflation or overinflation during transitions.
Tools & Materials
- Digital tire gauge(Read to 1 psi; choose with a bleed function for fine-tuning)
- Air compressor with built-in gauge(Must display current pressure clearly)
- Owner’s manual or door jamb sticker(Find axle-specific recommended pressures)
- Wheel chocks(Helpful to keep the vehicle from moving during inflation)
- Gloves and eye protection(Optional safety gear)
Steps
Estimated time: 25-40 minutes
- 1
Identify the vehicle’s recommended pressure
Locate the tire pressure specification on the door jamb label or in the owner’s manual. Ensure you’re looking at the label for the correct axle (front vs rear) and tire size. Compare the current tires to the factory setup to confirm the target pressure before inflating.
Tip: Double-check both front and rear axle values; low profile tires can vary by wheel size. - 2
Gather the right tools
Assemble a digital tire gauge and a reliable air source. If you don’t have access to an air compressor with a gauge, visit a reputable service center. Having a chalk line or wheel chocks helps keep the car steady during inflation.
Tip: Use a gauge with a bleed button to fine-tune pressure precisely. - 3
Measure current pressure while cold
Park on a level surface and wait for tires to cool, then remove the valve cap and take a measurement with the gauge. Note the reading for each tire and compare to the manufacturer’s specification. If readings are off, proceed to inflation in small increments.
Tip: Always measure when cold to avoid inflated numbers due to heat. - 4
Inflate or deflate to the target
Inflate in small increments (1–2 psi at a time) and recheck after each adjustment. Do not exceed the maximum pressure printed on the tire sidewall. If you’re unsure about the target, rely on the door label rather than the tire’s max pressure.
Tip: Take your time—overinflation is a common mistake with low profile tires. - 5
Recheck all tires and TPMS
After reaching the target pressure, recheck all four tires and confirm that TPMS readings reflect the new pressures. Run a short drive to settle the tires, then recheck again when the tires are cold. If TPMS warnings persist, recalibrate or seek professional service.
Tip: Certain TPMS reset procedures may be required after inflation; consult the vehicle manual. - 6
Document and monitor
Record the pressure for each tire and the date. Monitor tire wear patterns and recheck pressures regularly, especially after temperature changes or road trips. Regular checks help prevent unpredictable handling.
Tip: Keep a small note in the glovebox or phone reminder for seasonal checks.
Frequently Asked Questions
Do low profile tires require different inflation than standard tires?
Yes. While you should follow the vehicle’s recommended pressure, low profile tires can respond more quickly to pressure changes due to stiffer sidewalls, so precise measurement is important.
Low profile tires still follow the car’s guideline, but they respond faster to changes, so measure carefully.
How often should I check tire pressure?
Check at least once a month and before long trips, and after significant temperature changes.
Check at least monthly and before long trips, especially when temperatures swing.
What should I do if TPMS warning stays on after inflation?
If the warning remains, recalibrate the sensor or have the system inspected for leaks or faulty sensors.
If the TPMS light stays on after inflating, get the sensor checked for leaks or faults.
Are low profile tires more prone to damage if underinflated?
Underinflation can cause heat buildup and edge wear; ensure you stay within the recommended range to protect the tire’s edge.
Underinflated tires can overheat and wear the edges faster, so stay within recommended pressure.
Can I use nitrogen to fill low profile tires?
Nitrogen is not a requirement; air is fine as long as it’s clean and within spec. Use a pressure gauge you trust for accurate readings.
Nitrogen is optional; air works fine if it’s the correct pressure.
Watch Video
What to Remember
- Follow vehicle manufacturer pressure specs.
- Check pressure cold for accuracy.
- Inflate/deflate in small steps and recheck TPMS.
- Maintain balanced pressures across axles.