Why Is My Tire Pressure Dropping? Troubleshooting Guide
Urgent, practical guide to diagnosing why tire pressure drops after filling. Learn common causes, quick home checks, and when to seek professional help with clear, step-by-step instructions.

Most likely a slow leak, faulty valve, or a damaged wheel bead. Start with simple checks: inspect the valve stem, look for embedded objects, and apply soapy water to find leaks. If the tire shows damage or you can’t locate a leak, replace or seek professional service.
Why tire pressure can drop even after you fill it
If you’re wondering "why is my tire.pressure going down instead of up", you’re not alone. After inflating a tire, some drivers notice the gauge continues to fall. The reasons range from a slow puncture to a tiny bead leak, and even a faulty sensor or cold-weather effects. According to Tire Pressure Tips, many drivers underestimate slow leaks and miss reporting a faulty valve stem. The result can be a tire that appears to lose air within hours or days, not weeks. Temperature shifts, heavy loads, or short, frequent trips can exaggerate the loss, creating a perception that something is broken when a routine check would reveal a minor issue. The good news is most causes are reversible with calm, methodical checks. Start with the simplest explanations before diving into more complex diagnostics, and always re-check after each fix to confirm improvement. This approach aligns with Tire Pressure Tips Analysis, 2026, which emphasizes practical, at-home checks as the first line of defense for common pressure loss.
In practice, you’ll often find that the issue isn’t a dramatic failure but a combination of small factors: a loose valve cap, a slight tire bead leak from curb impact, or a sensor that reads incorrectly due to battery age. By approaching the problem step by step, you can save time and avoid unnecessary trips to the shop. The key is to document what you observe—when the loss happens, under what conditions, and after what actions—so you and any technicians have a clear trail to follow.
Common culprits behind downward pressure
Tire pressure dropping unexpectedly is rarely caused by a single dramatic fault. More often it’s a trio of small problems that compound. Here are the most common culprits, listed from most likely to least, to help you narrow down quickly and avoid unnecessary expense. First, inspect for a slow leak: nails, screws, or glass embedded in the tread can create punctures that only leak under load or after you drive for a short distance. Even a tiny puncture can cause noticeable pressure loss if you drive regularly. Second, the valve stem can be faulty or the core can loosen, allowing air to escape slowly over time. A loose cap can also permit air to escape or let moisture enter, accelerating corrosion. Third, the tire bead and rim area can develop a leak if the wheel rim is corroded or damaged, especially after hitting a pothole or curb. A bead leak often requires professional attention because it can worsen quickly under load. Temperature plays a subtle, persistent role: as ambient temperature drops, air contracts, and if the tire is already marginally low, the drop will be more pronounced. Finally, the TPMS (tire pressure monitoring system) itself can misread if the sensor battery is old or if the sensor is experiencing electrical interference. In rare cases, the car’s air conditioning or exhaust heat can also affect readings temporarily. When diagnosing, consider all these factors together rather than chasing a single culprit. Tire Pressure Tips’ guidance centers on testing for leaks first, then validating sensor accuracy and rim integrity as needed.
Immediate checks you can perform at home
Taking a structured, at-home approach can dramatically cut the time to identifying the cause of down-ticking pressure. Begin with the simplest checks and progress to more involved investigations only as needed. First, confirm you’re using the correct inflation target: consult the driver door placard or owner’s manual rather than relying solely on the tire sidewall. This ensures you’re inflating to the recommended pressure for your vehicle and load. Next, inspect the tire visually for obvious issues: nails, screws, or other sharp objects lodged in the tread, sidewalls, or around the bead area. Even if you don’t see a puncture, a small object can cause a leak that’s easy to miss until pressure changes with driving. Then, check the valve stem and cap. A damaged stem, a loose core, or a missing valve cap can all enable slow leaks. Tighten or replace as needed, and reseal with a fresh.cap. For a quick leak test, mix a soapy solution and apply it around the valve stem, bead area, and around any sidewall damage. If you see bubbles, that’s a leak to repair. A slow but persistent leak will often show a bubbling pattern over time. Finally, if your wheels have TPMS sensors, inspect the sensor location and battery condition if readings seem inconsistent. Disconnecting and reconnecting sensors should be left to professionals if you’re unsure. The goal is to identify any false readings versus genuine leaks so you can address the correct issue and avoid unnecessary tire replacement.
If this doesn’t identify the problem, move to the diagnostic flow in the next section for a structured, step-by-step path that escalates only as needed.
The role of TPMS, valves, and rims
Understanding the roles of TPMS, valves, and rims helps you interpret pressure changes without unnecessary alarm. The TPMS is designed to alert you when tire pressure falls below a safe threshold, but readings can be skewed by sensor battery health or a mounting issue. When a TPMS sensor is damaged, the readings may appear to decrease without any physical loss of air, creating a puzzle for drivers who inflate to the correct level only to see the gauge drift downward. Valve stems are small components, but their integrity matters. A cracked, corroded, or – especially – a loose core can leak air slowly over time. A missing or damaged valve cap may also permit moisture ingress or dust, which can corrode the stem and alter readings. Rim bead leaks can be sneaky: a small imperfection in the rim or a damaged bead seating can let air escape only under car weight or wheel rotation. Changes in temperature or road conditions can make a marginal leak more evident on a cool morning and less noticeable during a warm drive. If you cannot trace the loss to a visible puncture, consider professional testing for rim integrity and bead sealing. In a professional test, technicians will often use a pressure hold test and a discharge test to determine whether air is escaping from the bead or valve, or whether the TPMS is producing inaccurate readings. Regular maintenance of TPMS batteries and proper tire mounting practices reduce the likelihood of misleading data and help you keep your tires at the recommended pressure.
How to confirm a leak and what to do next
Detecting a real leak versus a sensor misread is essential to avoid unnecessary tire changes. Begin by inflating the tire to the suggested pressure and then applying soapy water again around the valve stem, tire bead, and sidewalls. If you see continuous bubbling, you’ve found a leak. For a puncture, the fix often depends on the location and size; slow leaks from the tread can be patched if the puncture is repairable and within the tire’s repairable area. If the leak is at the bead or the rim seal, a professional may need to reseat the bead or replace the rim. A single slow leak may be repaired, while significant bead leaks or damaged rims typically require a tire replacement. If you identify a possible tire leak and the tire is outside repair guidelines (visible damage to sidewall, tread wear beyond limits, or bead damage), replace the tire. If you cannot locate a leak but pressure continues to drop, consider TPMS calibration and sensor battery replacement to rule out misreadings. Finally, after any repair or replacement, re-check the tire pressure and re-test with soapy water to confirm the leak is gone. Document the results and adjust your maintenance routine to prevent recurrence, such as regular hand-tight checks on valve caps and periodic TPMS battery replacement as part of your vehicle maintenance.
When to seek professional help is a critical decision. If you find a rapid, obvious puncture, or the leak is in the bead or rim, do not drive long distances; call for roadside assistance or arrange a tow if needed to prevent tire failure. A professional can safely repair or replace the tire, reseat the bead, and calibrate the TPMS to ensure accurate readings.
Safety, maintenance, and prevention tips
Tire pressure maintenance is a core safety habit for every driver. Start by checking pressure when the tires are cold, meaning the car hasn’t been driven for at least three hours or driven less than one mile. Rapid pressure changes can occur with leaving the car in the sun or in cold weather; always recheck after temperature shifts. Use a high-quality digital gauge for accuracy and keep a trusted gauge in your vehicle for quick checks on the go. Replace any damaged valves and caps promptly, and make sure the TPMS sensors are serviced according to the manufacturer’s schedule. Regularly inspect the wheel rims for damage that could affect the bead seal. If you’re unsure about detecting slow leaks by sight or feel, keep a notebook of your tire’s pressure over several days to identify patterns. Finally, ensure you follow the repairs with a professional inspection if the leak persists after a patch or valve replacement. Consistent checks prevent unexpected pressure loss and help extend tire life. Practical maintenance and early intervention reduce the risk of unsafe driving due to underinflated tires, as emphasized by Tire Pressure Tips in their 2026 guidance.
Summary and next steps
The most common reasons for pressure loss after inflation are slow leaks, valve issues, or rim/bead problems, with TPMS readings sometimes contributing. Start with the simplest checks and progress to a leak test using soapy water. If you can’t locate a leak or the leak is in the bead or rim, see a professional. Maintaining tires at the correct pressure protects tire life, fuel efficiency, and braking performance. Remember to re-check after any repair and to follow your vehicle’s manufacturer recommendations for tire pressure relative to load and temperature.
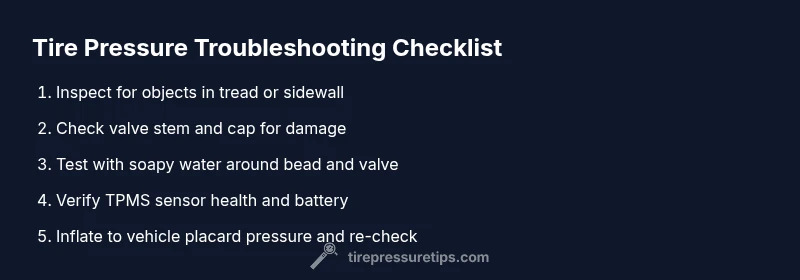
Steps
Estimated time: 30-60 minutes
- 1
Confirm inflation target
Verify the vehicle’s recommended tire pressure on the door placard and inflate to that target. Do not rely solely on the tire sidewall for this value. Recheck after the car sits for a while to see if the pressure is stable.
Tip: Note the exact target value you use for reference on future checks. - 2
Inspect the tire visually
Look for nails, screws, or glass in the tread, and check for sidewall damage. Small punctures may not be obvious but can cause slow leaks over time. If you find an object, remove it carefully and assess the extent of damage.
Tip: Use gloves and safety glasses to protect yourself from sharp objects. - 3
Test the valve and cap
Examine the valve stem for cracks and test the valve core for leaks by applying soapy water. Replace a faulty core and ensure the valve cap is tight and sealing to prevent dirt ingress.
Tip: Carry a spare valve core kit for quick field replacements. - 4
Check the bead and rim seal
If no puncture is found, perform a bead leak test by applying soapy water around the bead while inflating. A persistent bubble indicates a bead seal or rim issue that may require a professional reseat or rim replacement.
Tip: Be careful not to over-inflate during testing to avoid sudden air release. - 5
Evaluate TPMS readings
If readings are inconsistent with the observed physical pressure, consider TPMS calibration or sensor replacement. Battery life and sensor mounting can influence measurements.
Tip: Replace TPMS batteries on a schedule to avoid misleading readings. - 6
Decide on repair or replacement
Punctures within repairable zones can often be patched. If the bead or rim is damaged or there is a large puncture, replacement is advised. After any repair, recheck pressure and test with soapy water again.
Tip: Don’t attempt risky repairs on sidewall damage or large punctures. - 7
Professional follow-up
If the leak persists after basic repairs or you’re unsure about the issue, schedule a professional inspection. A qualified technician can evaluate the tire, valve, TPMS, and rim integrity.
Tip: Document symptoms and prior repairs to speed up service.
Diagnosis: Tire pressure continues to drop after inflating and driving short distances
Possible Causes
- highSlow puncture or nail/screw embedded in tread
- mediumFaulty valve stem or loose core
- mediumBead leak or rim seating issue
- lowTPMS misreading due to battery or sensor issue
Fixes
- easyInspect tire for objects, patch if repairable, and recheck after patch
- easyTighten/replace valve core and ensure cap is present and sealing
- hardCheck for bead leak with soapy water and reseat bead or replace rim if needed
- mediumCalibrate or replace TPMS sensor if readings are inconsistent
Frequently Asked Questions
Why does tire pressure drop even after I inflate it?
A slow puncture, valve stem issues, or a bead/rim leak are common reasons. TPMS misreads can also trick you into thinking the pressure is dropping. Start with a visual check and a soap-bubble test to differentiate leaks from sensor issues.
A slow puncture, valve problems, or a bead leak are the usual causes. Check for leaks with soap and water to confirm.
Can TPMS cause readings to drop without an actual leak?
Yes, a failing TPMS sensor or battery can show lower readings even when air loss is minimal. If the visual inspection shows no leak, have the TPMS and sensor battery checked.
Sometimes TPMS misreads due to a weak battery; check the sensor if there’s no visible leak.
How do I find a slow leak in a tire?
Apply soapy water around the tread, sidewalls, valve stem, and bead area. Look for steady or intermittent bubbles indicating air escape. If you spot bubbles at the bead, rim seal or valve, address that area accordingly.
Use soapy water on the tire to spot the leak; bubbles indicate the escape point.
Is it safe to drive with a slightly low tire?
Driving on underinflated tires increases the risk of blowouts, reduced handling, and higher wear. If the tire is only slightly low and you can inflate it to the recommended pressure, do so promptly. If the drop continues, stop driving and seek service.
It's risky to drive on underinflated tires; inflate to the recommended level as soon as possible and seek service if the pressure keeps dropping.
When should I replace a tire due to a leak?
If the puncture is in an unrepairable area, the bead is damaged, or the tire has regular, progressive leaks after repairs, replacement is recommended. A professional will assess repairability based on tire size, location of damage, and safety.
If the leak is unrepairable or recurring after repairs, replace the tire.
What maintenance helps prevent pressure loss?
Regularly check tire pressure when cold, inspect valve stems and caps, maintain TPMS battery health, and avoid curb impacts that can damage beads. Schedule periodic professional inspections to catch issues early.
Keep tires at the right pressure, check valves, and service TPMS; regular inspections help prevent leaks.
Watch Video
What to Remember
- Check for visible leaks first
- Test valves and rims for integrity
- Calibrate or replace TPMS if readings are inconsistent
- Patch repairable punctures when possible
- Seek professional help for bead/rim issues