How to Check, Maintain, and Troubleshoot Tire Pressure
Learn to verify tire pressure accurately, interpret readings, and maintain correct tire pressure for safety, fuel efficiency, and longer tire life. This step-by-step guide covers tools, TPMS basics, temperature effects, and practical maintenance tips.

You will learn how to check tire pressure accurately, interpret readings, and adjust to the manufacturer’s spec. You’ll need a reliable tire gauge, access to the vehicle placard, and a stable air source. This guide covers safety, TPMS basics, and best practices for year‑round maintenance, including how to handle a reading like tire pressure 90 90 12.
Why correct tire pressure matters
Maintaining correct tire pressure is essential for safety, fuel economy, tire wear, and vehicle handling. Underinflated tires can overheat and cause uneven wear, reduced grip, and higher rolling resistance, while overinflated tires may lead to a harsher ride and uneven tread wear. The recommended tire pressure varies by vehicle and tire size, and is typically listed on a door jamb placard or in the owner's manual. Regular checks help you catch slow leaks from punctures or valve stem issues before they become dangerous. Understanding how to read a standard gauge and how to respond to TPMS warnings will save you time and money in the long run. In this guide you’ll learn practical steps, how to interpret unusual readings such as tire pressure 90 90 12, and best practices for year‑round maintenance.
Understanding the phrase tire pressure 90 90 12 and what it means
If you encounter a note like tire pressure 90 90 12, it’s likely a misread, shorthand, or a non‑standard unit. Most passenger vehicles specify pressure in psi (pounds per square inch) or kPa, and typical numbers range around 28–35 psi when cold. Reading 90 psi for multiple tires would exceed most tire sidewall ratings and could indicate a gauge or labeling error. Always verify using the vehicle's official spec from the placard and cross‑check with your tire size and load. If a reading is significantly outside the expected range, do not drive on that tire until you confirm accuracy. This section clarifies how to approach confusing readings and why relying on the OEM specification is safer than chasing odd numbers.
How tire pressure affects safety, fuel economy, and tire wear
Tire pressure directly influences contact patch shape, traction, and heat buildup. Underinflation increases rolling resistance, which lowers fuel efficiency and accelerates wear on the outer edges of the tread. Overinflation reduces the tire's contact patch, leading to harsher rides and concentrated wear in the center. Proper pressure helps ensure even tread wear, predictable handling, and safer braking distances. Always align with the vehicle manufacturer’s recommended range and avoid relying on the tire’s maximum PSI value, which is not a target for everyday driving.
Tools and environment for accurate readings
To get reliable readings, measure when tires are cold (at least 3 hours after driving). Use a calibrated tire gauge with fine graduations (0.5 psi or better). Reset your TPMS if you’ve adjusted pressures, and perform readings with the vehicle on a level surface. Avoid inflating to the gauge at the gas pump if the air hose is not regulated. Having a weather‑stable environment minimizes temperature fluctuations that can skew readings.
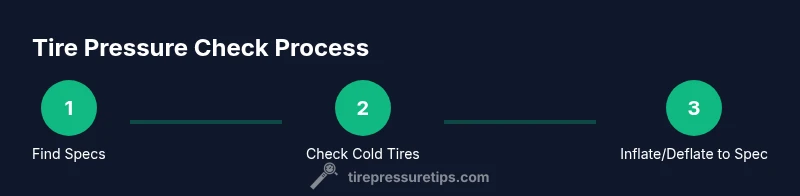
Step-by-step workflow: check, adjust, verify
This section provides a practical workflow you can apply in your garage or driveway, step by step, without needing specialized tools beyond a gauge and an inflator. It emphasizes safety and accuracy, and it maps directly to the STEP-BY-STEP section later in this article: gather specs, measure cold tires, attach gauge, compare to spec, adjust as needed, recheck, and confirm all four tires plus the spare if applicable.
Note: If your readings vary widely between tires, look for slow leaks, damaged valves, or a puncture rather than assuming a single misread. Seasonal changes can also shift readings, so plan routine checks around weather changes.
Common mistakes and how to avoid them
Common mistakes include reading while tires are hot, inflating to the tire’s maximum sidewall pressure, ignoring the placard specifics, and neglecting the spare. Also, mixing tire pressures between front and rear wheels without a valid reason can compromise handling. Use a consistent gauge, read each tire individually, and verify against the exact spec for your vehicle.
TPMS: How it helps and limitations
TPMS provides a warning when a tire is underinflated or overinflated, but it doesn’t replace manual checks. Some systems warn early, while others may lag behind slow leaks. If a TPMS warning persists, manually verify all readings and inspect tires for punctures, valve stem damage, or seal issues. Remember that TPMS readings can be affected by sensor faults or battery issues over time.
Seasonal and temperature effects on tire pressure
Temperature changes can cause noticeable pressure shifts: tires typically lose pressure as the air cools and gain a bit when they warm up during driving. For every 10°F drop, you may lose about 1 psi in general. This makes temperature a crucial factor in winter and early spring maintenance. Check pressure after the vehicle has cooled down to avoid skewed readings.
Tire pressure maintenance routine
Create a simple monthly routine: check pressures, compare with placard values, adjust if needed, and log readings. A quick post‑trip check can catch leaks after long drives or pothole impacts. Rotate your checks with seasonal changes, and inspect tires for wear patterns that might indicate improper inflation or alignment issues.
Quick check at a glance: 5-minute checklist
- Read the placard for the correct pressure.
- Check all four tires, including the spare where applicable.
- Use a calibrated gauge and verify cold readings.
- Recheck after inflation to ensure the target is reached.
- Reinstall valve caps and store readings for maintenance records.
Tools & Materials
- Tire pressure gauge (digital or analog)(Choose a gauge with at least 0.5 psi increments; ensure calibration is current.)
- Air compressor or access to inflation station(Prefer units with a built‑in gauge or external gauge for accuracy.)
- Vehicle owner’s manual or door placard with recommended pressure(Record both front and rear tire specs; include the spare if applicable.)
- Valve caps and valve core tool(Keep spare caps to prevent dirt ingress and slow leaks.)
- Notebook or app to log readings(Helps track maintenance and trends over time.)
Steps
Estimated time: 20-40 minutes
- 1
Find the correct tire pressure spec
Locate the vehicle’s recommended tire pressure on the door placard or in the owner’s manual. Note any differences between front and rear tires and whether the spare has a different spec. This is your target; inflating beyond this point offers little benefit and can harm wear.
Tip: Always start with the OEM spec rather than the tire’s maximum rating. - 2
Check tires when cold
Make sure the tires have not been driven recently; cold readings are more accurate. If you’ve just driven, wait at least 3 hours for tires to cool before checking. Temperature and recent driving can skew readings.
Tip: If you must check after a drive, wait a minimum of 30 minutes for the tires to cool. - 3
Remove valve caps and attach gauge
Carefully remove the valve caps and attach your tire gauge. If you’re using an inflator, ensure it’s compatible with your gauge. Read each tire one at a time to avoid cross‑contamination of readings.
Tip: Keep caps in a safe place to prevent loss. - 4
Read the current pressure
Read and record the pressure from each tire. Don’t estimate—use the gauge’s smallest increments for precise numbers. Write down the numbers for front, rear, and spare if applicable.
Tip: Cross‑check your gauge’s accuracy against another gauge if readings seem off. - 5
Adjust to the spec
If a tire is underinflated, add air in small increments (2–3 psi at a time) and recheck. If overinflated, release air in small amounts and recheck. Repeat until each tire matches the recommended spec.
Tip: Avoid inflating to the maximum rating; target the placard spec exactly. - 6
Recheck after adjustments
Recheck all tires after adjustments to confirm accuracy. Temperature and gauge tolerance can influence readings, so verify before concluding the process.
Tip: Double‑check when you’re done and replace valve caps. - 7
Check the spare tire
If you carry a spare, apply the same procedure to ensure it’s ready for use. Some spares are temporary and have different pressure specs.
Tip: Even temporary spares require periodic checks. - 8
Record and maintain
Log the final readings and dates to track changes over time. This helps catch slow leaks and plan maintenance before issues arise.
Tip: Keep a simple log in your car’s glove compartment or a mobile app.
Frequently Asked Questions
Why is my TPMS light on even after I check tire pressure?
TPMS can trigger due to sensor faults, leaks, or temperature shifts. If readings are normal but the light stays on, inspect sensors, valves, and possible slow leaks. A reset or professional diagnostic may be needed.
If your TPMS light stays on after you’ve checked pressure, it could be a sensor issue or a slow leak. Have the sensors inspected or reset if your vehicle allows it.
What should I do if one tire reads much higher than the others?
First release air in small increments to bring the tire down to spec. Inspect for punctures or a faulty valve. If pressure cannot be stabilized, have the tire inspected by a professional.
If one tire shows unusually high pressure, release air a little at a time and check again, then inspect for issues.
Can I drive with low tire pressure?
Driving on underinflated tires is unsafe and increases the risk of heat buildup, blowouts, and irregular wear. If you notice low pressure, inflate to spec before driving far.
It’s risky to drive on underinflated tires; fix the pressure before long trips if possible.
How often should I check tire pressure?
Check at least once a month and before long trips, ideally when tires are cold. Temperature changes or rapid driving can alter readings.
Aim to check monthly and before road trips, especially when the weather changes.
Does temperature affect tire pressure?
Yes. Colder temperatures reduce pressure and heat can increase it. Readings should be taken when tires are cold and adjusted accordingly during seasonal changes.
Temperature affects pressure; check when cold and adjust as seasons shift.
Where can I find the correct tire pressure for my vehicle besides the placard?
The placard on the door jamb is the primary source. The owner’s manual also lists recommended pressures. Do not rely on the tire’s maximum PSI as your target.
Refer to the door placard or owner’s manual for your exact tire pressure spec.
What to Remember
- Know and follow your vehicle's exact tire pressure spec.
- Measure when tires are cold for accuracy.
- Use a calibrated gauge and recheck after adjustments.
- Check all tires, including the spare, during routine maintenance.