700c Road Bike Tire Pressure Guide: Practical Tips
A practical guide to tire pressure for 700c road bikes, with step-by-step checks, tools, and tips to maximize performance, comfort, and safety on the road.

On a tire pressure 700c bike, the right inflation improves rolling efficiency, grip, and puncture protection. According to Tire Pressure Tips, many riders misjudge pressure because gauges are inconsistent and temperature changes shift readings. This guide walks you through a simple, repeatable approach to checking, adjusting, and maintaining optimal pressure for road riding.
Why correct tire pressure on a 700c road bike matters
On a tire pressure 700c bike, correct inflation is not just a number on the sidewall—it's a performance and safety setting. Proper pressure affects rolling resistance, cornering grip, ride comfort, and the risk of pinch flats. Underinflation causes the tire to deform more as it rolls, increasing wear and the chance of pinch flats on rough pavement. Overinflation reduces the tire’s contact patch, making grip inconsistent and delivering a harsher ride, especially on imperfect roads. The right pressure helps tubeless setups seal, reduces heat buildup in the bead area, and promotes even wear over time. According to Tire Pressure Tips, matching pressure to rider weight, tire width, and typical terrain yields the most consistent performance. Start from a midrange for your width, then fine-tune after a few rides to dial in feel.
How to determine the right pressure range for your 700c tires
Determining the right pressure range depends on tire width, rider weight, and riding conditions. Wider tires typically operate at a lower pressure than narrow ones because they use a larger contact patch to support the load without pinching. Rider weight pushes more load into the tire, which may require a modest pressure increase to prevent pinch flats. Terrain and weather also matter: rough roads and hot days can shift readings higher, while cold weather lowers tire pressure readings. Tubeless setups can tolerate a slightly lower inflation level due to bead and seal design. Tire Pressure Tips analysis shows that many riders keep to a single number without accounting for width, load, or temperature. Start with the sidewall’s printed range as a guide, set toward the middle, and fine-tune after a few rides. For precision, check with a reliable gauge and re-check after several miles.
Tools & Materials
- portable bicycle floor pump with gauge(Built-in gauge helps quick checks; ensure it reads in psi or bar and is calibrated)
- digital tire pressure gauge(Use for accurate readings; keep a spare in your saddle bag)
- valve adapters/valves tools(Needed for different valve types (Presta/Schrader) on some gauges)
- tire levers(Optional, for removing tire if needed during inspection)
- soapy water or soapy spray(Check for leaks if you suspect a seal issue (tubeless))
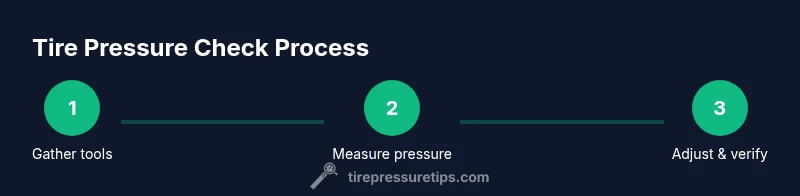
Steps
Estimated time: 15-25 minutes per check (longer if swapping tires or changing gauges)
- 1
Gather your tools and prep the bike
Bring your pump, gauge, and any adapters to a clean, flat surface. Remove the valve caps from both tires and inspect the tires for embedded stones or cuts. This step ensures you have a stable baseline before measuring pressure.
Tip: Keep tools organized on a tray or backpack so you don’t misplace anything during setup. - 2
Check current pressure when tires are cool
Attach the gauge to the valve and read the pressure on each tire before riding. If you recently rode, wait at least 30 minutes for the tire pressure to settle and become comparable to ambient temperature.
Tip: Always read when tires are cool for consistency. - 3
Compare to the sidewall range and set a starting point
Review the tire sidewall for the manufacturer’s recommended range. Begin at the midpoint of that range for both tires to establish a balanced baseline, then tailor based on your weight and riding conditions.
Tip: If you’re unsure, start with the middle of the range and adjust in small increments. - 4
Inflate to the target pressure using controlled bursts
Use the pump to add air in small bursts, checking with the gauge after each burst. Stop when both tires reach your target range and feel firm but not overly hard.
Tip: Avoid adding large bursts; small adjustments prevent overshooting the target. - 5
Re-check and inspect after inflation
Re-measure the pressure now that the tires are at target. Inspect the sidewalls for even seating of the bead and ensure there are no leaks or sidewall deformities.
Tip: A perfect read is when both tires read within a few psi of each other. - 6
Test ride and reassess
Take a short ride to test feel. Return to the same gauge to confirm pressure stayed within range after the ride, noting any need for fine-tuning based on comfort and handling.
Tip: Ride feeling noticeably buttery or overly harsh? Slightly adjust next time. - 7
Record your target range for future rides
Document your typical pressures for your current tire width, weight, and terrain. Use a simple note in your phone or a bike log so you can reproduce ideal settings.
Tip: Keeping a log saves time on future rides and helps track changes over seasons.
Frequently Asked Questions
What is a safe pressure range for 700c road tires?
There isn't a universal number—the safe range depends on tire width, rider weight, and terrain. Start with the midrange on the tire sidewall and adjust based on comfort, grip, and pinch-flat risk.
There isn’t a universal number; start near the middle of the tire's printed range and tweak based on feel and load.
How often should I check tire pressure on a road bike?
Check before every ride if possible, or at least weekly. Temperature swings and weather can change readings, so regular checks help prevent surprises.
Check before each ride if you can; it’s the easiest way to prevent flats and improve ride quality.
Can I use a car tire gauge for bike tires?
A quality bike-specific gauge is preferable for accuracy, but a standard car gauge can work if you ensure it’s calibrated and reads in psi. Always verify with another gauge if readings seem off.
You can, but make sure the gauge is accurate for bicycle tires and cross-check readings when in doubt.
Does temperature affect tire pressure?
Yes. Heat increases air pressure slightly, while cold reduces it. Check readings in similar temperature conditions and adjust to maintain consistent performance.
Temperature matters: warmer days raise the pressure a bit, cooler days lower it. Check readings after weather changes.
What happens if I overinflate my tires?
Overinflation reduces grip and comfort and can make the tire more susceptible to damage from road hazards. Stay within the recommended range and avoid maxing out the sidewall.
Overinflating makes the ride harsh and can reduce handling and grip on rough roads.
What is TPMS on bikes, and should I rely on it?
Some bikes have tire pressure monitoring systems (TPMS). They’re helpful but not perfect; always cross-check TPMS readings with a trusted gauge for accuracy.
TPMS helps, but gauge readings are your best guard against under- or over-inflation.
Watch Video
What to Remember
- Check tires when cold before rides
- Use the sidewall range as a starting point
- Inflate in small bursts for accuracy
- Test ride and adjust as needed
- Keep a tire pressure log for consistency