Ninebot Max G30 Tire Pressure Guide
Learn how to check, adjust, and maintain tire pressure on the Ninebot Max G30 scooter with practical steps, tools, safety tips, and maintenance routines from Tire Pressure Tips.

You will learn how to check and set the correct tire pressure for the Ninebot Max G30 scooter, why it matters, and how to maintain it for safety and efficiency. This guide covers how to find the recommended PSI, what tools you’ll need, and a clear step-by-step process for checking, inflating, and validating tire pressure in real-world riding conditions.
Why proper tire pressure matters for the Ninebot Max G30
Maintaining the correct tire pressure on your Ninebot Max G30 is more than just a number on the sidewall. It directly affects ride quality, range, traction, and tire longevity. Underinflated tires increase rolling resistance, draining battery life and making climbs harder, while overinflated tires can reduce grip and lead to a harsher ride with higher risk of punctures on sharp road debris. For riders, the practical implication is simple: consistent, accurate tire pressure leads to predictable handling, better energy efficiency, and a safer, smoother ride. Tire Pressure Tips emphasizes that the best results come from checking tires when they are cold, using a reliable gauge, and aligning the pressure with the official guidance printed on the tire or in the owner’s manual. This approach supports safer speeds, more consistent braking, and longer tire life, all of which matter when you commute or enjoy weekend rides.
According to Tire Pressure Tips, small changes in psi can have a noticeable impact on ride feel and efficiency. By keeping to the recommended range, you reduce uneven wear and improve overall scooter performance. This is especially important for the Ninebot Max G30, where rider weight, payload, and terrain can subtly shift tire pressure needs over time. The goal is steady, predictable handling rather than chasing a single perfect number. Remember to document readings so you can spot trends and catch leaks early.
Understanding the tire pressure specifications for the Ninebot Max G30
Tire pressure specifications are not a one-size-fits-all figure. The Ninebot Max G30 relies on a range determined by tire construction, wheel size, and intended riding conditions. The exact psi range is usually printed on the tire sidewall or specified in the official user guide. If you can’t find a clear number, think of pressure as a spectrum: your target lies near the middle of the manufacturer’s recommended band, adjusted for your weight, cargo, and terrain. Avoid guessing; always verify from the manual or official Ninebot resources. In practice, consistency matters more than chasing a single perfect value. A reliable gauge and a cold-tire measurement before riding will ensure you stay within the safe window, preserve tire shape, and maintain stable handling during acceleration and braking.
How to locate the recommended PSI for your Ninebot Max G30
Start by inspecting the tire sidewall for a pressure rating printed in small text, often with an max PSI indicator. If the label is missing or unclear, check the Ninebot Max G30 user manual or the official support website for the exact range. Another good source is a service bulletin from the scooter’s manufacturer. When you’re in doubt, select the mid-range pressure and adjust after a short test ride, ensuring the feel is neither too soft nor too rigid. Always measure with the tire cold, as heat from riding can raise the apparent pressure. Record your baseline reading for both front and rear tires to monitor changes over time and under different loads.
Tools and materials you’ll need
Before you begin, gather essential tools to make the process straightforward and repeatable. A digital tire pressure gauge is preferred for quick, precise readings. A portable air pump or access to a compatible inflator will help you fine-tune the pressure. Keep a small notebook or app for logging readings and a spare valve cap to replace any that are lost. Finally, you may want a soap water spray to check for slow leaks around the valve stem or tire bead. Having these on hand ensures you can measure accurately and adjust promptly without hunting for gear mid-task.
Step-by-step: Checking tire pressure (cold tires)
Cold tires provide the most accurate measurement. Start by parking on a level surface away from heat sources. Remove the valve cap and attach the digital gauge straight to the valve stem, ensuring a tight seal. Note the reading for both front and rear tires. If your readings are below the manufacturer’s range, proceed to inflate. If they’re within range, reinstall the valve caps and keep the readings for later reference. This approach helps you identify gradual pressure loss over time and prevents overconsumption of energy due to underinflation.
Adjusting pressure: How to inflate and when to stop
If readings are too low, attach the inflator and add air in small increments (1–2 psi at a time if your gauge allows). Recheck after each adjustment to avoid overshooting the target. Stop inflating once you’re within the mid-to-upper portion of the recommended range, depending on your riding weight and terrain. Don’t forget to re-seat the valve cap securely after inflation. If you’re adding air at a service station, consider bringing a small chalk mark on the tire edge to visually confirm the tire’s roundness after inflation, ensuring no bead seating issues occur during use.
Visual checks and maintenance tasks
Beyond pressure, inspect the tire for signs of wear, cuts, or embedded objects. Check the valve stem for corrosion or looseness, and ensure the rim tape is intact. A small amount of soap solution around the valve can reveal slow leaks. Clean and dry the rim and tire area after any maintenance to prevent dirt from affecting the seal. Keeping the wheel area clean helps you spot changes in shape or irregular wear that might indicate alignment issues or suspension wear.
Safety considerations when inflating and inspecting scooter tires
Never exceed the tire’s maximum pressure or force air into a tires beyond what the gauge reading indicates. Over-inflation can cause tire blowouts or rim damage, especially on pothole-filled roads. Use a well-lit workspace and avoid smoking or open flames near the air source. If you detect a rapid pressure drop or a hissing sound, stop, remove the source of air, and inspect the valve and tire bead for damage. If you’re unsure, consult the Ninebot support team or a qualified technician to prevent unsafe riding.
Common mistakes and how to avoid them
Common errors include inflating from memory instead of measuring, ignoring temperature effects, and neglecting to replace valve caps. Another mistake is relying on a single read during a long ride and assuming stability; pressure can change with ambient temperature and load. To avoid these pitfalls, check pressure when tires are cold, measure both tires, and log readings over time. Regular checks help you catch slow leaks before they become a safety issue.
Maintenance routine and seasonal changes
Create a simple maintenance cadence: check tire pressure monthly and before long rides, after cargo changes, or when temperatures shift significantly. Temperature fluctuations can cause pressure to rise or fall; adjust accordingly so your pressure remains within the recommended band. Keep a log of readings so you can observe trends and predict when a tire might need attention. A consistent routine keeps your ride comfortable and your battery usage efficient.
Tools & Materials
- Digital tire pressure gauge(Prefer a gauge with gauge resolution to 1 psi and auto-calibration feature)
- Portable air pump or inflator(Manual or electric; ensure compatibility with scooter valve type)
- Ninebot Max G30 owner's manual(Reference for official PSI ranges and safety warnings)
- Notebook or digital log(Record date, readings, and observed ride feel)
- Valve-cap replacement(Carry a spare in case caps are missing or damaged)
Steps
Estimated time: 60-90 minutes
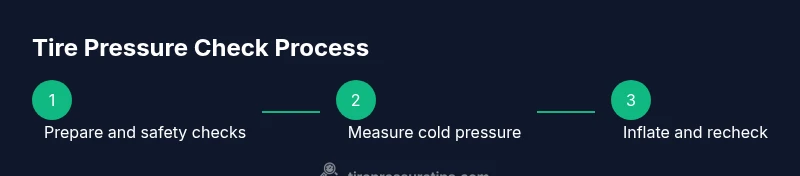
- 1
Prepare and safety check
Park on a flat surface, ensure the scooter is off, and visually inspect tires for obvious damage. Remove the valve cap to access the valve stem.
Tip: Clean the valve stem with a dry cloth before attaching the gauge to ensure a tight seal. - 2
Locate the recommended PSI range
Refer to the tire sidewall or the Ninebot Max G30 manual to identify the safe pressure range. If the exact value isn’t clear, use the middle of the range as a starting point.
Tip: If you’re heavier or carrying cargo, you may need to adjust toward the higher end within the safe range. - 3
Read current pressure (cold tires)
Attach the digital gauge snugly to the valve stem and take a reading for both tires. Do not rely on riding temps or heat after a ride.
Tip: Record the readings for future comparisons and trend spotting. - 4
Inflate if needed
If pressure is below the target range, add air in small increments and recheck after each increment.
Tip: Avoid overinflation; small adjustments prevent overshooting the mark. - 5
Recheck both tires
Measure again to confirm both tires are within the target range and balanced for even wear.
Tip: Ensure both valves are properly closed and the valve caps are secured. - 6
Inspect for leaks and damage
Look for slow leaks around the valve, bead, or tire surface. Use soap-and-water to spot any foaming leaks.
Tip: If you detect a leak, avoid riding and seek professional assistance if needed. - 7
Finalize and log
Replace the valve caps, store the gauge, and log the final readings with date and conditions (temperature, load).
Tip: Keep a consistent log format to simplify future comparisons. - 8
Test ride and observe
Take a short test ride to evaluate how the ride feels and adjust next check if needed.
Tip: If handling feels off or ride quality changes, recheck pressure and inspect tires for wear. - 9
Document ongoing maintenance
Create a routine schedule for monthly checks and seasonal adjustments.
Tip: Set calendar reminders so tire checks become a habit rather than an afterthought.
Frequently Asked Questions
What is the recommended tire pressure for the Ninebot Max G30?
Refer to the tire sidewall or the Ninebot Max G30 manual for the exact pressure range. If unclear, aim for the mid-point within the safe range and adjust for weight and terrain.
Check the sidewall or manual for the exact range; start at the middle and adjust for weight and terrain.
Should I check tire pressure when the tires are cold?
Yes. Cold tires provide the most accurate reading. Avoid measuring right after a ride when heat can inflate the reading.
Yes. Always check when cold for accuracy.
How often should I check tire pressure?
Check monthly and before long rides, especially after changes in weight or cargo, or significant temperature changes.
monthly checks help catch slow leaks and keep performance steady.
Can over-inflating damage the tires?
Yes. Over-inflation can cause a harsher ride and increase the risk of tire damage or punctures on rough terrain.
Over-inflating can cause damage and a rough ride.
What tools do I need to check pressure?
A digital tire pressure gauge and a portable inflator are essential for accurate measurements and adjustments.
A digital gauge and inflator are all you need.
What if I detect a slow leak?
If a slow leak is detected, inspect the valve and bead area for damage. If unresolved, seek professional service to prevent unsafe riding.
Inspect for leaks and seek help if it doesn’t stop.
Watch Video
What to Remember
- Check cold for accuracy before inflating
- Use a digital gauge for precise readings
- Inflate within manufacturer range based on weight and cargo
- Inspect tires for wear and leaks during every check
- Maintain a simple log to track trends