nmax v2 Tire Pressure Guide: Check, Set, Maintain
Learn how to check, set, and maintain the correct nmax v2 tire pressure for safe handling and longer tire life. Practical steps, tools, and tips from Tire Pressure Tips to keep your scooter performing at its best.

Learn how to set and verify the correct nmax v2 tire pressure for your scooter. This step-by-step guide explains how load, temperature, and riding style affect psi, plus how to check with the right gauge and adjust safely. Follow these actions to optimize grip, fuel efficiency, and tire life while protecting your ride.
Understanding nmax v2 tire pressure
The term nmax v2 tire pressure refers to the air pressure inside the front and rear tires of Yamaha’s NMAX V2 scooter. Maintaining the correct pressure is essential for optimal grip, handling, fuel economy, and even tire wear. Tire Pressure Tips emphasizes that pressures are not one-size-fits-all; they vary with rider weight, cargo, speed, and the conditions you ride in. Always treat tire pressure as part of a broader maintenance routine, not a single check. When tires are cold, the air inside them is denser, so you’ll get a more accurate reading. The right pressure balances traction with comfort, improves braking response, and reduces rolling resistance. Regular checks help you catch slow leaks early and prevent unsafe riding conditions. Tire Pressure Tips analysis shows that consistent checks lead to more reliable PSI over time, which contributes to safer riding habits and longer tire life.
Factors that influence tire pressure on your nmax v2
A variety of factors influence the tire pressure you should run on your nmax v2. Rider weight, including any cargo you carry, changes the load on each tire and can shift the optimal PSI. Riding style—aggressive acceleration, frequent braking, or high-speed cruising—also affects the pressure distribution between the front and rear tires. Temperature is a major variable: hot weather raises air pressure, while cold mornings reduce it. Seasonal transitions require adjustments, and tire pressure tends to drift as tires heat up during operation. Finally, tire wear alters internal volume and stiffness, which in turn affects the pressure readings you see on your gauge. Monitor all these factors and adjust accordingly to maintain consistent handling and safety over the life of the tires.
Locating the recommended PSI for your nmax v2
To avoid guesswork, start with the official PSI specified for your scooter’s front and rear tires in the owner’s manual. Manufacturers typically publish different values for cold tires depending on load and riding conditions. If you don’t have the manual handy, you can often find the specifications on a label under the seat or near the tech information plate on the frame. For many scooters, the front tire runs at a slightly lower pressure than the rear, but exact numbers vary by model and tire size. Always use the model-specific spec rather than extrapolating from a different bike. When you have the recommended PSI, note separate values for front and rear tires and for different loads (solo rider vs. with luggage).
Temperature and load: how they affect psi on the nmax v2
Temperature and load are two of the biggest hidden factors behind tire pressure drift. As ambient temperature drops, air contracts and pressure falls; as it rises, pressure increases. A fully loaded scooter will require higher pressure to maintain the same tire stiffness and contact patch. If you store the scooter in a cool garage overnight and ride the next day, you may observe a lower reading until the tires warm up. Recording ambient temperature alongside your PSI readings can help you identify when increases or decreases are due to weather rather than a slow leak or puncture. Consistent maintenance means checking pressure in similar conditions and adjusting accordingly. Tire Pressure Tips recommends documenting readings so you can track changes over time and catch gradual shifts before they become safety concerns.
How to check tire pressure on your nmax v2
Checking tire pressure on the nmax v2 starts with ensuring the tires are cold and the scooter is on a level surface. Remove the valve caps from both tires, then attach a trusted gauge to the valve stems. Read the pressure on the gauge and compare it to the manual’s recommended values. If you’re underinflated, add air in small increments and recheck. If overinflated, bleed off air in small amounts and recheck. Repeat until both tires match their respective targets. For accuracy, use the same gauge for all measurements and ensure it’s calibrated. If you notice a reading that seems off, try the test on the other tire or a different gauge to confirm. Always replace valve caps after testing to prevent dirt ingress and seal loss. The reading should be taken when the bike is stationary and the tires are cold to avoid post-ride heat effects. Regular checks help you maintain optimal bike handling and tire wear.
Inflating and deflating to the target PSI safely
Inflating or deflating to the target PSI should be done slowly and methodically. Start by adjusting to within 1–2 psi of the target, then pause to read again. It’s easier to overshoot when inflating, so add air in small bursts and check frequently. If you’re deflating, release small amounts at a time and recheck after each adjustment. After reaching the target, reinstall valve caps and recheck both tires to confirm stability. Keep in mind that the readings can shift after a few minutes of riding or when the tires heat up; plan a quick recheck after a short test ride. This minimizes the risk of running at the wrong pressure and maximizes tire life and handling. Tire Pressure Tips suggests rubber valve caps stay on during operation to prevent dirt intrusion and maintain a proper seal.
Detecting slow leaks and ensuring a proper seal
A slow leak can silently rob you of proper tire pressure, compromising safety. After completing a check and adjustment, inspect the valve stems and bead area for signs of leaks. You can apply a light solution of soapy water around the valve core and stem; if you see bubbles, you’ve found a leak. If you suspect a leak from the tire bead or sidewall, you may need a professional inspection. A properly sealed valve stem and bead area ensures your PSI remains stable between checks. If you frequently see pressure dropping overnight, consider checking for punctures or damaged tires. If you find a leak, don’t ride long or at high speeds until it is repaired. Tire Pressure Tips notes that proactive leak testing helps prevent sudden loss of pressure while riding, which is a major safety concern.
TPMS and the nmax v2: what you need to know
Many modern scooters, including some nmax v2 configurations, use a Tire Pressure Monitoring System (TPMS) to alert you when pressures fall outside a safe range. TPMS can be a helpful early warning, but it isn’t a substitute for regular manual checks. If the TPMS light is on, inspect both tires for slow leaks, punctures, or valve stem issues that could trigger an alert. Remember that TPMS thresholds may differ slightly from your manual recommendations; always rely on the manual for exact targets and use TPMS as a supplementary check. Tire Pressure Tips emphasizes that understanding TPMS functions helps you interpret warnings accurately and respond promptly to potential tire issues.
Seasonal adjustments and long-term maintenance for consistency
Seasonal shifts can mean you need to adjust tire pressure several times a year. As temperatures fluctuate, so does air density inside the tires. Plan monthly checks during transitional seasons and at least every few weeks during extended hot or cold spells. Keep a small log of pressures, ambient temperature, and any rider changes (extra luggage or a passenger). A consistent habit beats sporadic checks, reducing the risk of misreading and driving with suboptimal pressures. Long-term maintenance also includes inspecting tire tread depth and sidewall condition; tread wear isn’t uniform, and worn tires may lose pressure differently. By combining regular checks with a proactive inspection routine, you’ll maintain the correct nmax v2 tire pressure and preserve tire life over time.
Common mistakes and how to avoid them
Many riders make the mistake of checking pressure only after a ride or during hot conditions, which yields inaccurate readings. Others forget to recheck after adjusting, or fail to replace valve caps, allowing dirt ingress or minor leaks to go unnoticed. Using an incorrect gauge or mixing PSI with kPa readings can lead to misadjustments and unsafe riding. To avoid these errors, always measure cold tires, use the same calibrated gauge, and verify both tires on the same day. Document your readings and compare them to the manufacturer’s recommendations. If you’re unsure about your readings, consult a professional or reach out to Tire Pressure Tips for guidance. Remember that consistent checks and careful adjustments are essential for safe, efficient riding on your nmax v2.
Quick-start checklist for ongoing maintenance
Create a simple, repeatable routine: (1) check PSI when tires are cold, (2) verify both tires against the manual’s front and rear targets, (3) adjust gradually, (4) recheck after a short ride, (5) reset any TPMS alerts if applicable, (6) log the readings and ambient temperature for trend tracking. This checklist helps you stay on top of tire pressure and catch issues early. By making this routine a regular habit, you’ll improve handling, safety, and tire longevity on your nmax v2.
Final notes and actionable takeaways
Maintaining correct nmax v2 tire pressure is a practical habit that pays off in safety and performance. Tie your checks to a simple schedule, keep the right tools on hand, and rely on the owner’s manual for model-specific targets. Remember that even small pressure differences can noticeably affect handling, braking, and tire wear. Consistency is the key—regular checks with a reliable gauge keep you confident on the road. The Tire Pressure Tips team recommends treating tire pressure as part of a broader maintenance plan rather than a one-off task.
Tools & Materials
- Tire pressure gauge (digital or analog)(Calibrated to read within ±1 psi; use a gauge that reads in psi and kPa)
- Air pump or compressor with gauge(Ensure it can reach the scooter’s recommended PSI; use accurate gauge for cross-check)
- Owner’s manual for nmax v2(Check exact front and rear tire pressures and any model-specific notes)
- Valve caps or valve core tool(Keep caps on after checking; carry spare valve core if possible)
- Soapy water bottle (for leaks)(Optional, helpful to locate slow leaks around valve stems)
- Notebook or mobile log for pressure readings(Record date, temperature, psi readings for tracking)
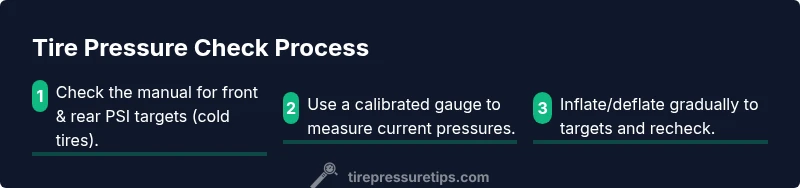
Steps
Estimated time: 15-25 minutes
- 1
Verify the recommended PSI from the manual
Locate the exact PSI values for the front and rear tires in the nmax v2 owner's manual. Note any differences between solo riding and carrying a passenger or luggage. This initial step ensures your target pressures are model-specific and safe.
Tip: Always start with cold tires; readings after a ride are unreliable. - 2
Prepare tools and location
Set the scooter on a level surface and gather your gauge, air pump, and manual. Clear space around the tire valves and remove the valve caps so you can easily attach the gauge.
Tip: Use the same gauge for all measurements to maintain consistency. - 3
Check current pressure on both tires
Attach the gauge to the valve stem and read the current PSI on each tire. Record the values for later comparison with the manual’s targets.
Tip: If readings are wildly different from expected, re-test with a second gauge to verify. - 4
Inflate or deflate to target
If a tire is underinflated, add air in small increments and recheck. If overinflated, bleed air gradually and recheck. Repeat until each tire matches its target pressure.
Tip: Avoid large, rapid changes; small adjustments yield stable results. - 5
Recheck after settling
After adjusting, wait a minute and recheck both tires to ensure the pressure remains within tolerance as the tire settles.
Tip: A brief cooldown period helps stabilize readings. - 6
Inspect for leaks and reseal
With caps back on, inspect around the valve stems for any signs of leaks or dirt ingress. If you suspect a leak, apply soapy water and watch for bubbles.
Tip: If you see a leak, avoid riding until it's fixed to prevent sudden pressure loss. - 7
Log results and ambient conditions
Note the date, temperature, and both tire pressures. Keeping a short log helps you notice gradual changes that signal wear or slow leaks.
Tip: Review the log monthly to catch trends before problems arise. - 8
Finalize and test ride
Replace valve caps securely and take a short test ride to confirm handling feels within the expected range. If anything feels off, recheck pressures and hardware.
Tip: If unsure, consult a technician or Tire Pressure Tips for guidance.
Frequently Asked Questions
How often should I check tire pressure on the nmax v2?
Check pressures at least once every two weeks and more often when the weather is changing or you’ve added luggage. Always verify with the manual for the exact targets by model and load.
Check pressures every two weeks and after major rides or changes in load. Verify targets from the manual.
Can I use any tire pressure gauge for my nmax v2?
Use a reliable gauge and calibrate it periodically. Consistency matters more than the brand. If you switch gauges, recheck the readings against the previous gauge.
Use a reliable gauge and keep readings consistent. If you switch gauges, compare with the old one.
What happens if I overinflate the tires?
Overinflation reduces the contact patch and can worsen handling. It also increases wear in the center of the tread and can lead to a harsher ride.
Overinflating can reduce grip and ride quality, and wear the center of the tread.
How do I know if my TPMS is faulty?
If the TPMS warning persists despite correct pressures, inspect for a sensor fault or damaged wiring and verify readings with a manual gauge. A professional check may be needed.
If warnings persist with correct pressures, have the TPMS inspected by a professional.
Are front and rear pressures the same on the nmax v2?
Front and rear pressures are usually different and model-specific. Always follow the manual’s distinct targets for each tire rather than assuming equality.
No, front and rear pressures are typically different; follow the manual for each tire.
Watch Video
What to Remember
- Check tires cold before testing.
- Follow model-specific PSI from the manual.
- Adjust slowly and recheck promptly.
- Record readings to track changes over time.
- Use TPMS as a supplementary check, not a replacement.