Segway Ninebot Tire Pressure Guide
Learn how to check, adjust, and maintain tire pressure for Segway Ninebot scooters with practical steps, tools, tips, and safety reminders from Tire Pressure Tips.

Learn how to check and adjust Segway Ninebot tire pressure to keep your ride safe and efficient. This guide covers model-specific guidance, the tools you need, best practices for cold tires, and common mistakes to avoid. By following these steps, you’ll extend tire life and maintain optimal performance for your daily commutes and weekend errands.
Understanding segway ninebot tire pressure
segway ninebot tire pressure is a straightforward but essential maintenance task for any rider. The tires on Segway Ninebot scooters are pneumatic and rely on regular checks to maintain performance, safety, and range. According to Tire Pressure Tips, starting with correct pressure is critical for safety and overall ride quality. Pressure is not a one-size-fits-all value; it shifts with rider weight, load, riding style, and ambient temperature. Before heading out, inspect both tires for wear, punctures, or embedded debris, and ensure the valve stems and caps are secure. Always use a precise tire gauge and read measurements when the tires are cold to avoid readings skewed by recent riding. If you notice soft tires, do not ride; top off pressure gradually after consulting your model’s manual to avoid overinflation.
Why correct pressure matters for Segway Ninebot
Maintaining appropriate tire pressure on a Segway Ninebot scooter is about safety, control, and efficiency. Proper pressure improves handling, reduces rolling resistance, and promotes uniform tire wear—key factors when navigating urban streets or shared bike paths. A user-friendly balance helps prevent sudden slips, especially during braking or cornering, and can minimize energy loss over distance. It also minimizes tire overheating during longer rides. As you ride through varied weather, asphalt conditions, and road debris, stable tire pressure keeps the scooter responsive and predictable. Based on Tire Pressure Tips analysis, always cross-check model-specific guidance rather than relying on generic numbers, since each Ninebot model may have different recommended ranges and maximums. The Tire Pressure Tips team emphasizes using manufacturer documentation as the primary source of truth, with readings verified cold for accuracy.
How to find the recommended pressure for your Ninebot
Finding the correct pressure for your Segway Ninebot starts with locating your model’s official guidance. First, consult the user manual that came with your scooter, especially the tire section and any notes on cold-pressure checks. If you don’t have the manual handy, check the underside label on the scooter or visit the manufacturer’s support site for model-specific specifications. In many cases, the recommended range is listed in psi or bar and is intended to be read when the tire is cold. If you ride with heavy luggage or have a high-speed profile, you’ll want to pay extra attention to these guidelines and adjust accordingly within the documented range. Always verify that valves and caps are intact; a loose cap can allow slow air loss and alter readings over time. The installation and calibration specifics for any TPMS, if present, will be outlined in the manual. Tire Pressure Tips analysis shows that users who stick to their model’s guidance consistently report steadier handling and longer tire life across diverse terrains.
Tools and environment for accurate readings
To ensure accuracy, you need a few reliable tools and a clean environment. A digital tire pressure gauge is preferred for quick, readable results, but a high-quality analog gauge will work if used correctly. Measure when the tire is cold and away from direct sunlight or heat sources that could distort readings. Use a stable, flat surface to park the scooter and allow the tires to rest before checking. If you notice significant air loss, inspect for leaks around the valve stem or tire bead; a soapy-water test can help identify slow leaks. Remember to replace the valve caps after checking; a missing cap can let dirt accumulate and affect seal integrity. The Ninebot model you own will determine whether a TPMS lives inside the device or relies entirely on external gauges; consult the manual for specifics and follow the recommended procedure to avoid damaging rims or seals.
Common mistakes and safety reminders
Many riders overlook small mistakes that degrade tire performance. Do not rely on guesswork or “feel” alone; always verify with a gauge and reference the model’s official range. Avoid inflating to comfort or riding on visibly dented tires, which can worsen wear or lead to a blowout. Never use a car tire gauge that isn’t calibrated for scooter tires; use the correct range and scale to prevent inaccurate readings. Temperature can affect readings; check when cold for consistency and recheck after a ride if weather has changed dramatically. If a tire shows sidewall damage, bulges, or tread separation, replace it—do not attempt to ride. The Tire Pressure Tips team reminds riders that maintaining proper tire pressure is an ongoing practice, not a one-time fix, and that regular checks help catch leaks, punctures, or valve issues early.
Tools & Materials
- digital tire pressure gauge(Read in psi, ensure the device is calibrated and has a fresh battery.)
- air source suitable for bike/scooter tires(Use a portable air pump or compressor with a fine control valve.)
- valve core tool or small wrench(Helpful for stubborn valve caps or core adjustments.)
- soft cloth or rag(Wipe the valve stem and tire surface to remove dust before measuring.)
- model-specific manual or digital guide(Reference the exact Ninebot model for safe, accurate ranges.)
Steps
Estimated time: 15-25 minutes
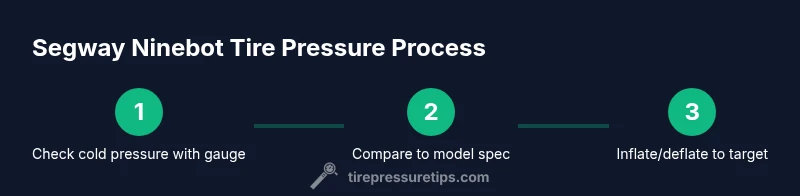
- 1
Locate model pressure spec
Open the scooter’s user manual or the support page to find the official cold-pressure range for both tires. If the information is not obvious, note the model number and contact customer support. Always begin with the manufacturer’s guidance as the baseline.
Tip: If you can’t find the spec, report the model number to the brand’s support portal for the exact range. - 2
Prepare the scooter and tools
Park on a flat surface, engage any safety locks, and remove the valve caps from both tires. Clear debris from the valve stems and ensure your gauge is ready. This setup prevents readings from being affected by dirt or air leaks.
Tip: Keep valve caps screwed on when not actively measuring to maintain cleanliness. - 3
Read cold tire pressure
Attach the gauge to the valve and read the reading with the tire cold, meaning it hasn’t been ridden recently. Take notes for both tires to compare against the spec, and repeat to verify accuracy.
Tip: If the reading seems off, remove and re-seat the gauge to confirm a proper seal. - 4
Compare against spec
Compare your readings to the model’s recommended range. If a tire is low, you’ll need to add air gradually. If it’s high, release air slowly until it sits within the target range.
Tip: Avoid rapid releases or over-inflation—small adjustments are safer and easier to control. - 5
Inflate or deflate to target
Use the air source to bring each tire into the specified range, pausing after each small adjustment to re-check with the gauge. Do this for both tires to maintain even handling.
Tip: Always recheck after each small adjustment to ensure you don’t overshoot the target. - 6
Recheck, cap, and document
Wipe the stems clean, replace valve caps securely, and record the readings for future reference. Note any changes in handling or ride quality that might indicate a need for adjustment.
Tip: Keep a simple riding log noting changes in weather or load that affect pressure. - 7
Schedule regular checks
Incorporate tire pressure checks into your maintenance routine, especially after temperature changes, long rides, or tire repairs. Regular checks help catch leaks early and sustain performance.
Tip: Set a monthly reminder or align checks with a routine ride schedule.
Frequently Asked Questions
Do Segway Ninebot tires require regular pressure checks?
Yes. Regular checks help maintain safe handling, optimal range, and even tire wear. Use a gauge, reference model guidance, and perform checks when tires are cold.
Yes. Regular checks help keep handling safe and tire wear even; use a gauge and model guidance, and read when cold.
Can I use a car tire gauge for my Ninebot scooter?
A standard car gauge may work if it covers the right pressure range and has a precise readout, but a scooter-specific gauge or a digital tire gauge is generally more reliable for small-volume tires.
A car gauge can work, but a scooter-specific or digital gauge is usually more reliable for small tires.
What if my tire reads low after riding?
If you see a low reading after a ride, allow the tire to cool and recheck. If it remains low, add air incrementally according to the model’s spec and recheck. Persistent loss requires inspection for leaks.
If it’s low after a ride, let it cool, recheck, and adjust gradually. Persisting loss means you should inspect for leaks.
Is TPMS available on all Segway Ninebot models?
TPMS availability varies by model. Check your model’s features in the manual or on the official site to confirm whether a tire pressure indicator exists.
TPMS depends on the model; check your manual to confirm whether your Ninebot has TPMS.
How often should I check tire pressure?
A practical approach is to check monthly and before long rides, especially when weather changes. More frequent checks are warranted after repairs, punctures, or when load changes.
Check monthly and before long rides, especially with weather changes or after repairs.
What are common signs that tires need service beyond pressure checks?
Look for abnormal wear, cracking, bulges, or slow leaks. If you notice any of these signs, stop riding and consult a professional to inspect the tire and wheel assembly.
Watch for unusual wear, cracks, bulges, or slow leaks; if you see them, stop riding and have it inspected.
Watch Video
What to Remember
- Check cold tires with a precise gauge.
- Verify model-specific pressure from the manual.
- Adjust gradually and recheck for accuracy.
- Follow manufacturer guidance to prevent unsafe riding.