Motorcycle Tire Pressure Gauge: Check, Inflate, and Maintain
Learn to select, use, and maintain a reliable motorcycle tire pressure gauge. Get accurate psi readings, account for temperature shifts, and keep TPMS in sync with practical, actionable steps.

According to Tire Pressure Tips, using a reliable motorcycle tire pressure gauge is essential for safety, handling, and tire longevity. This quick answer outlines how to select the right gauge, read psi accurately, account for temperature shifts, and maintain TPMS awareness across modern motorcycles, so you can keep tires within the manufacturer’s target range every ride.
Why a Motorcycle Tire Pressure Gauge Matters
Maintaining correct tire pressure is essential for safety, handling, braking, and tire longevity on motorcycles. A reliable tire pressure gauge ensures you can verify readings consistently rather than guessing by feel or relying on TPMS alone. According to Tire Pressure Tips, accurate tire pressure is foundational to predictable grip, even wear, and fuel efficiency. The Tire Pressure Tips team notes that small errors in pressure can compound under load, affecting cornering stability and braking distance. Whether your ride is a lightweight naked or a heavy touring bike, knowing your exact target pressures and how to measure them precisely gives you confidence on every ride. This section explains why accuracy matters, how TPMS complements manual checks, and how to choose the best gauge type for your needs.
Choosing the Right Gauge for Motorcycles
A motorcycle tire pressure gauge comes in several styles, with dial and digital options being the most common. Dial gauges offer mechanical reliability and a quick glance, while digital gauges provide clear numerals and sometimes hold a measurement for convenient reading. Durability is another key factor: look for a gauge with a rugged build, an easy-to-read display, and a wide enough range to cover typical motorcycle tires. Calibration and maintenance matter too; a gauge that drifts over time can give false readings, which defeats the purpose of regular checks. In short, pick a gauge you can trust, that feels sturdy in your hand, and that matches your riding environment. The Tire Pressure Tips guidance emphasizes choosing a model you’ll actually use in regular maintenance and keeping it calibrated.
Reading and Interpreting PSI Targets
Your motorcycle’s recommended tire pressures are written on the sidewall placard or in the owner's manual. Always compare your gauge reading to those manufacturer targets rather than basing it on feel. Temperature, tire wear, and recent riding can affect readings, so start with a cold measurement after the bike has been inactive for several hours. If your reading deviates from spec, check for leaks, valve stem issues, and potential valve cap problems. Remember that TPMS can alert you to under- or over-inflation, but it should complement, not replace, a manual gauge check for accuracy and for detecting slow leaks. The goal is consistent readings that map to safe handling and even wear across both front and rear tires.
How to Use a Motorcycle Tire Pressure Gauge
Using a gauge correctly matters as much as having a good gauge. Attach the gauge firmly to the valve stem, ensure no air leaks around the connection, and read without wiggling the stem. If you are using a dial gauge, gently press straight in to avoid parallax errors; with a digital gauge, allow the display to stabilize before recording the number. For cold readings, deflate or inflate only after confirming you’re within the target range, then recheck. If you need to add air, use a compressor or hand pump with a built-in gauge so you can adjust accurately in small increments. Finally, recap the valve stem to prevent dirt ingress. The goal is a stable, repeatable measurement every time.
Common Mistakes and How to Avoid Them
Common mistakes include measuring hot tires, using damaged gauges, neglecting to check both tires, and ignoring the difference between front and rear pressures. Avoid parallax errors by reading at eye level, and never rely on a single reading to judge your tire health. If your gauge reads differently from the TPMS, recheck with a second gauge or confirm with a shop. Regular calibration is essential to keep readings trustworthy. Tires should also be inspected for wear, punctures, and tread depth, which can influence recommended pressures and safety.
Maintaining Your Gauge and Tools
Store your gauge in a protective case, away from extreme temperatures and direct sunlight. Periodically verify accuracy against a known reference, especially before long trips or track days. If the gauge battery is low (for digital models), replace it promptly to avoid drift. Replacing worn seals or the gauge tip can help prevent air leakage, ensuring consistent readings. A well-maintained gauge saves you time, reduces frustration, and improves overall tire maintenance.
TPMS and Manual Readings: Working Together
TPMS provides a quick alert when pressures fall outside expected ranges, but it may not replace the precision of a manual gauge for exact pressure values. Use TPMS as a sentinel and rely on a trusted gauge for precise adjustments. Regular cross-checks between TPMS readings and manual checks help you identify slow leaks early and confirm the accuracy of the TPMS sensors themselves. This combined approach gives you the best balance of safety, performance, and tire life.
Tools & Materials
- Motorcycle tire pressure gauge(Dial or digital gauge; choose one with clear display and reliability.)
- Owner's manual or tire placard(Source of exact recommended front/rear pressures.)
- Notepad or digital log(Record readings and maintenance dates.)
- Calibration tool (optional)(Use if your gauge drift is suspected.)
Steps
Estimated time: 15-25 minutes
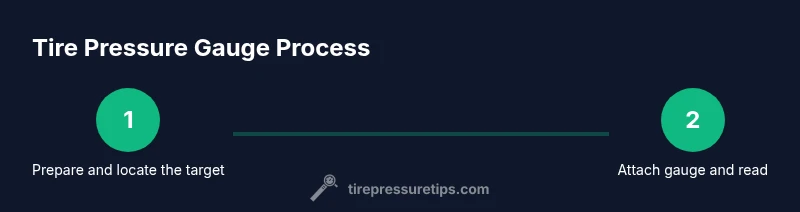
- 1
Prepare the bike and gauge
Park on a level surface and allow tires to cool before measuring. Remove the valve caps to access the stems, and inspect the valve stems for damage or dirt that could affect readings.
Tip: A cold measurement is crucial for accuracy; avoid measuring after a ride. - 2
Find the target pressures
Check the manufacturer’s recommendation on the placard or in the owner’s manual for both front and rear tires. Note the differences between front and rear pressures, and whether you ride mostly on city streets or highways.
Tip: Different riding styles may justify a small, safe deviation within the manufacturer's spec. - 3
Attach the gauge to the valve stem
Place the gauge firmly on the valve stem with a straight alignment to avoid air leaks and parallax errors. Ensure you get a tight seal before reading.
Tip: If you hear escaping air, reseat the gauge and try again. - 4
Take a reading and interpret
Read the gauge display once it stabilizes. Record the front and rear values for comparison against the spec. If you use a dial gauge, read at eye level to avoid misreading.
Tip: Record both tires to catch imbalances early. - 5
Inflate or deflate to spec
Add air in small increments if below target or release air if above target. Recheck after adjustments to confirm alignment with the recommended pressures.
Tip: Use air pumps with fine air-control to avoid overcorrecting. - 6
Recheck after adjustments
Re-measure both tires after adjustments to ensure accuracy. If readings are inconsistent, re-seat the gauge or try a different gauge to verify.
Tip: Inconsistent readings may indicate a weak valve stem or a faulty gauge. - 7
Close up and log
Replace the valve caps, close the toolbox, and log the reading for future reference. Note any changes in wear or handling that might indicate a tire issue.
Tip: Keeping a log helps track trends and detect gradual leaks. - 8
Repeat for the other tire
Always measure front and rear tires, as pressures often differ. Make sure both readings are within spec to ensure balanced handling.
Tip: Do not forget the spare tire if applicable.
Frequently Asked Questions
What is the best type of gauge for motorcycles?
Dial gauges are known for durability and quick readings; digital gauges are easier to read and often store readings. Choose based on your environment and personal preference.
Dial gauges are durable; digital gauges are easier to read in bright sun.
How often should I check tire pressure on a motorcycle?
Check pressures regularly, especially before long rides or trips. Use a log to track changes over time and catch slow leaks early.
Check regularly, especially before long trips.
Can I rely on TPMS alone for tire pressure?
TPMS is a helpful alert system but should be used alongside manual gauge checks for precise readings and to verify readings during maintenance.
TPMS helps, but you still need a manual gauge for exact numbers.
Why should I measure cold tires for accuracy?
Cold readings are more stable and reflect the tires’ baseline pressure. Hot tires read higher due to heat buildup, which can mislead adjustments.
Cold tires give the true pressure, not readings heated by riding.
What should I do if readings vary between gauges?
If readings differ, recalibrate or try a different gauge to confirm. Check for valve stem leaks and ensure proper seating.
If a gauge reads differently, recheck with another gauge to verify.
Watch Video
What to Remember
- Check tires when cold using a trusted gauge
- Always follow manufacturer PSI targets
- Keep gauges calibrated and protected
- Use TPMS readings to supplement manual checks