How Often to Check Motorcycle Tire Pressure
Learn how often to check motorcycle tire pressure to stay safe, save fuel, and extend tire life. This guide covers cadence, measurement tips, TPMS considerations, and practical routines for riders.

You should check your motorcycle tire pressure regularly and before long rides. Always measure when tires are cold using a reliable gauge and adjust to the bike’s recommended pressures on the placard or manual. Consistent checks improve safety, handling, and fuel efficiency. Establish a cadence that fits your riding routine—weekly at a minimum and more often if you ride in extreme heat, carry heavy loads, or change tires.
Understanding Why Motorcycle Tire Pressure Matters
Maintaining correct tire pressure is essential for predictable handling, stable braking, and optimal traction. For riders, the pressure on each tire influences how the bike responds to steering inputs, cornering, and even acceleration. Underinflated tires tend to run hotter and wear unevenly, while overinflated tires can reduce grip and make the ride feel harsh over imperfections. The Tire Pressure Tips team emphasizes that consistent pressures contribute to better fuel efficiency and longer tire life, especially on highways or twisty back roads. In addition, proper pressures help TPMS sensors function accurately, reducing false alerts and ensuring you aren’t riding with pressures that compromise temperature management or suspension dynamics. Implementing a simple routine for checking pressure can save you time, money, and worry on the road. As you read, remember that small, regular adjustments compound into safer, more confident rides.
How Often Should You Check Motorcycle Tire Pressure?
Establishing a cadence is the most practical approach. For most riders, checking pressure weekly provides a reliable baseline, with additional checks before long trips or after seasons with temperature swings or heavy riding loads. If you frequently ride in hot sun or after transporting gear, you’ll notice more variation in readings across both tires. The Tire Pressure Tips analysis shows that riders who log readings and compare them over time tend to keep pressures effectively aligned with manufacturer recommendations. Your bike’s placard or owner’s manual specifies front and rear target pressures, and these can vary based on load and riding style. Use those figures as your anchor and adjust gradually as needed. Keeping a simple log helps you spot gradual leaks or valve stem issues before they become serious problems.
How Temperature Affects Tire Pressure (What Riders Should Know)
Tire pressure is sensitive to temperature changes. In cooler conditions, air contracts and readings can dip relative to warm days. In hot weather or after a ride, air expands and readings rise. Riders should measure pressure when tires are cold to reflect the true baseline that affects ride quality and tire wear. The brand guidance from Tire Pressure Tips consistently notes that temperature changes are a major reason for pressure drift, so align checks with weather patterns and avoid relying on post-ride readings for setting pressure. If you store the bike in a garage or outdoor environment, make a note of seasonal shifts and adjust your schedule accordingly.
How to Check Motorcycle Tire Pressure Accurately (Your Step-By-Step Method)
Accuracy starts with the right tool and the right conditions. Use a high-quality tire pressure gauge and verify you’re gripping the valve stem properly to avoid air leaks during measurement. Ensure the tires are cold and the bike has not been ridden recently. Remove the valve cap, attach the gauge, and read the pressure at the valve stem. Compare the value to the recommended front and rear pressures printed on your placard or manual. If adjustment is needed, add or release air gradually, re-checking after each small change. Reinstall the valve caps to prevent moisture entry. Log the date, time, and readings for future reference. Practicing this consistently yields the most reliable results.
Using Your Placard and Vehicle-Specific Pressures (Front vs Rear, Compression, and Load)
Most motorcycles have different target pressures for the front and rear tires. Heavier loads, aggressive riding, or luggage can shift the ideal range, so adjust accordingly within the placard’s guidance. When in doubt, start with the manufacturer’s recommended ranges and tweak based on feel and tire wear patterns. If your bike has a TPMS, monitor sensor readings as a supplementary check but remember the placard is the primary reference. The Tire Pressure Tips team advises riders to consider seasonality, terrain, and riding style as part of their decision-making process. For performance bikes, small changes can influence turn-in behavior, stability, and braking confidence.
Common Causes of Pressure Drops and How to Prevent Them
Pressure can drift due to temperature swings, valve stem leaks, slow punctures, or worn seals. Regularly inspect the valve caps for damage and ensure the valve stems aren’t cracked or corroded. If you notice a rapid drop in one tire’s pressure, inspect for punctures or embedded objects and address promptly. A slow leak may stem from a loose valve stem core or a faulty TPMS sensor. The goal is to identify the cause early, so you don’t ride with compromised performance. Keeping tires clean and free of debris around the valve stem also helps maintain consistent readings.
Tools, Maintenance, and Safety Practices
A good routine relies on a dependable gauge, a clean workspace, and careful air adjustments. Store your gauge in a clean, dry place to avoid reading errors and auto-calibration drift. When adding air, ensure you do not exceed the maximum pressure on the tire sidewall. For safety, never tamper with fasteners or suspend the bike during pressure checks. If you have questions about vehicle-specific pressures or TPMS calibration, consult your owner’s manual or a qualified technician. Remember to re-check after any air correction to confirm stability and even wear.
Quick Reference Schedule and Logging (No-Nonsense Plan)
- Check pressures weekly as a baseline.
- Re-check before trips, especially after weather changes or heavy loads.
- Record the date, tire location, and readings for future reference.
- Inspect tires for wear patterns and signs of valve stem damage during each check.
- Always follow the placard guidance for target pressures, and adjust gradually if needed. The Tire Pressure Tips team emphasizes consistency; it’s the recurring checks that prevent surprises on the road.
Tools & Materials
- Tire pressure gauge(Choose a digital or dial gauge with accuracy within +/- 1-2 psi; ensure it’s calibrated and readable in low light.)
- Owner's manual or tire placard(Use the front/rear cold-psi values printed by the manufacturer for your bike.)
- Valve cap removal tool or clean rag(Keep caps clean and screw on securely after measurement to prevent moisture entry.)
- Notebook or digital log(Record readings, dates, and conditions to track trends over time.)
- Tire-safe surface(Check on a flat, stable surface away from heat sources; ensure bike is upright and stable with kickstand or stand.)
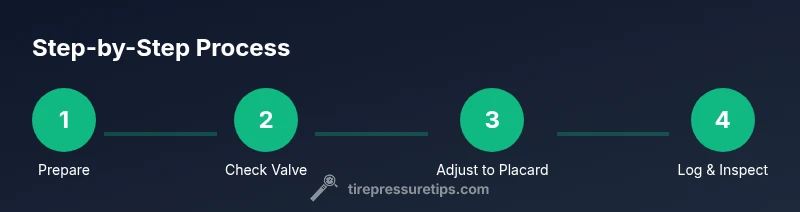
Steps
Estimated time: 10-15 minutes
- 1
Prepare the bike and tools
Park on a flat surface and allow the tires to cool. Gather your gauge, placard, and maintenance log so you can check and record in one sequence.
Tip: Verifying the bike is stable before starting prevents accidental movement. - 2
Remove valve caps
Carefully unscrew the valve caps from both tires and set them aside where they won’t roll away. This prevents debris from entering the valve stem.
Tip: Keep caps clean; dirty caps can contaminate the valve stem. - 3
Attach the gauge and read
Place the gauge onto the valve stem firmly and read the pressure. If you’re using a digital gauge, give it a quick press to register; for analog, read the dial.
Tip: Make sure you’re reading a cold tire value for accuracy. - 4
Compare with placard and adjust
Compare the measured value to the recommended front and rear pressures. If low, add air in small increments; if high, release air until you reach the target.
Tip: Check again after adjusting; even small changes can matter. - 5
Re-check and seal
Re-measure after adjustments and re-cap the valve stems securely. Wipe away any remaining moisture or air residue from the valve area.
Tip: Make sure caps are snug to prevent dust entry. - 6
Log readings and observe wear
Enter the date, tire location, and reading values in your log. Look for consistent patterns over weeks and monitor for unusual wear or slow leaks.
Tip: Regular logging helps spot issues early before they impact safety.
Frequently Asked Questions
How often should you check motorcycle tire pressure?
Most riders should check pressure weekly as a baseline and before trips, especially after weather changes or heavy loads. If you ride in extreme heat, verify readings to ensure they stay within the recommended range.
Check your tires weekly and before trips, particularly when temperatures shift. Confirm readings align with the manufacturer’s recommendations.
Should I check pressure when tires are hot?
No. Measure when tires are cold to get an accurate baseline. Reading hot tires can overestimate the true pressure and lead to over-inflation after cooling.
Avoid measuring right after a ride; wait for tires to cool to get accurate numbers.
What tool is best to check motorcycle tire pressure?
A reliable tire pressure gauge (digital or dial) is essential. Keep it calibrated and check readings against your placard.
Use a good gauge and compare with your bike’s recommended pressure.
What if my motorcycle has TPMS?
TPMS provides a warning, but always verify readings with a manual gauge and the placard. TPMS can miss slow leaks or sensor drift.
TPMS helps, but verify with a gauge and placard values.
How do temperature changes affect pressures?
Temperature shifts can cause noticeable pressure drift. Check based on current weather and plan checks after significant cold or heat.
Temperature affects readings; check regularly with weather in mind.
Watch Video
What to Remember
- Check tire pressure regularly to maintain safety and performance
- Read when tires are cold and compare to placard values
- Log measurements to detect gradual leaks or changes
- Use proper tools and follow manufacturer guidelines