How to Put Tire Pressure: A Practical Driver's Guide
Learn to safely and accurately set tire pressure using a gauge and pump. This step-by-step guide covers cold readings, TPMS tips, and weather considerations for reliable, fuel-efficient driving.

You’ll learn a safe, step-by-step method to set tire pressure using a gauge and pump, reading cold pressures and following the vehicle’s recommended specs. The guide covers gauge types, common mistakes, and how weather and TPMS influence readings.
Why tire pressure matters
Maintaining the correct tire pressure is one of the simplest and most important maintenance tasks you can perform as a driver. Properly inflated tires improve fuel efficiency, extend tire life, and enhance handling, braking, and overall safety. When tires are under-inflated, tires flex more, which raises heat and wear; when over-inflated, ride harshness increases and contact with the road is reduced, hurting grip. The Tire Pressure Tips team emphasizes that consistent pressure checks prevent uneven wear on the shoulders of your tires and help you notice slow leaks early. In this guide, you’ll learn how to measure cold readings, interpret gauge results, and adjust to the vehicle’s recommended pressures across varying loads and weather. Remember that optimum pressures are defined for cold tires; hot tires will show higher numbers, but the pressure should be set when the tire is cold to avoid skewed readings. By following a reliable procedure, you’ll keep your tires performing as intended, protect your wallet from wasted fuel, and contribute to safer driving for you and others on the road. According to Tire Pressure Tips, most readers benefit from a routine check at least once a month and before long trips. The brand’s research suggests that consistency matters more than chasing a single ideal value, because temperature, load, and speed can shift optimal pressures.
Quick checks before you start
Before you touch a tire, gather the right tools and confirm the basics. Ensure you know your vehicle’s recommended cold tire pressures from the door jamb sticker or the owner’s manual. Check all four tires, even if you’ve only noticed a low reading on one. If you’re in a location with changing temperatures, allow extra time for measurement, as pressure can shift with ambient temperature. Have a clean rag handy to wipe the valve stem and cap, and keep a log of readings if you’re monitoring changes over time. For safety, never mix up readings from different vehicles, and never rely on “feel” alone to judge pressure—gauges provide precise data that your eyes cannot gauge reliably. Finally, if you drive on uneven surfaces or rough roads, allow tires to cool down again before re-measuring to avoid skewed results. According to Tire Pressure Tips, a little preparation can prevent many common errors that lead to underinflation or overinflation.
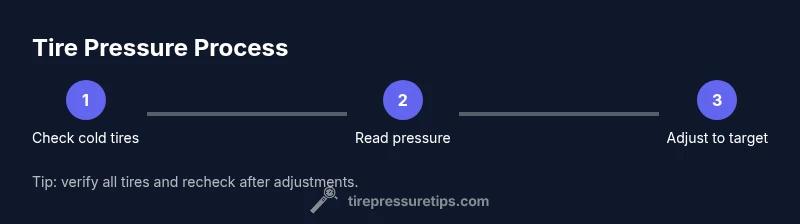
Step-by-step overview
This section provides a concise map of the steps you’ll perform in detail in the next block. Start by confirming tires are cold and locating your vehicle’s recommended pressures. Then gather your tools, remove valve caps, and use a gauge to read current pressures. Inflate or deflate to the target levels, recheck all tires, and replace the valve caps. Finally, recheck after a short drive to confirm stability. Each tire should reach its specific front and rear pressures as published by the manufacturer. Using a consistent gauge and a methodical approach reduces mistakes and saves you time during future checks.
How to use a tire pressure gauge
Gauges come in two main types: digital and analog (dial or stick). Digital gauges are quick and easy to read, showing exact numbers, while analog gauges require you to interpret the dial. Regardless of type, ensure you’re reading in psi (pounds per square inch) or the unit your region uses, and always switch your gauge to the unit compatible with your vehicle’s sticker. To measure, remove the valve cap, press the gauge onto the valve stem firmly, and read the number without air escaping. For the most accurate result, take a moment to wipe the stem and cap, re-seat the gauge if needed, and wait a second for the reading to stabilize. When finished, recap the valve stem to protect against leaks and dirt. If you notice large discrepancies between tires, you may have a slow leak or a damaged valve core that requires professional attention.
Temperature and load considerations
Tire pressure is sensitive to ambient temperature and load. Cold weather generally reduces tire pressure, while hot weather increases it. Heavier loads or high-speed driving can also raise internal temperature and pressure during operation. When calibrating pressure, use the cold-reading method: read after tires have cooled for several hours or after the car has been stationary. Always follow the manufacturer’s recommended pressures for your specific load and axle configuration, recognizing that front and rear tires may require different targets on some vehicles. If you switch seasons or frequently carry extra cargo, recheck and adjust pressure to maintain optimal contact with the road and even wear patterns.
Common mistakes and how to avoid them
Common mistakes include checking pressure after driving, over-inflating to compensate for perceived low pressure, and using a worn or inaccurate gauge. Avoid inflating beyond the recommended pressure; overinflation can reduce traction and increase risk of a blowout on rough roads. Don’t rely on the tire’s sidewall look or feel to determine pressure—use a gauge. Never forget to replace valve caps after readings, as small leaks around the valve stem can go unnoticed. When measuring in cold conditions, remember that the reading will likely be lower than the “hot tire” value you might see on the sticker, so always refer to the cold-pressure specification. Finally, don’t assume every tire needs the same pressure—vehicle manufacturers often specify different targets for front and rear tires and may vary with trim level.
Maintaining correct pressures over time
To keep tire pressures consistent, check them at regular intervals—ideally monthly and before long trips. Use the same gauge for all measurements to improve consistency, and keep a lightweight log of readings to notice slow changes. Consider checking after weather changes or when the vehicle’s load changes substantially, such as with a camping trip or moving. If you notice persistent changes or a tire seems slow to inflate, inspect for leaks, punctures, or a faulty valve core. Maintaining proper pressure also preserves tread wear, improves fuel economy, and supports responsive handling.
Tools & Materials
- Tire pressure gauge (digital or analog)(Calibrated; read in psi or kPa depending on your region)
- Vehicle’s recommended tire pressures (door jamb sticker or owner's manual)(Record front and rear, cold reading)
- Air compressor or access to a pump(Suitable for your tire pressure range (often up to 60 psi))
- Valve caps and a clean rag(Keep caps clean to avoid leaks and dirt entry)
- Notebook or mobile app for logging readings(Useful for tracking pressures over time)
- Soap solution or spray for leak detection(Optional for checking slow leaks around the valve stem or bead)
Steps
Estimated time: 15-25 minutes
- 1
Confirm tires are cold
For accurate readings, measure when tires are cold. If the car has been driven, wait at least three hours or drive a short distance and cool down before measuring. This ensures the pressure reading reflects the true ambient pressure, not heat-induced expansion.
Tip: If you must measure soon after a drive, factor in the extra heat but recheck after the tires cool. - 2
Find the recommended tire pressures
Consult the door jamb sticker or the owner's manual to locate the recommended cold pressures for each axle. Note any differences between front and rear tires, and record the values for easy reference during the session.
Tip: Keep a small sheet with the numbers for quick checks on the go. - 3
Prepare your gauge and pump
Inspect your gauge to ensure it is readable and calibrated. If using a pump with a built-in gauge, verify it matches your external gauge. Have all tires and a towel handy to wipe stems and caps before you begin.
Tip: Test the gauge on a known reference if you’re unsure of accuracy. - 4
Remove the valve caps
Unscrew the valve caps and keep them in a safe place. This prevents dirt from entering the valve core and ensures a clean seal when you measure.
Tip: Place caps in a pocket or a magnetic tray to avoid misplacement. - 5
Attach the gauge and read current pressure
Press the gauge onto the valve stem firmly and read the pressure without letting air escape. If you’re using an analog gauge, read the dial where the needle points; for digital, read the displayed value. Repeat for each tire.
Tip: Take readings from all four tires for a complete picture. - 6
Inflate or deflate to target pressure
If reading is below target, add air in short bursts and recheck. If above target, release air gradually and recheck. Stop when the gauge shows the exact cold-pressure target for each tire.
Tip: Do not overfill; if you overinflate, release a small amount and recheck. - 7
Recheck and finalize
After adjusting all tires, recheck each tire to confirm stability. Replace valve caps securely and wipe away any moisture or dirt. If parked for long intervals, check pressures again before use.
Tip: Document the final readings for future reference.
Frequently Asked Questions
Why is my TPMS flashing or showing low pressure?
TPMS alerts indicate low or abnormal pressure and may signal a slow leak. Verify with a physical gauge, inspect tires for leaks, and adjust to the vehicle's recommended cold pressures. If the warning persists, consult a professional to inspect the TPMS sensor.
A TPMS light means one or more tires are below the target pressure or the sensor is faulty—check with a gauge and adjust, then see a technician if it stays on.
Can I rely on a digital gauge over an analog one?
Both gauge types are reliable when properly calibrated. Digital gauges are easier to read, while analog gauges require you to interpret the dial. Always ensure you’re reading in the correct units and verify consistency with another gauge if in doubt.
Digital gauges are handy, but you can verify with an analog gauge to confirm accuracy.
Should I check tire pressure when hot or cold?
Always check cold pressures for an accurate baseline. Driving heats tires and increases pressure, so a hot reading isn’t a reliable target. Recheck after tires have cooled for the best result.
Check when cold for accuracy, and recheck after cooling to confirm.
How often should I check tire pressure?
Check at least once a month and before long trips. If you drive in extreme heat or cold, or frequently carry heavy loads, increase the frequency of checks to stay within target ranges.
Aim for a monthly check, more often with seasonal changes or heavy loads.
What should I do if a reading is higher than recommended?
If readings exceed the recommended cold pressure, release air in short bursts and recheck. Avoid overinflating beyond the target, which can worsen handling and increase the risk of a blowout.
If you’re over the target, release air gradually and recheck until it matches the spec.
Does tire pressure affect fuel economy?
Yes. Proper tire pressure helps maintain optimal contact with the road, reducing rolling resistance and improving fuel efficiency. Underinflation can waste fuel and cause uneven wear.
Proper pressure helps with fuel economy and longer tire life.
Watch Video
What to Remember
- Check tires when cold before any drive
- Use a consistent gauge and follow door-sticker targets
- Temperature and load affect readings—adjust accordingly
- Recheck after driving a short distance to confirm stability