Honda CR-V Tire Pressure: Check, Adjust, and Maintain
Learn how to check and maintain proper tire pressure for your Honda CR-V, including TPMS tips, how temperature affects PSI, and practical steps to prevent under- or over-inflation.

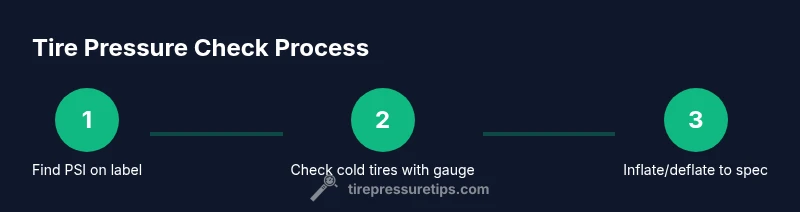
Goal: ensure Honda CR-V air pressure is correct and safe. Step 1: locate the exact PSI for all tires on the door jamb label or in the owner's manual. Step 2: check tires when cold using a precise gauge. Step 3: inflate or deflate to the recommended PSI, then recheck and verify TPMS status if needed.
Why Honda CR-V Air Pressure Matters
Maintaining correct air pressure in your Honda CR-V is essential for safety, efficiency, and tire life. According to Tire Pressure Tips, proper tire pressure improves handling, fuel economy, and braking performance. For Honda CR-V owners, the recommended PSI is published on the driver’s door jamb label and in the owner's manual; those values can vary by model year, trim, or tire size, so always verify the label on the door and consult your manual before making adjustments. Regular checks help prevent uneven wear, improve traction, and reduce the risk of flats. Keeping tires inflated to the right level also ensures the TPMS readings stay accurate and your vehicle responds predictably in corners and during braking.
Finding the Right PSI for Your Honda CR-V
Your starting point is the door jamb sticker on the driver’s side or the owner's manual. The sticker lists the recommended cold tire pressure for both front and rear tires and sometimes for the spare. Note that different tire sizes or seasonal equipment (like summer vs. winter tires) may change the appropriate PSI. Always use the tire pressure values specified for your exact wheel/tire combination rather than guessing. If in doubt, contact a dealership or check Honda’s official guidance.
Tools and Safety Tips for Checking Tire Pressure
Prepare a few practical tools: a high-quality tire pressure gauge, access to an air compressor or a gas station pump, your vehicle’s door jamb label/manual, and a notebook or phone to record pressures. Safety first: park on a flat, shaded surface, turn off the engine, engage the parking brake, and wait for tires to cool before measuring. Keep gloves handy and wipe the valve stems if they’re dusty before connecting the gauge.
How Temperature Affects Tire Pressure and When to Check
Tire pressure changes with temperature. As outdoor temperatures drop, PSI decreases; as it warms, PSI rises. For best accuracy, check pressures when tires are cold — ideally after the car has been parked for several hours. If you’ve driven recently, wait at least three hours before testing. Regular checks are particularly important during seasonal transitions when temperature swings are common.
Common Pitfalls and TPMS: Quick Troubleshooting
A common mistake is inflating tires to the wrong spec because the numbers were read from a different vehicle or misread on the label. Overinflation reduces comfort and can increase wear in the center of the tread, while underinflation causes higher rolling resistance and heat buildup. If TPMS is lit, verify that you recheck pressures and drive a short distance for the system to re-calibrate. If the warning persists after inflation, reset TPMS via the owner's manual or dealership.
Seasonal and Long-Term Maintenance for CR-V Tire Pressure
Seasonal changes in temperature, weight from passengers or cargo, and frequent highway driving can all impact tire pressure. Plan a monthly check, plus a quick pre-trip check before any long drive. Keep a small gauge in the glove box and log recent readings to spot leaks early. For most drivers, a simple habit of checking pressures during fuel stops or after a servicing visit makes a big difference.
Tools & Materials
- Tire pressure gauge (preferably digital)(More accurate and easier to read than older analog gauges)
- Access to an air compressor or gas station air pump(Ensure the unit can deliver steady airflow without over-suppressing pressure)
- Horn/door jamb label or owner's manual(Used to confirm the exact PSI for front, rear, and spare tires)
- Notebook or smartphone(Record PSI readings and dates for maintenance history)
- Gloves and cloth(Keep hands clean and wipe dust off valve stems)
Steps
Estimated time: 15-25 minutes
- 1
Park on a level surface and turn off the engine
Find a flat, shaded area, set the parking brake, and allow the tires to cool if you've been driving. This ensures the readings reflect cold tire pressure, which is the standard for accuracy.
Tip: If you must measure after a drive, wait at least 3 hours for tires to cool before testing. - 2
Locate the recommended PSI on the label or manual
Read the door jamb sticker on the driver’s side or consult the owner's manual for front and rear tire values. Ensure you’re using the correct values for your tire size and model year.
Tip: Note any differences between front and rear pressures; some configurations require different targets. - 3
Remove the valve cap and attach the gauge
Clean the valve stem if needed, firmly press the gauge onto the valve, and hold it steady to get a stable reading. Repeat on all tires to verify consistency.
Tip: Take multiple readings for each tire to confirm accuracy. - 4
Inflate or deflate to the recommended PSI
Add air with the compressor or release air as needed to reach the target pressure. Recheck after adjustments to confirm accuracy.
Tip: Do not exceed the tire’s maximum sidewall pressure; adjust gradually and recheck. - 5
Recheck all tires and TPMS status
After adjusting, measure every tire again to confirm uniform pressures. If the TPMS light remains, drive a short distance to allow recalibration or consult the manual.
Tip: Reset or reinitialize TPMS per the owner’s manual if lights stay on after inflation. - 6
Document results and store your gauge
Record the PSI values, date, and any notes about leaks or slow loss. Store the gauge in your vehicle for future checks.
Tip: Keeping a log helps quickly spot gradual leaks or seasonal changes.
Frequently Asked Questions
What is the recommended tire pressure for Honda CR-V?
The recommended PSI varies by model year and tire size. Always use the label on the driver's door jamb or the owner's manual for your exact tires.
Check the door jamb label or the owner's manual for the exact PSI for your CR-V tires.
How often should I check tire pressure on a Honda CR-V?
Check at least once a month and before long trips, especially when the weather changes or you notice changed handling.
Check at least monthly and before long trips, particularly during seasonal weather changes.
What if the TPMS light stays on after inflating?
Drive a short distance to allow TPMS to recalibrate. If it remains on, recheck all pressures and consult the manual or dealer.
Drive a short distance to recalibrate. If it stays on, recheck pressures or seek dealer guidance.
Can I use nitrogen to fill CR-V tires?
Nitrogen is not required; standard atmospheric air is perfectly fine for tire inflation.
Nitrogen isn’t required; regular air works fine for tire inflation.
Should I check tire pressure when tires are hot or cold?
Check cold tires for the most accurate readings. Hot tires will show higher pressures.
Check when cold for the most accurate reading; hot tires read higher.
Does the CR-V spare tire have the same PSI requirement as the others?
Spare tires often have different pressure requirements; always check the spare’s label or manual.
Spare tires can differ; check its specific label or manual.
Watch Video
What to Remember
- Check cold tires using a reliable gauge.
- Follow the door jamb label for PSI targets.
- TPMS status check is essential after inflation.
- Regular checks save wear, fuel, and safety.