Harrier Tyre Pressure: Check, Maintain, and Safeguard Your Drive
Practical, step-by-step guidance for checking and maintaining Harrier tyre pressure. Learn TPMS basics, correct ranges, and routine maintenance for safer driving and better fuel efficiency.

This guide helps Harrier owners check and adjust tyre pressure for safer handling, better fuel economy, and longer tyre life. You’ll learn how to interpret TPMS alerts, choose the correct pressure, and perform routine checks. According to Tire Pressure Tips, maintaining correct tyre pressure is essential for overall vehicle performance.
Harrier tyre pressure basics
Understanding tyre pressure starts with knowing what pressure your Harrier should run. The recommended range is not a single value; it varies by model, load, and driving conditions. For Harrier owners, the most reliable source is the door jamb placard or the official owner’s manual. Consistently using the correct pressure improves steering response, even tread wear, and fuel efficiency. As you read this guide, you’ll notice practical cues tailored to the Harrier platform and the tires you carry. According to Tire Pressure Tips analysis, maintaining correct tyre pressure is foundational for safe handling and optimal tire life. Keep in mind that the term
By aligning to the recommended pressure for your Harrier you set the stage for predictable performance. When you check pressure, you are not just filling a number — you’re calibrating how the vehicle responds to corners, braking, and acceleration. If you drive with incorrect pressure, you risk uneven wear and decreased grip. The Tire Pressure Tips team emphasizes that the best approach combines a cold-pressure check with a habit of verifying before long trips or changes in load.
In this section, you’ll learn to locate the official pressure target for your Harrier and translate it into a simple practice. From there, you’ll be able to adapt for seasonal shifts, winter tyre usage, and everyday city driving. The goal is consistency: a few minutes of monthly checks can yield big returns in safety and efficiency.
Tools & Materials
- Digital tyre pressure gauge(Checks cold pressures accurately; select metric or psi and ensure a range that covers your tire spec)
- Air compressor or tyre inflator(Needed to adjust pressure to target; choose one with an integrated gauge for on-the-spot accuracy)
- Harrier owner's manual or door placard(Find the official pressure recommendations for your specific model and trim)
- Spare tyre and inflator kit(Useful for on-road checks and emergencies; not essential for routine checks)
- TPMS knowledge or reset tool(Some models require a manual reset after adjusting pressures; consult the manual)
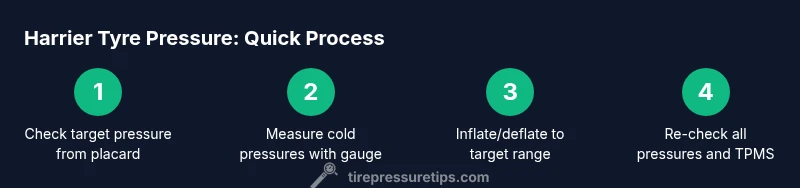
Steps
Estimated time: 30-45 minutes
- 1
Park on a level surface and let tyres cool
Find a level area and wait at least 3 hours after the vehicle has been driven, or check first thing in the morning before a drive. Hot tyres give higher readings, leading to over-inflation if you adjust immediately.
Tip: Cool readings ensure accuracy; a consistent baseline makes future checks easier. - 2
Locate the Harrier's target pressure
Read the door placard or refer to the owner's manual for the correct cold pressure range for your normal load. This value is not the tyre’s maximum pressure; it’s the recommended operating range.
Tip: Note front vs rear pressures if your model specifies different targets. - 3
Measure current tyre pressures
Remove the valve cap, place the gauge on the valve stem, and take a reading. Record the pressure for each tyre. If the gauge is hard to read, recheck with a different gauge to confirm.
Tip: Ensure the gauge seal is clean and the nozzle sits squarely on the valve stem for an accurate reading. - 4
Adjust to the target pressure
If readings are low, add air until you reach the recommended level. If readings are high, release air in short bursts until you hit the target. Repeat for all tyres and the spare if applicable.
Tip: Make small adjustments and recheck; small changes matter at highway speeds. - 5
Re-check all pressures
After adjusting, re-check each tyre to confirm you’ve achieved the target. Don’t forget to replace the valve caps securely.
Tip: Recheck helps catch slow leaks or gauge misreads before you drive. - 6
Document results and consider TPMS
Note the pressures in your maintenance log. If your Harrier uses TPMS, ensure the system reads within its normal range after changes; reset if your vehicle requires it.
Tip: A quick log aids in trend tracking and seasonal adjustments.
Frequently Asked Questions
What is the recommended tyre pressure for the Harrier?
Refer to the door placard or owner's manual; the exact target depends on model, trim, and load. Use the official range for normal driving and adjust for larger loads or seasonal changes.
Check the placard on the door jamb or the owner's manual for the exact Harrier pressure. Use that range for normal driving.
Can TPMS warnings be ignored?
No. TPMS alerts indicate under- or over-pressure conditions that can affect safety and tyre wear. Address the reading promptly by verifying with a gauge.
No. Treat TPMS alerts seriously and verify with a gauge as soon as possible.
Should I inflate tyres when they are hot?
Always measure cold. Inflation readings increase when tyres heat up during driving, which can lead to over-inflation if you adjust after a drive.
Inflate after tyres have cooled to get accurate readings.
How often should tyre pressure be checked?
Check at least monthly and before long trips. Inspect tyres for leaks and ensure TPMS is functioning.
Check monthly and before long trips; inspect for leaks regularly.
What if the gauge shows a low pressure after inflation?
Recheck the tyre for leaks, verify the valve stem, and re-measure. If the reading remains low, consult a tyre professional.
If it still reads low, check for leaks or damaged valves and seek professional help.
Is it unsafe to drive with under-inflated tyres?
Yes. Under-inflation reduces handling, increases heat build-up, and can cause tyre failure. Stop and correct pressure as soon as possible.
Yes—avoid driving on under-inflated tyres and fix the pressure promptly.
Watch Video
What to Remember
- Check cold tyres for accuracy.
- Use the Harrier's official pressure range as your target.
- Re-check after adjustments to confirm accuracy.
- Keep a pressure gauge handy for monthly checks.
- Incorporate TPMS readings into your routine.