Brand New Tire Losing Air Pressure: Urgent Troubleshooting Guide
Urgent guide to diagnose and fix a brand new tire losing air pressure. Fast checks, TPMS tips, and practical steps to keep you safe on the road today.

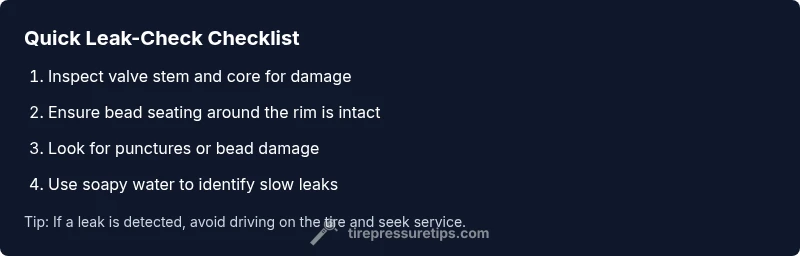
If you notice a brand new tire losing air pressure, start with quick, safe checks. Inspect the valve stem and core for damage, verify the tire bead sits evenly on the rim, and look for visible punctures or cracks. If the tire still loses air, park safely, and proceed with the diagnostic flow and step-by-step fixes below.
The Urgency of a Brand New Tire Losing Air Pressure
A brand new tire losing air pressure is not just a nuisance—it can be a safety risk. Air loss can happen for several reasons, even when a tire is fresh from the shop. It might indicate a faulty valve stem, a bead seating issue, or a hidden defect in the tire itself. In the moments after noticing a leak, you should treat it as an urgent maintenance matter. The Tire Pressure Tips team emphasizes the importance of quick, controlled actions to avoid a sudden loss of control, a blowout, or accidental driving on a underinflated tire. Throughout this guide, you can expect practical steps that any driver can perform with basic tools and safe methods. We’ll cover common causes, a diagnostic flow, and a step-by-step fix plan to help you regain proper air pressure and drive with confidence. Remember: until you confirm a stable seal, avoid pushing the tire near its listed maximum pressure and avoid high-speed driving on a suspect tire.
Common Causes in Brand New Tires
New tires can leak air for several reasons. The most frequent culprits are a damaged or improperly seated valve stem, a failing valve core, and imperfect bead seating around the wheel rim. Less common but possible causes include small punctures, cracking in the tread or sidewall, and damage to the TPMS sensor or stem. Temperature fluctuations can also cause slow leaks, particularly in colder weather when air contracts and leaks appear more pronounced. For drivers, distinguishing between a slow leak and a rapid deflation is critical, as it determines whether a quick fix suffices or a tire replacement is needed. Tire Pressure Tips recommends a systematic approach: start with the simplest checks and progress to more involved inspections if the leak persists.
Safety First: Immediate Actions to Take
If your tire is losing air while you’re driving or appears visibly unstable, pull over to a safe location as soon as possible. Do not continue to drive long distances on a suspected leaking tire. Turn on hazard lights, and assess surroundings for sharp objects, curb damage, or nails around the tire surface. Use gloves or a tire gauge to check the current pressure and compare it to the vehicle’s recommended PSI found on the door jamb placard or owner’s manual. If you smell burning rubber, hear hissing, or see a bubble of air when applying soapy water, treat it as an urgent leak and seek roadside assistance if you cannot address it safely on-site.
Diagnostic Flow: Symptom to Diagnosis (Overview)
The diagnostic path begins with simple, obvious checks and progresses toward more involved tests. Start by inspecting the valve stem and core for damage, then verify the bead seating around the rim. Next, check for punctures, cuts, or cracks in the tread or sidewall. If no external damage is visible, test for slow leaks using soapy water and confirm if the leak is steady or accelerating. If TPMS is showing inconsistent readings, inspect the TPMS sensor and battery. The goal is to identify the exact source of air loss before choosing a repair approach—bead seating may require professional equipment, while a loose valve stem can often be fixed with a replacement valve core.
Step-By-Step Fixes for the Most Likely Cause: Improper Bead Seating or Valve Stem Issues
The most common reason for a brand new tire losing air pressure is a bead seating issue or a faulty valve stem. Start with the simplest fix and verify results after each step. A properly seated bead ensures a waterproof, airtight seal between tire and rim. A damaged valve stem or a loose core can leak air steadily. Below is a practical sequence for addressing these issues without specialized tooling in most cases. If you’re uncomfortable at any point, stop and contact a professional.
Detailed Step-by-Step: Inspect, Seal, Inflate, and Verify
Step-by-step guidance helps you perform the most common fixes efficiently. Each step includes a practical tip to reduce risk and avoid user error. The testing method uses conventional hand tools and a basic tire gauge. Always work on a cool tire and use a properly rated jack and wheel chocks when lifting a vehicle. If the leak remains after every basic check, you should engage a certified tire technician for a bead seating procedure or rim inspection.
Additional Checks: Leakage from Valve Core, TPMS, or Rim
Even after the bead seal and valve stem have checked out, leaks can originate from the valve core or TPMS assembly. A slow leak from the valve core is common and can often be solved by tightening the core with a valve core tool or replacing it. If the TPMS sensor is damaged, the leak could appear to persist because the sensor housing is compromised or the battery is weak. Rim damage or a corroded bead seat may also cause micro leaks; this may require professional repair or wheel replacement. In scenarios where the leak alternates with temperature changes, you’ll want to assess the tire for rounding issues or a shifting bead due to wheel deformity.
Prevention Tips to Avoid Future Leaks
Regular maintenance reduces the risk of leaks and ensures consistent tire performance. Check tire pressure at least once a month and before long trips, especially after seasonal temperature changes. Use a high-quality digital tire gauge for consistent readings, and verify the recommended pressure for your vehicle. Inspect the valve stems and TPMS sensors during routine tire rotations. If you notice a tire that repeatedly loses air, schedule a professional inspection to check for bead damage, rim integrity, or hidden punctures.
When to Seek Professional Help and What to Expect
If the leak persists after performing the recommended checks, or if you discover bead damage, rim corrosion, or a damaged TPMS sensor, consult a tire professional. Bead seating often requires specialized equipment to ensure a proper, airtight seal. A professional will inspect the entire wheel assembly, perform leak tests, and advise on repairs or tire replacement. For safety, never drive a vehicle with a tire that shows a consistent, significant loss of air pressure.
Steps
Estimated time: 30-45 minutes
- 1
Inspect valve stem and core
Check for cracks, damage, or looseness on the valve stem. Use a valve core tool to tighten or replace the core if the leak is concentrated at the valve. After adjustment, inflate the tire to the recommended PSI and recheck after 30 minutes.
Tip: Tighten carefully; overtightening can crack the valve stem. - 2
Check bead seating on the rim
Inspect the bead area for gaps or corrosion. If you have access to a bead seating tool, gently reseat the tire to ensure a proper seal. If the bead is visibly separated or damaged, do not force the seal—seek professional service.
Tip: Make sure the tire is cool before attempting reseating. - 3
Look for visible punctures or damage
Walk the tire with gloves to feel for nails or sharp objects stuck in the tread. Remove any foreign object only if it’s safe, then use soapy water to check for active leaks around the tread and sidewalls.
Tip: Do not attempt to remove large objects that cause rapid deflation without professional help. - 4
Test for slow leaks with soapy water
Generously apply soapy water to the tire seam, valve stem, and rim. Watch for continuous bubbles which indicate air leaks. Mark the leak area for reference and plan repair or replacement accordingly.
Tip: Repeat testing after any fix to confirm the leak is resolved. - 5
Check TPMS readings and sensor health
Compare TPMS readings with manual pressure. If readings are inconsistent or the sensor appears damaged, inspect the sensor housing and battery. Replace the sensor if necessary to restore accurate readings.
Tip: TPMS maintenance is essential for accurate pressure monitoring. - 6
Decide on repair or replacement
If a leak is easily fixable (valve core, bead seating), complete the repair and recheck pressure. If the tire shows bead damage, sidewall cracks, or unsafe wear, replace the tire.
Tip: Never drive on a damaged bead or compromised sidewall.
Diagnosis: Brand new tire losing air pressure
Possible Causes
- highDamaged or loose valve stem/core
- highImproper bead seating on rim
- mediumTire bead or rim damage causing slow leak
Fixes
- easyInspect valve stem and core for damage and tighten/replace as needed
- mediumCheck bead seating and reseat if possible using proper equipment
- easyTest with soapy water to locate slow leaks around beads, stems, and rims
- mediumInspect TPMS sensor and battery; replace if faulty
- hardIf leak persists, arrange professional bead seating or wheel repair
Frequently Asked Questions
Why would a brand new tire lose air pressure after installation?
Common causes include a faulty valve stem/core or bead seating issues. A thorough check using soapy water helps locate the exact leak source. If a leak persists, a professional inspection is recommended.
A leaking tire after installation usually means the valve stem or bead seating has a problem; a quick soap test will show the leak source, and if it keeps leaking, a pro should check it.
Can a tire lose air due to temperature changes alone?
Temperature fluctuations can cause air pressure to change, but significant loss beyond a few PSI usually indicates a leak or seal issue. Monitor readings across different temperatures to distinguish between normal and abnormal loss.
Temperature changes can alter tire pressure, but big drops usually mean there’s a leak or seal problem.
Is TPMS a leak source?
TPMS measures pressure but does not itself cause air loss. A faulty sensor can give incorrect readings or mask a real leak. Inspect the sensor and battery if readings don’t match manual pressure.
TPMS isn’t the leak, but a bad sensor can hide a leak or misreport pressure.
When should I replace a tire that loses air?
If the tire bead, sidewall, or core shows irreversible damage, or leaks persist after repairs, replacement is necessary. Safety comes first when a tire cannot be reliably sealed.
If leaks keep coming back or the tire is damaged, replacement is the safer option.
Do I need professional help for bead seating?
Bead seating often requires specialized equipment. If you’re unsure about the seal or notice uneven seating, a professional tire technician should perform the repair.
Bead seating can be tricky—if you’re unsure, get a pro to take care of it.
What maintenance prevents leaks?
Regular pressure checks, TPMS maintenance, and careful handling during mounting prevent leaks. Inspect valve stems and rims periodically, especially after curb impact or road hazards.
Regular checks and careful mounting help prevent leaks from starting.
Watch Video
What to Remember
- Identify leaks quickly with basic checks
- Valve stems and bead seating are common culprits
- Use soapy water to locate leaks reliably
- TPMS health affects air-reading accuracy
- Consult a professional for persistent leaks