Low Pressure Tyre Troubleshooting: Quick Fixes & Safety
Urgent troubleshooting guide for a low pressure tyre. Learn fast checks, diagnostic flow, step-by-step repairs, and prevention tips to stay safe on the road.

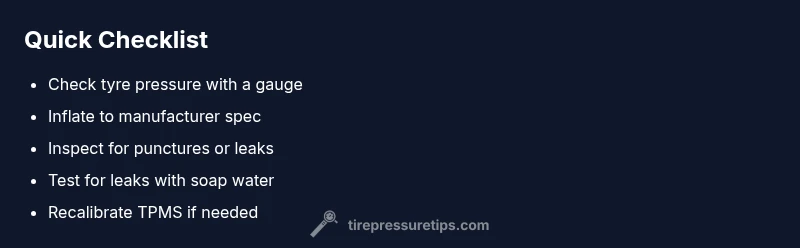
Start by confirming the tyre pressure with a reliable gauge and inflate to the vehicle’s recommended PSI. Common culprits are slow punctures and temperature drops, so inspect for nails, cracks, or bead leaks while the tyre is cool. If the TPMS light stays on after reinflation, seek professional help and check for damaged valves or rims.
Why a low pressure tyre matters
A low pressure tyre drastically changes how a vehicle handles, brakes, and accelerates. When a tyre runs below the recommended PSI, the contact patch with the road becomes uneven, increasing heat buildup and irregular wear. This not only reduces fuel efficiency but raises the risk of a sudden blowout, especially at highway speeds. For drivers, a recurring issue with low pressure tyre can compromise steering response and cornering stability. According to Tire Pressure Tips, maintaining proper tyre pressure is one of the simplest safety measures a driver can take, and it directly affects grip, braking distance, and tire life. Prioritising accurate pressure checks now can prevent roadside disruptions and costly repairs later.
What causes a tyre to lose air (and how to spot it)
Low tyre pressure can come from several sources. Slow punctures from nails or screws create a gradual loss we often notice only when the TPMS alerts us or the ride feels softer. Temperature drops from cold nights or seasonal changes can also reduce PSI, sometimes by several pounds per square inch. Imperfect valve stems or a damaged bead seal between the tyre and rim can contribute to slow leaks, especially after long drives. A quick visual inspection should also check for cracks in the sidewall or wheel rim corrosion that can allow air to escape. Regularly inspecting all four tyres ensures you don’t miss a creeping leak, protecting you from sudden pressure drops on the road.
How to check tyre pressure accurately (cold tyre rule)
Always measure tyre pressure when tyres are cold for the most accurate reading. Remove the valve cap, place the gauge onto the valve stem, and press firmly to obtain a stable reading. Compare the measurement against the vehicle manufacturer’s recommended PSI printed on the door jamb placard or in the owner's manual. Check each tyre, including the spare if equipped. If any tyre reads below the recommended level, inflate to spec and recheck after a few minutes of driving when tyres warm to verify stability. Keep a quality gauge in the glove box for quick checks at home, work, or on road trips.
Temperature and season: pressure changes you need to track
Seasonal temperature shifts and daily temperature swings can significantly affect tyre pressure. A drop of 10°C can reduce PSI by roughly 1–2 PSI, depending on tyre construction and load. In winter, the effect is more pronounced, so you may need to add air to maintain the ideal pressure as temperatures fall. Conversely, warming tyres during a commute can raise pressure, so don’t overcompensate after a cold start. Monitoring pressure with a gauge during extreme temperature changes is essential for consistent handling and tyre wear prevention.
Visual cues and quick diagnostics for a slow leak
Apart from TPMS, look for visible signs of air loss: a creeping damp spot or hissing sound near the valve stem, bead, or sidewall, and uneven wear that indicates underinflation on one edge. A soap-water test can help locate leaks: mix a spray bottle with dish soap and water, apply to the tyre surface and valve area, and watch for bubbles forming at the leak source. If bubbles appear around the bead or rim, it may require professional attention to reseal or replace the tyre. Remember: signs of slow leakage should prompt prompt corrective action to avoid unsafe driving conditions.
When to seek professional help
If you inflate a tyre and it continues to lose air quickly or you cannot identify the leak, it’s time to contact a professional. Persistent leaks around the valve stem or bead often require tyre repair or replacement, and a TPMS fault might indicate sensor problems or wiring corrosion around the wheels. A professional service can safely patch or plug punctures, replace damaged tyres, and recalibrate TPMS sensors to restore accurate readings. Regular maintenance with a trusted shop keeps you safe and reduces the risk of on-road failure.
Safe driving with a known low pressure tyre
If you must drive with a low pressure tyre, reduce speed, avoid hard cornering, and plan routes with safer stopping points if possible. Keep the load within vehicle capacity and check pressure again as soon as feasible. Driving on an underinflated tyre increases heat, leading to faster wear and possible blowouts. After airing up to the recommended PSI, monitor the tyre closely for several days for any continuing signs of leakage or irregular wear.
Steps
Estimated time: 30-40 minutes
- 1
Gather tools and locate data
Collect a digital or dial tyre gauge, air pump, and the vehicle’s recommended PSI from the placard. Make sure tyres are cold before you start. This quick prep avoids inaccurate readings.
Tip: Having a portable gauge in your glovebox saves time on trips. - 2
Measure current pressure
Remove valve caps and press the gauge onto the valve stems to get stable readings for each tyre. Record the numbers so you can compare against the recommended PSI.
Tip: Measure all four tyres for symmetry; a single underinflated tyre can skew handling. - 3
Inflate to recommended PSI
Inflate each tyre to the manufacturer’s recommended pressure and recheck after a couple of minutes to ensure they settle at the correct level.
Tip: Do not exceed the max inflation printed on the tyre sidewall. - 4
Inspect for damage
Look for nails, screws, cracks, or bulges. Check valve stems and rims for corrosion or bead damage that could cause slow leaks.
Tip: If you see obvious damage, stop and seek professional service. - 5
Test for leaks
If a tyre remains stubbornly low, apply soapy water around the valve, bead, and sidewall to locate bubbles indicating leaks.
Tip: A leaking bead may require professional resealing or tyre replacement. - 6
Drive gently and recheck
Take a short test drive to let tyres warm up, then re-measure pressure. Temperature changes can affect readings slightly.
Tip: If the pressure climbs too much after heating, you may have inflated beyond recommended PSI. - 7
Verify TPMS status
Reset or recalibrate the TPMS if you repaired the tyre, or if a sensor replacement was performed.
Tip: A miscalibrated TPMS can give false warnings and confuse maintenance. - 8
Document and monitor
Note down the date, tyre pressures, and any repairs. Check pressures monthly or before long trips to prevent future issues.
Tip: Set a calendar reminder for proactive maintenance. - 9
When in doubt, seek help
If you cannot locate a leak or the tyre continues to lose air, consult a professional immediately.
Tip: Safety first—driving with a persistent leak is risky.
Diagnosis: TPMS warning light or visibly soft tyre on one corner
Possible Causes
- highSlow puncture from nail, screw, or debris
- mediumTemperature drop causing pressure loss
- lowDamaged valve stem or bead seal leak
- lowTPMS sensor fault or calibration issue
Fixes
- easyCheck tyre pressure with a reliable gauge and inflate to the recommended PSI
- easyInspect for visible damage and repair or replace the tyre as needed
- mediumCheck valve stem and bead seal; replace components if leaking
- mediumIf the TPMS remains faulty, have the sensor calibrated or replaced by a professional
Frequently Asked Questions
Why is my TPMS light on after I inflate the tyre?
TPMS can remain on if a sensor is faulty, if the tire has a slow leak you haven’t fully fixed, or if the system hasn’t recalibrated after inflation. Recheck all tyres, reseat the sensor if needed, and consider a professional TPMS diagnostic if the light stays on.
If the light stays on, check for leaks and recalibrate the TPMS with a professional.
Can driving with low pressure tyres cause damage?
Yes. Underinflated tyres heat up faster, wear unevenly, and can lead to sidewall damage or blowouts. Maintaining proper pressure improves safety and fuel efficiency.
Yes, underinflation risks heat buildup and blowouts; keep pressure at the recommended level.
How often should I check tyre pressure?
Check at least once a month and before long trips. Temperature changes and road conditions can alter pressure, so regular checks prevent surprises.
Check monthly and before long trips to stay safe.
How do I repair a slow puncture?
Slow punctures should be repaired by patching or plugging the tyre if the puncture is in the tread and within repairable limits. If the sidewall is damaged, replace the tyre.
Get a tyre repair professional to patch the puncture if safe to repair.
Is it safe to drive on a slightly low tyre?
It’s best to avoid driving on underinflated tyres. If you must, drive slowly, avoid sharp turns, and seek a proper repair as soon as possible.
Try not to drive on underinflated tyres; fix it soon for safety.
What to Remember
- Check pressure when tyres are cold.
- Use a gauge to confirm PSI before driving.
- Inspect for punctures or leaks if underinflated.
- Maintain regular tyre pressure checks (monthly).