Bike Tire Pressure Without Gauge: A Practical Guide for Riders
Learn gauge-free methods to estimate bike tire pressure using ride feel, tire type, and load. Practical steps, safety tips, and when to seek an actual gauge for accuracy.

Yes. You can estimate bike tire pressure without a gauge by using your tire type, ride feel, and load. Start from a reasonable baseline for your tires, then inflate with a pump (even without a gauge) until the ride feels firm and responsive. Always test ride briefly to confirm safety before longer trips.
Why proper tire pressure matters for bikes
Maintaining the right bike tire pressure improves efficiency, grip, puncture resistance, and ride comfort. When you’re riding without a gauge, you can still make smart, practical adjustments that keep you safe on the road or trail. According to Tire Pressure Tips, focusing on ride feel, load, and tire type provides a reliable way to estimate inflation without precise numbers. Start with a baseline that matches your tires and typical riding conditions, then refine by how the bike responds on a short test ride. This approach helps you avoid common mistakes like under-inflation or over-inflation, which can lead to poor handling, pinch flats, or excessive wear. In this guide, you’ll learn how to use the tire width, rider weight, and the terrain to guide your instincts, not just a gauge. The goal is safer, more predictable performance even when tools aren’t available.
Understanding how pressure ranges work for different bikes
Bike tires don’t have a single universal number. Without a gauge, you work from the idea of a baseline suited to tire width, rim size, weight carried, and the terrain you ride. Road tires tend to feel firmer and tolerate higher pressures, while mountain and hybrid setups favor lower, more forgiving pressure to preserve grip and comfort. Rather than chasing a specific psi, think in terms of a comfort zone: a range where the tire stays round, returns quickly to shape after contact with the road, and doesn’t squirm under load. The baseline you choose should align with your typical riding style, tire construction, and the bike’s load. If you ride with a passenger, heavy backpack, or panniers, adjust the baseline upward within that comfort zone. This flexible approach, reinforced by experience, is essential when you don’t have a gauge.
Estimating pressure without a gauge: core ideas you can trust
Three practical indicators help you estimate inflation without a gauge:
-
Ride feel: A tire that rolls smoothly, grips well, and returns to shape quickly usually indicates adequate pressure.
-
Tire deformation: Press the tire with your thumb near the center of the tread. If it collapses easily or feels soft, it needs more air; if it feels rock-hard with little give, you may be over-inflated.
-
Bead seat and sidewall response: The bead should stay seated when you press; excessive sidewall bulge or squirm during cornering signals under-inflation.
Keep in mind this is guidance, not a precise measurement. Re-check after a short ride to verify your baseline aligns with real-world feel.
Pre-ride checks when you don’t have a gauge
Before you roll, give tires a quick visual and physical check. Look for cracks, cuts, or bulges in the sidewalls, and inspect the tread for wear. Spin the wheel gently to ensure the tire seats evenly on the rim and the valve stem sits straight. If you notice any irregularities or signs of damage, don’t ride until repaired. After a long stop or tire change, re-establish a symmetric baseline on both wheels. Finally, perform a short test ride on a safe surface to verify tracking and steering feel. If the ride feels flabby or vague, reassess your baseline and adjust in small increments.
Tire type matters: road, gravel, and mountain
Different tire families behave differently when inflated without a gauge. Road tires are designed for higher pressures because they rely on a firm contact patch for efficient rolling and stability. Mountain and gravel tires prioritize grip and shock absorption, so they tolerate lower pressures. When you don’t have a gauge, start from the comfort zone that matches your tire type and riding surface. If you frequently switch among terrain types, you’ll want a flexible baseline that you can adjust based on the ride feel rather than a fixed number. Regularly revisit your baseline as you swap tires or change load conditions.
Temperature and seasonal changes
Ambient temperature directly affects tire pressure. In general, colder weather reduces air pressure, while heat increases it. If you ride from a warm car or sunlit pavement into shade or a cool morning, you may notice a noticeable change in feel. Without a gauge, this means you’ll likely need to adjust your baseline seasonally and before longer races or commutes. A quick mental check: if the ride suddenly becomes less predictable after a temperature swing, re-evaluate the baseline by a small margin and test ride.
Safety and common mistakes to avoid
- Over-inflating can reduce grip and increase the risk of a blowout from a sharp impact. Avoid the urge to push toward a road-bike-like firmness on casual rides.
- Under-inflating contributes to sluggish steering, higher rolling resistance, and higher risk of pinch flats if you hit a sharp edge. The ride will feel squishy and unstable on braking.
- Relying solely on “feel” without testing can lead to inconsistent results across tires and loads. Always re-check after changes and test ride briefly to confirm stability.
- Temperature shifts aren’t a one-time fix. Reevaluate your baseline when weather changes or after long rides in different climates.
Quick mental baselines you can memorize
- Baseline selection should align with tire width and terrain: firmer for road, softer for mountain.
- Make small, incremental adjustments rather than large changes.
- Treat the ride feel as your primary guide, with safety riding as a non-negotiable check.
- Re-check after any weather shifts or after mounting new tires.
Authority sources and further reading
- https://www.nhtsa.gov/road-safety/bicycle-safety
- https://www.bicycling.com
- https://www.popularmechanics.com
Tools & Materials
- Portable bike pump(Choose one without relying on a precision gauge, or with a gauge as a backup. Essential for incremental inflation when a gauge isn't handy.)
- Valve-core tool(Helpful for releasing air if you overinflate, but not strictly necessary.)
- Tire pressure reference chart(Having a simple tire width-based baseline guide helps when you can’t measure psi.)
- Rag or paper towels(Wipe the valve area to ensure a clean seal and avoid dirt entering the valve.)
Steps
Estimated time: 20-40 minutes
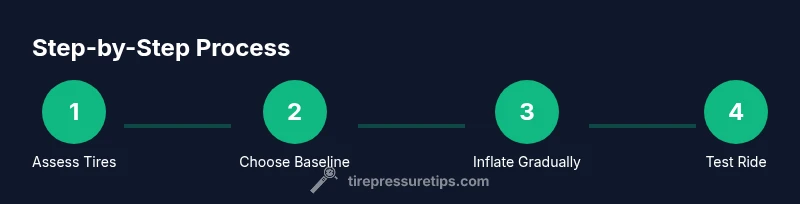
- 1
Gather tools and inspect tires
Gather your pump and reference materials, then inspect both tires for signs of wear, cuts, or bulges. Ensure the rims spin true and the valve stems sit straight. This establishes a safe starting point before inflation.
Tip: A clean valve stem reduces the chance of air leaks when you begin inflating. - 2
Choose a baseline for your tire type
Decide on a rough baseline based on tire width and terrain (road, hybrid, or mountain). This baseline is not a fixed number; it’s a comfort zone that you’ll adjust by feel.
Tip: If you’ve just changed tires, set a new baseline before riding. - 3
Attach the pump and begin inflating
Attach the pump securely to the valve. Inflate in small, controlled increments, stopping to check the ride feel after a few strokes. If your pump has a gauge, use it as a reference, but don’t rely on it exclusively.
Tip: Keep strokes steady and avoid bouncing the tire with rapid inflations. - 4
Take a short test ride
Ride on a safe surface for 30–60 seconds to assess stability, steering, and responsiveness. Note whether the bike feels overly soft, squishy, or too stiff.
Tip: Pay attention to cornering grip and braking response during the test ride. - 5
Adjust by feel in small increments
If the ride feels vague or bottomed out, add air a little at a time and test again. If it feels harsh, release air slightly and retest. Always aim for a firm, confident response without excessive vibration.
Tip: Avoid large changes; tiny adjustments improve accuracy over time. - 6
Repeat on the other tire
Proceed to the other tire with the same approach, ensuring symmetric feel and consistent handling. A balanced setup improves stability and control.
Tip: If one tire requires a different feel, double-check wheel alignment and rim tolerances. - 7
Re-test after tubing and setup changes
If you’ve removed and reinstalled tires or adjusted rims, re-check both tires with a brief ride to confirm consistency. Temperature, sun exposure, and ride duration can alter feel.
Tip: Always re-check after any maintenance activity on the wheel. - 8
Document your baseline for quick reference
Note your preferred baseline in a small notebook or digital note. Include tire width, bike type, and typical load so you can reset quickly in the future.
Tip: A written baseline saves time on daily rides and helps track changes over seasons.
Frequently Asked Questions
Is it safe to ride on under-inflated tires without a gauge?
Riding with low pressure can compromise grip and stability and increase pinch-flat risk. If feasible, re-inflate using a baseline feel and test ride before continuing.
Riding with low pressure can compromise grip and stability. Re-inflate using a baseline feel and test ride before continuing.
What is the best sign that pressure is correct without a gauge?
A balanced ride feel—firm enough to respond quickly, but not so stiff it bounces or skates uncontrollably—is a good practical indicator.
A balanced ride feel—firm but not harsh—indicates you're close to the right pressure.
Can I rely on household items to estimate pressure?
Household items are not reliable for precise pressure. Use ride feel and controlled pump strokes as your guide, and check with a proper gauge when possible.
Household items aren’t reliable for precise pressure. Use ride feel and careful pump strokes, then verify with a gauge when you can.
How often should I check tire pressure?
Check before each ride if you are without a gauge, especially after temperature changes or tire/tube replacements.
Check before each ride, especially after weather changes or tire work.
Does tire type influence how often I should check?
Yes. Road tires typically require firmer baselines, while mountain or hybrid tires operate well at lower pressures to maintain grip.
Yes. Road tires tend to need firmer baselines; mountain tires allow for a bit more give to keep grip.
What if I can’t inflate because the valve is leaking?
If the valve leaks, avoid forcing air in. Inspect the valve stem and seal, and repair or replace components before riding.
If the valve leaks, don’t ride; inspect and fix before use.
Watch Video
What to Remember
- Establish a tire-type baseline for your ride.
- Inflate in small increments and test ride.
- Check both tires for balanced handling.
- Re-check pressure after temperature changes.