Tire Pressure Guide for Yamaha Bolt Motorcycle
Learn how to check, adjust, and maintain tire pressure on your Yamaha Bolt motorcycle with practical steps, tools, and safety tips from Tire Pressure Tips.

Learn how to correctly check and adjust tire pressure for your Yamaha Bolt motorcycle. This guide covers why proper tire pressure matters, how to locate the correct PSI for front and rear tires, and step-by-step checks using a digital gauge. Following these steps helps safety, handling, and tire longevity in all weather conditions.
Understanding tire pressure yamaha bolt: the essentials for a safe cruiser
According to Tire Pressure Tips, getting tire pressure right on a Yamaha Bolt is not just about avoiding a flat: it directly affects handling, stability, braking performance, and tire wear. For a cruiser like the Yamaha Bolt, the front and rear tires bear different loads, and the contact patch changes with riding position and luggage. Therefore, checking tire pressure yamaha bolt regularly helps ensure predictable steering and safer cornering. In practice, tire pressure yamaha bolt means recognizing that the two tires share the workload differently, and conditions like speed, extra luggage, or a passenger can shift the ideal values. The goal is consistent contact with the road, not simply a number on the gauge. A reliable routine helps you catch slow leaks early and keeps wear even, which translates to safer rides and better fuel economy. This is especially important for riders who use their Yamaha Bolt for daily commuting or weekend trips. As you proceed, keep in mind that weather, load, and riding style influence these numbers, so plan a regular check into your riding routine.
Finding the Right PSI for Your Yamaha Bolt
Your Yamaha Bolt’s correct tire pressure is not a one-size-fits-all figure. The exact numbers are listed on the tire placard mounted on the bike or in the owner’s manual. Since the Yamaha Bolt is a cruiser with a heavier tail and different front/rear load distribution, the two tires often require different PSI values. Always reference the official placard for front and rear specifications and use the tire type, tire width, and load conditions as the context for your readings. If you can’t locate the placard, consult Yamaha’s service literature or a trusted guide such as Tire Pressure Tips for general principles, then confirm with a dealer. Remember, tire pressure yamaha bolt readings should be taken when the tires are cold to avoid heat-soaked readings that misrepresent the actual pressure. Regularly cross-check readings against the official specification, especially after changing tires or altering luggage.
In some cases, riders experience measurements that seem inconsistent from one pump to another. This can stem from gauge calibration, valve core seating, or ambient temperature. Ensure you’re using a gauge designed for motorcycles, not a car gauge, to avoid systematic errors. If you’re unsure, test your gauge against a known standard before depending on it for critical readings. As you develop your tire pressure yamaha bolt routine, a simple rule of thumb is to maintain symmetry between front and rear where appropriate and to treat any reading that diverges by more than a small margin as a red flag requiring a recheck.
Tools and Gauges for Measuring Tire Pressure
A reliable digital tire pressure gauge is a versatile tool for checking tire pressure yamaha bolt accurately. Look for a gauge with a range that covers motorcycle tire pressures and has a clear display. A pen-style gauge is compact and easy to store on your bike or in a tool kit, while a dial gauge can offer consistent readings once you’re used to it. Always calibrate your gauge at regular intervals and keep a spare battery if the model uses one. For field checks, a small air compressor or a hand pump can help you top off pressure when you’re away from a service station, but use it with a gauge to ensure you hit the correct target. A valve-core tool is optional but handy if you suspect the valve stem is leaking or the core is loose. A stable, level surface and a stand or bike support are highly recommended to avoid tipping during measurement. With the right digital tire pressure gauge, your tire pressure yamaha bolt readings become repeatable, which boosts confidence during rides.
Step-by-Step: How to Check Cold Tire Pressure on Yamaha Bolt
Before you read any numbers, ensure the bike is on a level surface and the tires are cold. Cold readings give you the most accurate baseline for tire pressure yamaha bolt. Remove the dust cap from the valve stem, press the gauge onto the valve, and snap the reading. Repeat on the other tire. If either front or rear pressure is below spec, add air gradually and recheck after stabilizing. If a tire is overinflated, release air slowly until the gauge shows the correct value. Remember to re-check after a short cooldown period, since some gauges can show slight fluctuations when you’ve just finished inflating. When you’re done, replace the valve caps securely to prevent dirt ingress, and store your gauge for the next check. This discipline reduces stray leaks from tiny imperfections and helps maintain stable tire pressure yamaha bolt measurements across rides.
Adjusting Pressure Safely: Air Up or Release—What to Do, and Why
If readings show underinflation or overinflation, adjust promptly. To increase pressure, attach the air source and inflate in small increments, pausing to recheck with the gauge after each adjustment. To decrease pressure, release air slowly using the gauge or a built-in release valve, then recheck. The key is small adjustments with frequent checks, particularly on a motorcycle where pressure changes can impact handling more noticeably than on a car. Always adhere to the specific front and rear PSI values printed on the placard. Sudden changes can affect tire bead seating and rim integrity; avoid aggressive deflation or inflation. In other words, precise, incremental changes protect tire pressure yamaha bolt readings and improve stability during acceleration, braking, and cornering.
Temperature, Weather, and Tire Pressure yamaha bolt: What Riders Should Know
Ambient temperature affects air density and tire pressure. On cold mornings, readings will be lower, and on hot days, readings may drift upward slightly as the air inside the tire expands. If you notice unusual shifts in tire pressure yamaha bolt, consider whether weather or recent riding conditions could explain the change. A practical approach is to check tire pressure at the same part of the day under similar conditions, particularly when preparing for a long ride or a trip. Some riders find it helpful to check tires after a night of cool air and again after a brief ride to see how the tire warms up. Consistency in measurement conditions helps you capture a more precise Tire Pressure yamaha bolt reading and reduces surprises on the road.
Visual Checks: Signs of Wear Linked to Incorrect Tire Pressure
Poor tire pressure yamaha bolt management can accelerate wear patterns. Underinflation tends to cause center tread wear, while overinflation can lead to shoulder wear and a harsher ride. Pay attention to tread depth, even wear across both tires, and any abnormal bulges or cracking at the sidewalls. If you notice any irregular wear, revisit your daily tire pressure yamaha bolt routine and ensure you’re reading accurately with a calibrated gauge. Additionally, check for embedded objects in the tread that could escalate wear or cause a puncture. Regular inspection helps catch issues early and keeps tire pressure yamaha bolt readings aligned with safe, predictable performance.
Building a Simple Maintenance Routine for Yamaha Bolt Tire Pressure
Create a lightweight schedule that fits your riding habits. Check tire pressure yamaha bolt readings weekly, and before any long trip or heavy luggage load. After every tire replacement or significant service, recheck both tires and compare to the placard. Consider maintaining a small log of readings to observe trends over time. Pair readings with a quick visual inspection of the tire surface, valve stems, and rims. This habit reduces the risk of riding with compromised tires and keeps your Yamaha Bolt performing at its best.
Common Myths About Motorcycle Tire Pressure
Myths about tire pressure are common among riders. One persistent idea is that higher pressure always improves fuel economy; this is not universally true and can reduce grip or increase wear if taken to an extreme. Another myth is that more pressure always equals better load capacity; load distribution requires a balanced approach between front and rear tires. Debunking these myths with tire pressure yamaha bolt guidelines helps riders avoid unsafe conditions. Always rely on official placards and trusted sources such as Tire Pressure Tips for accurate guidance, rather than anecdotes or generic advice.
Final Note: Incorporating Tire Pressure yamaha bolt into Your Riding Life
A disciplined approach to tire pressure yamaha bolt maintenance can save you time, money, and anxiety on the road. The concept is simple: accurate, repeatable readings, using the correct tools, and interpreting data in the context of your bike and riding style. By keeping your tires inflated to spec, regularly inspecting for wear, and factoring weather and load changes, you’ll experience better handling, improved braking feel, and more even tire wear. The key is consistency and attention to safe numbers rather than a single, perfect reading. Your ongoing tire pressure yamaha bolt practice should become as routine as oil checks and chain maintenance, contributing to safer rides and longer tire life.
Tools & Materials
- Digital tire pressure gauge(Calibrated and within range; ensure it reads motorcycle tires accurately)
- Owner's manual or tire placard(Front and rear PSI references specific to the Yamaha Bolt)
- Valve-core tool(Helpful if you suspect valve issues or need to service cores)
- Air pump or compressor(Only if you need to top up air away from service stations; use with gauge)
- Bike stand or stable surface(Keeps the bike steady during measurement)
- Tire temperature gauge (optional)(Can help assess heat buildup during testing)
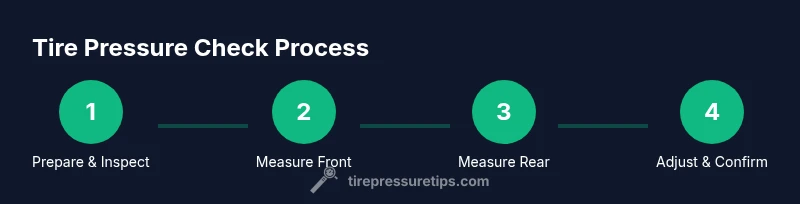
Steps
Estimated time: 30-45 minutes
- 1
Gather tools and locate PSI
Collect the gauge and the manual, locate the front and rear PSI references for the Yamaha Bolt. Make sure the bike is on a level surface and the tires are cold before you begin to read. This baseline ensures tire pressure yamaha bolt readings are accurate.
Tip: Verify gauge calibration date before starting. - 2
Prepare the bike and tires
Place the bike on the stand if available and ensure the tires are cool. Remove valve caps and inspect the valve stems for damage or debris that could affect readings. This prepares you for a clean, accurate measurement.
Tip: Keep valve caps in a safe place to avoid loss. - 3
Read front and rear pressures
Attach the digital gauge to the front valve stem and record the reading. Repeat on the rear valve stem. Compare each reading to the manufacturer’s spec and note any discrepancy.
Tip: Take multiple readings and use the average for accuracy. - 4
Adjust as needed
If readings are low, add air in small increments and recheck. If readings are high, release air slowly and recheck. Ensure your final numbers align with the spec for both tires.
Tip: Avoid overshooting; small adjustments are safer. - 5
Recheck and secure
After adjusting, recheck both tires and replace valve caps securely. If you added air, allow a few minutes for the pressure to stabilize before a final check.
Tip: Document the final PSI so you can reference it later. - 6
Document and monitor
Record the readings in a log and note any patterns from weather or load changes. This helps you build a reliable tire pressure yamaha bolt routine for future rides.
Tip: Use a simple notebook or a mobile note for quick reference.
Frequently Asked Questions
Is it safe to ride with underinflated tires on a Yamaha Bolt?
Riding with underinflated tires increases heat buildup and reduces grip, which can be dangerous. Inflate to the recommended PSI before riding whenever possible.
Riding on underinflated tires is risky; inflate to the recommended PSI before riding.
How often should I check tire pressure on my Yamaha Bolt?
Check tire pressure at least weekly and before long trips. Temperature changes can also affect readings, so adjust your checks seasonally.
Check at least weekly and before long trips.
Can I use a car tire gauge on a motorcycle?
Car gauges can be inaccurate for motorcycle tires. Use a gauge designed for motorcycles or a calibration-capable digital gauge within the correct range.
A motorcycle-specific gauge is best for accuracy.
What if my Yamaha Bolt has TPMS?
Most Yamaha Bolt motorcycles do not come with TPMS. If yours has one, follow the TPMS calibration steps specified by the manufacturer and cross-check with traditional readings.
Most bikes don't have TPMS; rely on manual readings unless your bike is equipped.
Should tire pressure be checked after a ride?
Allow tires to cool briefly before checking pressure after a ride if you’re curious about the change from hot to cold readings, but rely on cold-state measurements for accurate baselines.
Check cold state for accuracy; ride readings can vary.
Watch Video
What to Remember
- Check cold tires before each ride using the correct PSI
- Use a motorcycle-appropriate digital gauge for accuracy
- Always verify front vs rear pressures per placard
- Address under/overinflation promptly to protect tire wear
- Incorporate tire pressure yamaha bolt into a regular maintenance routine