Mercedes A180 Tyre Pressure: A Practical Maintenance Guide
Learn how to check and maintain Mercedes A180 tyre pressure for safety, efficiency, and TPMS health. Includes placard guidance, gauge usage, and calibration tips.

This guide helps you check and adjust Mercedes A180 tyre pressure to improve safety, handling, and fuel efficiency. You’ll learn the correct cold pressures from the placard, how to use a gauge accurately, how TPMS works, and steps to troubleshoot common issues. This quick answer primes you for the detailed steps below and highlights essential safety checks.
Why Mercedes A180 tyre pressure matters
For a Mercedes A180, the right tyre pressure is not just about comfort; it directly affects safety, grip, tire wear, and fuel efficiency. The mercedes a180 tyre pressure you should aim for comes from the vehicle placard, which accounts for tire size and load. Maintaining correct pressure helps your car respond predictably in corners, improves braking, and reduces the risk of tread issues. According to Tire Pressure Tips, consistent checks protect your tires and TPMS health, and small pressure changes can have a noticeable impact on performance. This section explains why staying within the recommended range matters for daily driving, long trips, and adverse weather.
Understanding tyre pressure is especially important for European compacts like the A180, where tire setup, load, and speed ratings influence the optimal target. The Tire Pressure Tips Team emphasizes consistency—check pressure at the same ambient conditions and with the same gauge to compare readings meaningfully. By embracing a routine, you keep handling predictable and tires wearing evenly, which saves money and reduces risk over time.
How to locate the correct pressure for your A180
The first and most reliable source for mercedes a180 tyre pressure is the door jamb placard on the driver’s side. It lists separate targets for front and rear tires and notes the units (PSI or kPa) used by your market. If the placard is missing or illegible, consult the owner’s manual or contact a Mercedes-Benz service center. For most drivers, starting with the placard and then verifying with a gauge provides the best balance of accuracy and practicality. Tire Pressure Tips emphasizes following the manufacturer’s specification rather than guessing based on a similar vehicle. In some markets, the recommended pressures may vary with load or wheel size, so confirm with your exact configuration.
If you still have questions, a quick call to a dealer or a certified tire technician can save time and prevent misreads. Recording the target values in your vehicle notes helps you quick-check on future trips and avoids guessing during busy weeks. The Tire Pressure Tips Team suggests keeping a copy of the placard near the gauge for easy reference.
Cold vs hot readings and how to measure
Tire pressure changes with temperature and driving. Always measure when the tires are cold for a valid baseline. If you’ve just driven, wait at least 3 hours or cool the tires before taking a reading. Cold readings prevent over- or under-inflation caused by heat buildup. Once you know the cold target, you can plan a quick check before trips or after refueling. Keeping a small notebook or notes app helps you track changes over time, which is a practical habit recommended by Tire Pressure Tips Team.
A practical approach is to check pressures during moderate weather and after long periods of inactivity, so you’re comparing like-for-like conditions. If you notice a sudden change during extreme temperatures, it can indicate a leak or seal issue that warrants inspection by a professional. Regular, disciplined checks reduce the likelihood of driving with underinflated tires and improve overall safety.
Using a gauge and interpreting results
A reliable pressure gauge is essential. Remove the valve cap, press the gauge onto the valve stem, and note the reading immediately. If the pressure is below target, add air in short bursts and recheck until you’re within range. If it’s above target, release air slowly, then recheck. Always replace the valve cap to preserve the seal. Remember to check all four wheels and account for spare tire pressure if your car model uses a full-size spare. The key is to perform the check with clean, dry hands on a level surface. A consistent method helps you avoid under- or over-inflation caused by rushed checks.
When you bench-test a gauge, do a quick cross-check with a second gauge to confirm accuracy. This simple step prevents errors that could lead to improper inflation and subsequent tire wear.
TPMS basics and calibration for the A180
The Tire Pressure Monitoring System (TPMS) alerts you when a wheel is underinflated. It does not measure pressure on the wheel itself; it relies on sensors in the tire or wheel hub and the vehicle’s computer. If you adjust pressures, reset or recalibrate TPMS only when the car manual instructs you to do so, or after rotating tires. Tire Pressure Tips analysis shows that ensuring TPMS communication with your ECU keeps readings accurate, especially after a tire change. If the warning light stays on after you’ve corrected pressure, consult a technician.
Understanding TPMS update cycles helps you interpret warnings more accurately. Some systems recalibrate automatically after you drive a short distance and maintain the correct pressure for a certain period. If you replace wheels or sensors, ensure the system is reprogrammed to the exact vehicle configuration to avoid false alarms. The A180’s TPMS configuration often requires a dealer-level check if you notice persistent alerts.
Troubleshooting TPMS warnings and leaks
If the TPMS light comes on, verify all four tires are within spec and check for slow leaks or punctures. A hot day or driving on rough roads can mislead readings temporarily; recheck after cooling. If a sensor appears damaged or dead, a replacement may be required. Always inspect valve stems for cracking, and look for tire sidewall damage that could cause slow leaks. Regular checks help catch issues before they become unsafe. If you recently repaired a puncture or changed a tire, ensure the TPMS has been properly reset according to the manual and local regulations.
For stubborn warnings, use an external gauge to verify readings and compare to the TPMS values displayed in your car’s settings panel. If the TPMS remains inconsistent, consider a professional tire service to inspect the wheel sensors and wiring. Routine inspection of the valve stems can also prevent slow leaks that trigger false warnings.
Maintenance schedule for the A180 and practical tips
Make tyre pressure a monthly habit and before long trips. Temperature changes in seasons can affect pressure; adjust accordingly only after a proper cold readings. Rotate tires and inspect tread depth regularly, as worn tires can alter the pressure target feel and performance. The Tire Pressure Tips Team recommends keeping a small gauge in the car and recording readings to monitor trends over time. Regular checks help you catch gradual leaks and component wear before they become safety concerns.
A practical diary or app log makes it easier to notice gradual shifts over weeks rather than days. Pair your pressure checks with tread depth and wheel condition inspections to get a full picture of tire health. By keeping pressure aligned with the placard and staying mindful of driving load, you ensure safer journeys and better fuel efficiency.
Tools & Materials
- Digital tire pressure gauge(Prefer a gauge with a bleed button and a clear scale (PSI or kPa). Include calibration date if possible.)
- Door jamb placard/owner’s manual(Reference the manufacturer’s target pressures for your exact trim and wheel size.)
- Valve caps and rag(Keep caps clean and replace after checking to maintain seal.)
- Notebook or mobile note app(Record readings for trend tracking and maintenance planning.)
- Spare tire (full-size) check tool(Verify the spare is properly inflated if your car uses one.)
Steps
Estimated time: 15-25 minutes
- 1
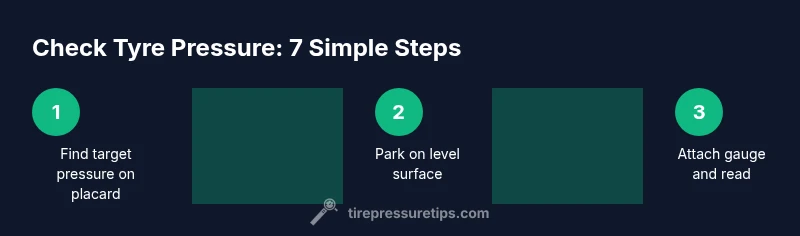
Identify target pressures on placard
Locate the door jamb placard on the driver’s side and note the front and rear targets and the units shown. This is your benchmark for the mercedes a180 tyre pressure. Verifying the exact values ensures you inflate to the correct range.
Tip: Use a flashlight if the placard is dim or worn. - 2
Park on a level, cold surface
Turn off the car and let it sit for several hours if possible. A level surface ensures readings aren’t skewed by gravity or wheel position.
Tip: Avoid inflating after a short drive; heat temporarily raises readings. - 3
Remove valve caps and prep gauge
Take off the valve cap from one wheel, keep it in a safe spot, and prepare your gauge for immediate use to avoid moisture entry.
Tip: Wipe the valve stem with a dry cloth before measurement. - 4
Take the reading and compare
Apply the gauge to the valve stem and read the display promptly. Compare with placard values for that wheel.
Tip: If reading is off, recheck with a second gauge to confirm. - 5
Adjust pressure as needed
If underinflated, add air in small bursts and recheck. If overinflated, release air gradually and recheck until it matches target.
Tip: Aim for the middle of the target range for comfort and safety. - 6
Reinstall caps and recheck all wheels
Replace all valve caps, then recheck all four tires and the spare if applicable to ensure uniformity.
Tip: Check again after a short drive to confirm stability. - 7
Record the results and schedule next check
Document the readings and plan the next monthly check or pre-trip check, depending on your driving load and climate.
Tip: Set a reminder to maintain consistency over time.
Frequently Asked Questions
What is the correct Mercedes A180 tyre pressure?
The correct pressure is shown on the door placard and may differ between front and rear tires. Always measure with cold tires and use a reliable gauge to verify against the placard.
Check the door placard and use a gauge when the tires are cold, then adjust to the recommended target for each axle.
How often should I check tyre pressure on a Mercedes A180?
Check at least monthly and before long trips, and more often if you drive with heavy loads or extreme temperatures.
Check monthly and before trips to stay within the recommended range.
Can TPMS replace a gauge reading?
No. TPMS warns about underinflation but does not provide a precise reading. A gauge is needed for exact pressures.
TPMS tells you if you’re low, but you should still read the exact pressure with a gauge.
What if TPMS warning stays on after inflating?
If the light remains on after inflation, recheck all tires, inspect for leaks, and consider resetting TPMS per the manual or visiting a technician.
If it stays on, recheck, inspect for leaks, or seek service to recalibrate the system.
Is it safe to inflate beyond the placard?
No. Overinflation can affect handling and tire wear. Always follow the placard for your Mercedes A180.
Don’t go above the recommended pressure on the placard.
Should I check TPMS after changing tires or sensors?
Yes. After any tire work or sensor replacement, ensure the TPMS is recalibrated to your vehicle configuration.
Recalibrate TPMS after tire changes to avoid false alarms.
Watch Video
What to Remember
- Check cold tyre pressure using the placard guidance
- Use a reliable gauge and recheck after adjustments
- Calibrate TPMS settings only per the manual and after changes
- Maintain a monthly habit to catch slow leaks early