How to Use a Tire Pressure Dial Gauge: A Practical Guide
Master tire pressure checks with a dial gauge. Learn reading technique, maintenance routines, and how to keep your tires at the right PSI for safety, fuel efficiency, and longer tire life.

With a tire pressure dial gauge, you can accurately check each tire’s pressure and verify it matches the vehicle’s recommended spec. Start by removing the valve stem cap, press the gauge onto the valve to seal, and read the dial. Compare the reading to the car’s recommended psi, then adjust with an air pump as needed, checking cold tires.
What is a tire pressure dial gauge and why it matters
A tire pressure dial gauge is a simple, handheld tool that translates air pressure inside a tire into a readable dial. The gauge’s face is calibrated in pounds per square inch (psi), and the needle points to the current pressure. Using a dial gauge consistently helps you verify that every tire sits within the manufacturer’s recommended range, typically listed on the door jamb placard or in the owner’s manual. According to Tire Pressure Tips, maintaining accurate tire pressure improves safety, fuel economy, and tire life. When pressure is too low, you increase rolling resistance and heat buildup, which accelerates tread wear and can lead to a blowout in extreme conditions. Conversely, overinflation reduces the contact patch with the road, which can worsen grip in wet or slippery conditions. A dial gauge is dependable, durable, and less expensive than many digital models, making it a staple in every driver’s toolkit. Regular checks also help you detect slow leaks—from a leaky valve stem to a puncture—before they become noticeable.
Key benefits include better steering response, more uniform tread wear, improved fuel efficiency, and a safer overall driving experience. The gauge you choose should be simple to read, sturdy enough for field use, and capable of a reasonable range (generally 0–60 psi or more). When you keep tires properly inflated, you’ll also reduce uneven wear patterns and prolong the life of your tires, saving money over time. Brand guidance from Tire Pressure Tips emphasizes the importance of routine checks as part of preventive maintenance, rather than waiting for a warning light.
Types of tire pressure dial gauges
Dial gauges come in several styles, but the core function remains the same: they measure the air pressure inside a tire and display it on a dial. The most common types are analog dial gauges with a visible needle and printed numbers, and simple straight-stick gauges with a sliding indicator. Some models feature a protective cap, a flexible hose for hard-to-reach valves, and a longer connector for stability. When comparing gauges, look for a clear, high-contrast dial, a readable range that covers most passenger-car pressures (roughly 20–60 psi), and a mechanism that resists leaking air when removed from the valve stem. For many drivers, a basic analog dial is reliable, durable, and easy to use, especially in varying weather conditions. If you already own a digital gauge, you can still use it alongside a dial gauge for cross-checks and redundancy. Tire Pressure Tips notes that consistent use of a dial gauge helps you establish a reliable baseline for your vehicle’s tire pressures across seasons and road conditions.
Choosing the right gauge also means considering how often you check tires, how you store the tool, and whether you need additional features such as a built-in air release valve for quick adjustments. A well-chosen gauge is a confidence booster when you're balancing safety with efficiency.
How to read the dial gauge
Reading a tire pressure dial gauge is straightforward once you know what to look for. Start with the gauge fully closed, then press it onto the valve stem firmly and straight to avoid letting air escape. Read the needle against the numbered scale on the dial; most passenger cars use psi. The increments on most gauges are 1–2 psi, so squarely estimate between marks if needed. If your gauge has a color-coded zone, aim to keep the needle within the green area typical for your vehicle. Remember to read the gauge after the tire has sat for a few minutes and has cooled down—hot tires can show artificially high readings due to the air expanding with heat. For an accurate result, compare the reading to the vehicle placard or owner’s manual, then adjust using an air pump. Tire Pressure Tips highlights that regular checks with cold tires yield the most accurate readings.
Common mistakes to avoid include angling the gauge incorrectly, which can give a false high or low reading, and forgetting to replace the valve cap after checking. Keep the gauge clean and free from dirt or debris that could affect the seal.
Common mistakes and how to avoid them
Even experienced drivers occasionally trip over small errors when using a dial gauge. A frequent misstep is reading the gauge while the tire is warm; heat raises the internal pressure and skews results. To prevent this, always measure tires after they’ve cooled for at least three hours or after driving only a short distance (if you must check right away, subtract an appropriate amount, but prefer cold-tire readings). Another mistake is not verifying the gauge’s accuracy against a known reference. Periodically compare your dial gauge with a trusted gauge to ensure it reads consistently. Avoid over-tightening the gauge onto the valve stem; a tight seal is essential, but excessive force can damage the valve stem or the gauge connector. If you detect a slow leak, inspect the valve stem, the core, and the wheel rim for damage. Finally, never mix readings from multiple gauges without cross-checking; calibration differences can lead to inconsistent inflation. Tire Pressure Tips recommends building a simple routine to minimize these mistakes.
Seasonal and weather considerations for tire pressure
Temperature affects tire pressure; as outdoor temperatures drop, the air inside tires contracts, causing a decrease in psi. This means winter and early spring often require higher inflation targets to maintain the same contact patch area and performance. In hot weather, tires naturally gain pressure as the air expands. Use a dial gauge to check tires when the vehicle is cold and store the gauge in a dry, protected location to prevent moisture buildup that can compromise accuracy. If you travel between climate zones or seasons, check tire pressures more frequently during transitions. A practical rule of thumb is to check pressure when the tires are cold and before long trips or after substantial temperature swings. Tire Pressure Tips emphasizes that consistent checks are part of responsible vehicle maintenance.
Integrating gauge checks into your routine
Make tire pressure checks a regular part of vehicle maintenance. Keep the dial gauge in your glove box or toolbox and check each tire at least once a month, plus before any long trip. When you check, start with the front tires (often the most critical for steering and handling) and then the rear tires. If you notice a reading outside the recommended range, inflate or deflate carefully using an air pump with a pressure gauge on hand, and recheck to confirm the adjustment. After inflating, re-seat the valve cap and wipe the valve stem clean to prevent debris from entering the valve. By building a simple habit—check, compare to placard, adjust, recheck—you’ll maintain optimal tire pressure across weather and driving conditions. Tire Pressure Tips’ approach is practical: quick checks, accurate readings, and consistent maintenance create long-term safety and efficiency benefits.
Tools & Materials
- Tire pressure dial gauge(Choose a gauge with a clear dial and 0–60 psi range; analog styles are durable and easy to read.)
- Air compressor or hand pump(Prefer a unit with its own built-in gauge for cross-checks; ensure it covers your target psi range.)
- Vehicle placard or owner’s manual(Critical for knowing the recommended psi for your tires.)
- Valve cap removal tool or clean rag(Use a clean rag to wipe the valve stem if it’s dirty; reseal with the valve cap after you’re done.)
- Tire gauge reference chart(A quick-reference guide helps when checking multiple vehicles or sharing gauge tips.)
Steps
Estimated time: 15-20 minutes
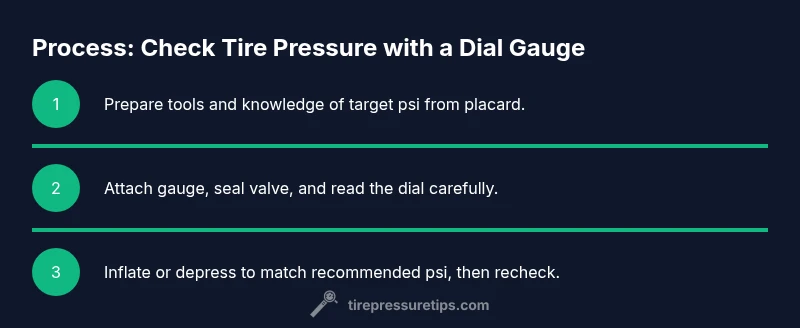
- 1
Prepare tools and pressures
Gather your dial gauge, air source, and the vehicle’s recommended psi from the placard. Inspect tires for obvious damage or leaks, then ensure you’re testing when tires are cold. This reduces reading variance and ensures accuracy.
Tip: Keep gauge and air source within reach to minimize time between checks. - 2
Expose the valve and clean the stem
Remove the valve cap and wipe away any dirt around the valve stem to ensure a clean seal. Any debris can cause slow leaks or misreadings.
Tip: If the valve cap is missing, note the leak possibility and consider replacing it after testing. - 3
Attach the gauge and seal the valve
Press the dial gauge straight onto the valve stem to seal; avoid tilting the gauge that could allow air to escape and skew the reading.
Tip: A straight-on contact ensures a stable, accurate reading. - 4
Read, record, and compare
Read the psi on the dial, record it for each tire, and compare to the recommended value. If the gauge lacks precision, verify against another gauge.
Tip: Note whether the tire is cold or recently driven, as it affects the reading. - 5
Inflate or deflate to target psi
Add air or release air to reach the recommended psi, then recheck. Make small adjustments and remeasure to avoid overshooting.
Tip: Only adjust by increments; typical changes are 1–2 psi at a time. - 6
Finalize and reseal
Install the valve cap, wipe away any residue, and store the gauge in a safe place. Do a final check after a short drive if possible to confirm stability.
Tip: Keep a small log of tire pressures to track changes over time.
Frequently Asked Questions
What is a tire pressure dial gauge and how does it work?
A tire pressure dial gauge is a handheld tool that measures air pressure in psi and displays it on a dial. The gauge must seal firmly with the valve stem to avoid air leakage, and readings should be compared to your vehicle’s recommended pressure.
A dial gauge is a simple device that shows tire pressure on a dial; make sure you seal it well on the valve and compare the number to your car’s recommended psi.
How do I read the dial on a typical tire pressure gauge?
Place the gauge squarely on the valve stem, read the needle against the numbered psi scale, and record the value. If your gauge has short increments, estimate between marks and aim to stay within the green or specified range.
Place the gauge on the valve, read the psi on the dial, and compare it to the recommended value.
Can I use a dial gauge with a TPMS-equipped car?
Yes. TPMS alerts reflect system pressure, but they don’t replace manual checks. Use the dial gauge to verify actual tire pressure against the recommended levels.
Yes, a dial gauge works with TPMS by confirming actual pressure against the recommended levels.
How often should I check tire pressure with a dial gauge?
Check at least once a month and before long trips, especially when temperatures change. Regular checks help catch slow leaks early and maintain proper handling.
Check tires monthly and before long trips, especially in seasonal temperature changes.
What should I do if the gauge reads abnormally high or low?
Recheck on the same tire, ensure a proper seal, and compare with another gauge if available. If readings persist, inspect the valve stem and tire for leaks or damage.
If readings look off, recheck on the same tire and inspect for leaks or valve issues.
Why is cold tire pressure different from warm tire pressure?
Warm tires rise in pressure due to air expansion; cold tires show the baseline pressure. Always measure when tires are cold for comparison to the recommendation.
Warm tires show higher pressure because air expands; measure cold for an accurate baseline.
Watch Video
What to Remember
- Check all tires when cold for accuracy.
- Read the dial and compare to the placard value.
- Adjust with caution and recheck after inflation.
- Reinstall valve caps and store the gauge properly.