Electronic Tire Pressure Gauge: Practical Guide for Accuracy
Learn how to select, use, calibrate, and maintain an electronic tire pressure gauge for accurate tire readings, better inflation practices, and safer driving. This comprehensive guide covers steps, tips, TPMS integration, and common troubleshooting.

Learn how to use an electronic tire pressure gauge to get precise, repeatable readings for every tire. This guide covers choosing a gauge, how to read psi or kPa, calibrating for accuracy, and how to interpret results with TPMS data. Follow these steps to protect tires, boost fuel economy, and drive safely.
What is an electronic tire pressure gauge?
An electronic tire pressure gauge is a handheld device that measures the air pressure inside a tire and displays the result on a digital screen. Unlike traditional analog gauges, electronic gauges give a numeric readout in psi, kPa, or bar, often with backlit screens for easy reading at night. For drivers, the most important feature is accuracy and consistency across multiple measurements. According to Tire Pressure Tips, using an electronic tire pressure gauge can reduce underinflation and overinflation errors that develop due to gauge wear or misreading. A good digital gauge will apply a steady pressure to the valve stem and provide a stable reading within a few tenths of a psi. Modern models also store last readings and allow quick comparisons, which helps when checking tires across long road trips. The Tire Pressure Tips team found that consistent use leads to better tire wear and safer handling. When selecting a gauge, look for clear decimal resolution, interchangeable units, a long nozzle for hard-to-reach stems, and a protective case to prevent damage in your trunk. This article focuses on electronic gauges, but many principles apply to any device that measures tire pressure. Using the gauge correctly requires clean valve stems and properly seated nozzles. Keep your gauge out of direct sunlight and temperature extremes to preserve accuracy. Before you start, verify your gauge reads zero when not attached.
Why choose an electronic gauge over analog
Choosing an electronic tire pressure gauge offers several advantages over traditional dial gauges. Digital readouts are quick to interpret, reducing the chance of human error when you read a tiny dial. Many electronic gauges provide measurements in multiple units (psi, kPa, bar), backlighting for low-light conditions, and a memory function that stores recent readings for comparison. They are typically more compact and water-resistant, which makes them practical for roadside use and winter weather. In addition, some models feature auto-off to conserve battery life and a pressure hold function to lock the display after you remove the nozzle. For daily drivers who want a straightforward check, an electronic gauge reduces guesswork and helps you maintain consistent inflation against vehicle specifications. The Tire Pressure Tips analysis shows that using a digital gauge can improve inflation accuracy across a fleet of vehicles, contributing to longer tire life and better fuel economy. When you’re shopping, consider build quality, screen readability, unit conversion, and whether the gauge comes with a protective case. If you regularly check tires in cold weather, a rugged, water-resistant design is particularly valuable. The device’s reliability becomes a practical safety feature on winter trips.
How to read measurements and interpret psi values
Readings from an electronic tire pressure gauge are typically shown as a numeric value with a unit indicator (psi, kPa, or bar). Always select the same unit you use for your vehicle’s recommended pressures, which are usually listed in the owner’s manual or a door jamb placard. Readings should be taken after the tire has cooled (the car has not been driven for at least 3 hours or has been driven less than a mile); heat from driving can temporarily raise the tire pressure. When comparing to the manufacturer’s specification, use the cold-pressure value for accuracy. If your gauge offers a memory function, you can track changes over time and spot gradual leaks. For quick checks, many gauges offer a hold feature to lock the reading on screen so you can note it without keeping the nozzle pressed. Tire experts emphasize consistency: check each tire in the same way, at the same time of day, and on similar ambient temperatures. The first step is to select psi as the unit. If you’re more comfortable with metric units, many gauges switch to kPa or bar with a simple button press. Remember that very small deviations (a few psi) can still impact tire wear and fuel efficiency over the long run.
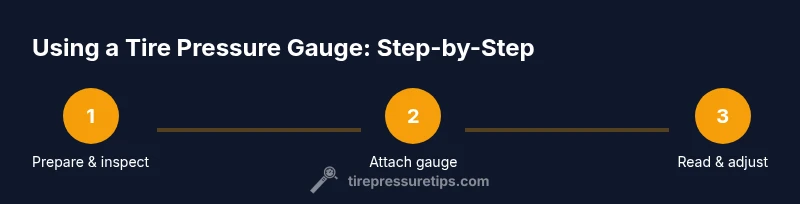
Step-by-step usage with car/two-wheel drive and SUV examples
Using an electronic tire pressure gauge is straightforward, but following a repeatable process helps prevent errors. Start by parking on a level surface and turning off the engine. Remove the valve cap, attach the gauge nozzle squarely to the valve stem, and press firmly to seat the nozzle without bending the stem. Read the display, then compare with the vehicle’s recommended pressure. If the reading is low, top up using an air compressor or portable pump until you reach the target value, then recheck. If it’s high, release air in small amounts until you meet the recommended pressure. For SUVs or heavier vehicles, allow for tire heat differences when taking the final reading. Some gauges offer a hold feature to freeze the display for recording. The same process applies to motorcycles and bicycles, but the valve stems may differ in size; check compatibility before applying the gauge.
Calibration and maintenance of your electronic tire pressure gauge
Regular calibration checks help maintain accuracy over time. Start by inspecting the battery level and replacing batteries as needed to prevent reading drift. When possible, compare your gauge against a known-good reference gauge at least quarterly or after a battery change. Store the gauge in a protective case away from direct sunlight and extreme temperatures; heat can degrade sensors. Clean the nozzle and valve stem connectors with a dry cloth to prevent dirt from skewing readings. If readings seem erratic, re-seat the gauge, try a new battery, and perform a zero-check with the gauge disconnected. For most consumers, maintaining a simple routine—check monthly, calibrate yearly, and replace weak units—will deliver reliable results.
Troubleshooting common issues and accuracy tips
If readings drift between checks, verify you’re using the correct unit and that the valve stem is clean and undamaged. A loose connection can cause fluctuating readings, so ensure the nozzle is fully seated before reading. A dead battery is a frequent cause of inconsistent results; replace batteries and retest. If the gauge shows an error code, consult the instruction manual for supported units and range; some models require a cooldown period after exposure to cold. Temperature can affect accuracy, so avoid testing in direct sun or on extremely hot surfaces. If a gauge reads zero when attached, ensure the stem valve isn’t blocked and that the battery isn’t drained. Finally, compare readings to a vehicle’s recommended tolerance; small deviations are normal, but persistent large differences may indicate a leak or a faulty gauge.
Integrating readings with TPMS, vehicle specs, and seasonal changes
Your tire pressure gauge readings should be interpreted alongside TPMS indicators and the vehicle-specific pressure chart. TPMS warns you when a tire is under-inflated, but it relies on sensor data that can drift with temperature and load. Use the gauge readings to verify whether the TPMS alert reflects actual pressure changes or a sensor issue. In cold weather, pressure tends to drop; in hot weather, it can rise. A practical approach is to check pressures during seasons and align them with the manufacturer’s cold-inflation values. Keeping tires within the recommended range improves traction, handling, and fuel efficiency. The Tire Pressure Tips team notes that combining manual gauge checks with TPMS insights gives a robust inflation strategy. For best results, adjust your inflations when tires are cold, and recheck after a few miles of driving to account for heat buildup and driving conditions.
Quick reference: choosing, using, and maintaining your electronic gauge
- Choose a gauge with clear decimal resolution, multiple units, a long nozzle, and a protective case.
- Use the gauge on cold tires, repeat readings, and compare against the vehicle’s spec.
- Calibrate regularly, replace batteries, and clean connectors to maintain accuracy.
- When in doubt, cross-check with a known-good gauge or visit a service station for verification.
Final thoughts on tire pressure and safety
Maintaining proper tire pressure is a simple yet impactful part of vehicle safety. An electronic tire pressure gauge makes this process reliable and repeatable, enabling you to diagnose issues early and avoid sudden flats or blowouts caused by underinflation. Tire Pressure Tips emphasizes consistency in checks and calibration to sustain performance across weather conditions and vehicle models.
How to get the most from your gauge in winter and summer
Seasonal temperature changes affect tire pressure; colder temperatures reduce pressure, while heat increases it. Make a habit of checking tire pressure when temperatures are steady and accounting for the seasonal adjustment recommended by your vehicle’s manual. Consider carrying a portable gauge with you for road trips and stop-and-go driving to sustain safe inflations.
Tools & Materials
- Electronic tire pressure gauge(Digital readout; supports psi, kPa, and bar; backlit display; test in cold conditions)
- Fresh batteries(Carry spares; replace as needed to avoid drift or display loss)
- Air compressor or portable pump(Useful for topping up tires after measuring)
- Valve cap remover or clean cloth(Optional for tight valve stems; use cloth to clean nozzle)
- Notebook or app for logging readings(Helpful for tracking tire pressure over time)
Steps
Estimated time: 15-25 minutes
- 1
Prepare your workspace
Park on a level surface, turn off the engine, and allow tires to cool if they were recently driven. Gather your gauge, spare batteries, and a cloth for cleaning. This ensures accurate readings and safe handling.
Tip: Always inspect tires for visible damage before measuring. - 2
Remove the valve cap and inspect the valve
Take off the valve cap to expose the valve stem; wipe away any dirt around the stem to prevent debris from entering during measurement. A clean surface reduces reading errors.
Tip: If the valve stem is damaged, do not force the gauge onto it. - 3
Attach the gauge and take a reading
Place the gauge nozzle squarely on the valve stem and press firmly to seal. Read the digital display without moving the gauge. Record the value and unit.
Tip: Ensure the gauge stays perpendicular to the stem for a stable reading. - 4
Compare with vehicle spec and adjust
Refer to the owner’s manual or door placard for the recommended pressure. If low, add air until you reach the target and recheck. If high, release air in small increments until near the target.
Tip: Make small adjustments; over-correcting is common. - 5
Finalize and store your gauge
Replace the valve cap, clean the nozzle if needed, and power down the gauge if applicable. Store in its protective case away from heat and moisture.
Tip: Keep batteries fresh; old batteries can leak and damage electronics. - 6
Document and monitor
Log readings and any changes to tire pressure over time. This helps catch slow leaks and validate improvements in wear and fuel efficiency.
Tip: Regular checks (monthly) yield the best long-term results.
Frequently Asked Questions
What is an electronic tire pressure gauge?
An electronic tire pressure gauge is a handheld device that electronically measures and displays tire pressure as a numeric value. It typically reads in psi, kPa, or bar with a digital display for easy interpretation.
An electronic tire pressure gauge is a handheld device that shows your tire pressure as numbers on a screen. It reads in psi or other units and is easy to read.
How accurate are electronic tire pressure gauges?
Most digital gauges are accurate within a small margin when used correctly, especially when calibrated and used on cold tires. Readings can drift with battery life and temperature, so periodic checks help maintain reliability.
Digital gauges are generally accurate, but cold tires and fresh batteries are important for best results.
How often should I replace the gauge’s batteries?
Check the battery level regularly and replace batteries when readings begin to drift or when the display dims. Keeping spare batteries around minimizes downtime during checks.
Keep spare batteries handy and replace them when readings drift or the screen dims.
Can I use a digital gauge with TPMS readings?
Yes. Use the gauge to verify TPMS readings and confirm that the sensor’s alert aligns with the actual tire pressure. TPMS measures pressure differently and may drift, so cross-checking helps.
You can cross-check TPMS alerts with a digital gauge to confirm actual pressure.
What PSI should my tires have?
The recommended tire pressure is specified by the vehicle manufacturer and is listed on the door placard or in the owner's manual. It varies by model, tire size, and load.
Check the vehicle’s manual for the exact PSI, which can vary by model and tire size.
Can I use an electronic gauge on motorcycles or bicycles?
Most digital gauges work on motorcycles and some bicycles, but you may need a compatible nozzle. Always ensure the gauge attachment fits the valve stem before measuring.
Yes, but make sure the gauge fits the bike’s valve stem before measuring.
Watch Video
What to Remember
- Check all tires with a reliable digital gauge
- Calibrate and replace batteries regularly
- Record readings to spot leaks early
- Keep tires within manufacturer-recommended pressures
- Use cold-tire measurements for accuracy