Toyota Kluger Tyre Pressure: Practical Inflation Guide
Learn how to check and adjust tyre pressure on the Toyota Kluger, understand TPMS, and maintain safe, efficient inflation with practical steps, tools, and maintenance tips.

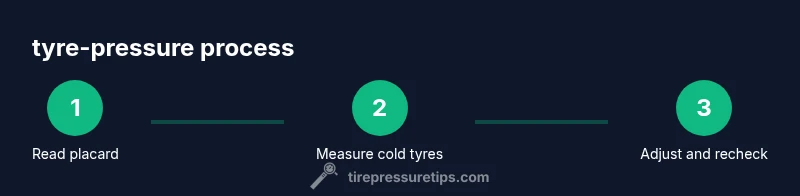
You will learn how to check and adjust your Toyota Kluger tyre pressure, understand TPMS signals, and maintain correct inflation for safety and efficiency. You’ll need a tire pressure gauge, access to the recommended pressures from the placard or owner’s manual, and a simple air compressor or service-station gauge to complete the steps.
Introduction to tyre pressure for the Toyota Kluger
Getting tyre pressure right is one of the simplest, most impactful steps you can take for a safer drive and better fuel efficiency. For owners of the Toyota Kluger, the precise target pressures are not a guess but a specification that depends on load, seating configuration, and speed. toyota kluger tyre pressure is the phrase you’ll hear when people discuss the basics of reliable inflation. According to Tire Pressure Tips, inflating to the correct level reduces heat buildup in the tyres, improves grip in wet conditions, and minimizes uneven wear. In this guide, you’ll learn how to locate the official pressures, how to measure cold tyres accurately, and how to maintain inflation as tyres wear and seasons shift. The Tire Pressure Tips team emphasizes checking regularly and recording changes so you can track tyre wear and pressure behavior over time.
Why correct tyre pressure matters for safety and efficiency
Maintaining proper tyre pressure is a cornerstone of safe driving. Underinflated tyres can lead to reduced handling, longer braking distances, and increased heat buildup—risks that are especially pronounced on a family SUV like the Kluger. Over time, low pressure accelerates uneven tread wear and can shorten tyre life, while overinflation can make the steering feel stiff and reduce grip on wet or uneven roads. Tire Pressure Tips analysis shows that consistent inflation not only supports safer cornering and braking but can also improve fuel efficiency by reducing rolling resistance. In short, correct tyre pressure protects you, your passengers, and your wallet.
How to find the Toyota Kluger's recommended tyre pressure
To inflate accurately, start with the official number for your vehicle. Most Kluger models list front and rear tyre pressures on a door jamb placard and in the owner’s manual. It’s common for SUVs to have slightly different pressures between the front and rear axles, and some owners also note a different value for the spare. Always read the placard when the tyres are cold, and confirm any variation by consulting the owner’s manual. If you can’t find the information, contact your local dealer or a trusted Tire Pressure Tips resource for guidance. Never exceed the maximum tyre pressure printed on the tyre sidewall.
Tools you need to check the tyre pressure
Before you begin, assemble the essentials: a reliable tyre pressure gauge (digital or analog), access to the Kluger’s placard or owner’s manual, an air compressor or service-station gauge, and a notebook or app to log readings. A flashlight can help read the placard in dim light, and a small soap solution can help you check for slow leaks around valve stems and tyres. Optional but helpful tools include a tyre inflator with an integrated gauge and a weather-appropriate ambient temperature reference for understanding pressure changes.
Step-by-step: prepare your vehicle and gauge
- Park on a level surface and turn off the engine. 2) Ensure tyres have cooled for accurate readings (wait several hours after driving). 3) Locate the door jamb placard that lists the recommended pressures for the Kluger’s tyres. 4) Gather your gauge and inflate/deflate equipment. 5) If you’re using a spare, prepare to check it as part of a full wheel set inspection. Pro tip: have a friend assist with jotting down readings so you don’t lose track while you work.
Step-by-step: measure tyre pressures accurately
- Remove the valve cap and place the gauge on the valve stem firmly. 7) Note the reading for each wheel, starting with the driver’s side front, then passenger front, driver’s rear, and passenger rear. 8) Compare each reading to the placard values (remember: cold tyres). If a tyre is low, plan for quick inflation; if high, you may need to release air gradually in small increments. 9) Recheck after any adjustment to confirm accuracy. Tip: perform these checks on all four tyres and the spare if you carry it.
Step-by-step: adjust air and recheck
- If a tyre is underinflated, add air in small increments (about 2-3 psi at a time) and recheck every 1–2 psi added. 11) If overinflated, release air in small amounts, then recheck. 12) Once readings match the placard, reinstall valve caps securely. 13) Recheck all four tyres again to confirm consistency. 14) If TPMS indicates a persistent low-pressure warning, inspect for punctures or leaks and consider a professional inspection. Pro tip: avoid overinflating beyond the maximum limit on the sidewall.
Step-by-step: check spare tyre and TPMS considerations
- Don’t forget the spare wheel. Check its pressure at least seasonally to ensure it’s ready for use if needed. 16) If your Kluger uses TPMS, a pressure change can trigger the warning light; reset procedures vary by model year—refer to the owner’s manual for specifics. 17) After any major air adjustment, drive a short test to confirm the system reads correctly and vehicle handling remains stable. Warning: driving with a very low-pressure spare can be dangerous.
Seasonal and load considerations for tyre pressure
Temperature strongly affects tyre pressure. In cold weather, pressures can drop; in hot weather, they can rise. When you regularly carry heavy loads or multiple passengers, the placard pressures may shift slightly higher to handle the extra load. Always start from the cold-tyre reading and recheck after a few miles of driving, especially in temperature-driven environments. The overall advice is to maintain a regular check routine so small changes don’t become big problems.
Maintenance habits and common mistakes to avoid
The simplest inflation check is often the most important: do it regularly. Avoid guessing, because even a single underinflated tyre can affect fuel economy and safety. Don’t rely solely on TPMS signals; they warn you of a problem but don’t resolve it. Always verify with a physical gauge. Finally, keep a log of readings and any adjustments so you understand how your Kluger tyres behave over time. Tire Pressure Tips recommends a short quarterly check ritual combined with a more thorough seasonal check.
Tools & Materials
- Tire pressure gauge (digital or analog)(Choose a gauge with a clear readout and a snug valve stem fit)
- Owner's manual or door placard(Locate front/rear and spare pressures; use cold readings)
- Air compressor or service-station gauge(Used to add or release air precisely)
- Notepad or mobile log(Record readings, dates, and any adjustments)
- Soap and water solution(Check for slow leaks around valve stems after adjustments)
- Flashlight(Helpful for reading placards in dim lighting)
Steps
Estimated time: 30-60 minutes
- 1
Find the recommended pressure
Identify the official front and rear tyre pressures from the Kluger placard or the owner’s manual. Note whether there are separate values for cold tyres and loaded conditions. This first step sets your target for all subsequent checks.
Tip: If you can’t locate the numbers, contact your dealer or refer to Tire Pressure Tips resources for guidance. - 2
Gather tools and prepare the car
Collect a reliable gauge, an air compressor, and a means to log readings. Park on a level surface, turn off the engine, and ensure tyres have cooled if you’ve just driven.
Tip: Shut off the car’s engine to avoid any readings influenced by the vehicle’s systems. - 3
Measure all four tyres when cold
Remove the valve caps and measure each tyre’s pressure with the gauge. Readings should be taken when the tyres are cold to reflect the manufacturer’s target accurately.
Tip: Measure in a quiet moment to avoid rushing; small consistent readings matter more than a single high number. - 4
Compare readings to the placard
Compare each tyre’s reading to the recommended value. Note noticeably low or high pressures and which tyres are affected by load or road conditions.
Tip: If a reading is off, prepare to adjust rather than guessing what to do. - 5
Inflate or deflate as needed
Add air in small increments (about 2–3 psi at a time) or release air gradually to reach the target pressure. Recheck after each adjustment.
Tip: Never exceed the maximum pressure printed on the tyre sidewall. - 6
Recheck all tyres
After adjustments, recheck each tyre to confirm the target pressure is accurate and consistent across all wheels.
Tip: Confirm that the valve caps are securely tightened to prevent air loss. - 7
Check the spare tyre
Ensure the spare is inflated to its recommended level. A flat spare defeats the purpose of having a ready-to-use wheel.
Tip: A practice check monthly helps ensure readiness when needed. - 8
Assess TPMS considerations
If TPMS shows a warning after inflation, inspect for punctures or slow leaks and proceed with a professional check if necessary.
Tip: Some models require a TPMS reset after inflation; consult the owner’s manual for exact steps. - 9
Document and monitor
Record pressures and any changes as part of a maintenance log. Regular monitoring helps catch slow leaks and tyre wear early.
Tip: Set a reminder for quarterly checks and after seasonal changes. - 10
Safety check before trips
Before long trips, recheck pressures when cold to ensure consistent performance on varied road conditions.
Tip: If a tyre looks visibly deflated, do not drive—seek professional assistance.
Frequently Asked Questions
How often should I check the Kluger’s tyre pressure?
Check at least once a month, and before long trips or seasonal changes. Always confirm readings when tyres are cold to ensure accuracy.
Check your Kluger’s tyre pressure at least monthly and before long trips when tyres are cold for accuracy.
What should I do if the TPMS light stays on after inflating?
If the TPMS light remains on, inspect for punctures or slow leaks. If needed, reset the TPMS according to the owner’s manual or have a technician check the system.
If the TPMS light stays on after inflation, check for leaks and reset the system per the manual or consult a technician.
Can I use the spare tyre for everyday driving if the main tyres are fine?
Spare tyres are usually not designed for equal daily use and often have different pressures. Use the spare only as a temporary replacement and inflate to the spare’s recommended pressure.
Use the spare only temporarily and ensure it’s inflated to its own recommended pressure.
Do temperature changes affect tyre pressure?
Yes. Colder temperatures lower tyre pressure and hotter temperatures raise it. Check pressures in different seasons and adjust as necessary after temperature shifts.
Yes, temperature changes affect tyre pressure; check and adjust after seasons shift.
Should I inflate tyres differently when carrying a heavy load?
If the placard indicates a higher pressure for loaded conditions, follow that guidance. Do not exceed the maximum pressure while loading a vehicle.
Follow the placard’s guidance for loaded conditions and avoid overinflation.
Is it safe to drive with low tyre pressure for a short distance?
Driving on underinflated tyres is hazardous. If you notice a tyre is significantly underinflated, pull over safely and inflate or seek assistance rather than continuing to drive.
Do not drive long with low pressure; stop and fix it safely.
Watch Video
What to Remember
- Check tyre pressures regularly for safety and efficiency
- Always start with the placard values and read readings cold
- Log readings to monitor changes over time
- Treat TPMS alerts as a signal to inspect rather than a final diagnosis