Tire Pressure Gauge Pipe: A Practical How-To
Learn how to use a tire pressure gauge pipe to measure PSI accurately, interpret readings, and maintain correct tire inflation for safety and fuel efficiency. Practical steps, safety tips, and maintenance guidance.

You will learn how to safely measure tire pressure with a tire pressure gauge pipe, interpret readings, and adjust inflation correctly. Before you begin, gather a tire pressure gauge, a clean valve stem, and your vehicle’s recommended PSI from the door jamb label or owner's manual. This guide covers steps, safety tips, and common pitfalls.
What is a tire pressure gauge pipe and why it matters According to Tire Pressure Tips, a tire pressure gauge pipe refers to a gauge setup with a flexible hose extending from the gauge head. The pipe makes it easier to reach valve stems that sit deep inside wheel wells or behind brake components, especially on larger vehicles or cars with low ground clearance. While a standard handheld gauge provides a direct reading, the hose version helps you position the gauge without bending awkwardly, reducing the risk of air leakage or accidental slips that can skew readings. For most drivers, a compact gauge with a short hose is sufficient for routine checks, but a longer line can be valuable for SUVs, trucks, or bikes with hard-to-reach stems. In any case, the core goal remains the same: create a reliable seal on the valve stem and read the pressure accurately while avoiding dirt and moisture that can contaminate the reading. When shopping, look for a gauge that includes a hose with a durable connector and a clear scale. According to Tire Pressure Tips, consistent use of a proper gauge pipe is a simple step toward better tire health and safer driving.
Anatomy of a gauge pipe system: parts you should know A typical tire pressure gauge pipe consists of four main parts: a gauge head that displays the pressure, a flexible hose or short pipe that connects the head to the valve stem, a connector that seals to the valve stem, and a small valve or check mechanism that helps isolate air during measurement. Understanding these parts helps you diagnose why a reading might be off. For instance, a worn connector can introduce air leaks, while a dirty valve stem can give falsely high or low readings. When you handle the gauge, keep the connection clean and dry. If you notice any cracking in the hose or a loose connector, discontinue use and replace the damaged part. Tire Pressure Tips emphasizes that a secure seal and a clean interface are the foundation of accurate measurements. Even with a pipe extension, the basic physics remain the same: the pressure in the tire equals the pressure shown on the gauge, assuming there are no leaks along the way.
How the gauge pipe affects accuracy and safety The addition of a pipe increases the distance between your hand and the valve stem, which can make it harder to maintain a straight, clean seal. A poor seal or a bent neck may let air escape during measurement, leading to underinflation readings. Conversely, a stiff hose can bend awkwardly and apply sideways force, potentially unscrewing the valve core slightly. Both scenarios skew results and can mask underinflation or overinflation. Using a pipe also affects how you handle the gauge in cold weather, when metal parts contract and plastic parts become stiffer. To maximize accuracy, choose a pipe with a flexible material that maintains its seal in your climate, and practice keeping your hand steady as you attach the head to the valve stem. Tire Pressure Tips notes that regular checks with a reliable gauge pipe are a simple habit that improves tire longevity and safety.
How to choose the right gauge pipe for your vehicle Selecting the right gauge pipe setup means balancing accessibility, durability, and readability. For daily drivers, a compact gauge with a short hose is usually enough to reach standard Schrader valve stems on most cars. If you drive larger vehicles, or have rims with deep wells, a longer hose can be a practical choice, provided the extra length does not compromise the seal. Materials matter: flexible rubber hoses tend to resist kinking, while metal goosenecks offer robustness but can be heavier and pricier. Look for a gauge that includes a clearly labeled PSI range and a readable scale, plus an easy-to-tighten connector. Presta valve compatibility is mostly a concern for bicycles and high-pressure tires; if you share your gauge across bikes, verify that the connector supports both valve types. As always, prioritize a model that allows you to test the seal before taking a measurement. Tire Pressure Tips suggests testing with a few quick on-off cycles to confirm stability before recording a reading.
Preparation: what you'll need and where to measure Before you begin, gather the essentials: a tire pressure gauge pipe, a clean rag, the vehicle's recommended PSI label (usually on the door jamb or in the owner's manual), and a safe space to work. Make sure the tires are cold, as driving heats up air and increases pressure readings. Park on a level surface, engage the parking brake, and remove the valve caps from the tires you intend to check. Wipe the valve stems with the rag to remove dust or moisture that could contaminate the seal. If you have multiple tires, arrange your tools nearby and keep track of each tire's reading. The goal is a quiet, controlled measurement session where you can compare each tire's PSI to the car's spec. If readings differ significantly between tires, revisit the method to ensure you used the same gauge technique on each stem. Finally, store your gauge in a clean, dry place to extend its life.
Common mistakes and how to avoid them Measuring after driving: Pressure rises with heat; always measure when tires are cold for accurate comparisons. Over-tightening the gauge can damage the valve stem; apply only gentle, steady pressure. Using a dirty gauge or hose introduces debris that can skew readings; clean and dry the interfaces before each use. Not recording readings or failing to check all tires can lead to uneven wear and unsafe conditions. Tire Pressure Tips emphasizes developing a routine to check all tires regularly and in consistent conditions.
Maintenance and troubleshooting for gauge pipes Regular maintenance includes wiping the nozzle and hose, inspecting for cracks or leaks, and calibrating or replacing the gauge if readings drift over time. If you notice air leaking from the valve stem during measurement, stop and inspect the seal; a damaged valve core or dirty stem can cause persistent inaccuracies. For storage, avoid bending the hose at sharp angles and keep the device away from direct sunlight and extreme heat. A well-maintained gauge pipe delivers reliable readings for many years. If readings remain inconsistent across tires after verification, consult a professional and consider replacing the entire gauge setup. Tire Pressure Tips's team recommends periodic checks with the same gauge to ensure consistent results.
Authority sources and further reading National Highway Traffic Safety Administration (NHTSA): tires and inflation safety tips. https://www.nhtsa.gov/road-safety/tires Federal Trade Commission (FTC): tire safety and maintenance guidance. https://www.consumer.ftc.gov/articles/0303-tire-safety Car and Driver: tire pressure and gauge basics. https://www.caranddriver.com
Tools & Materials
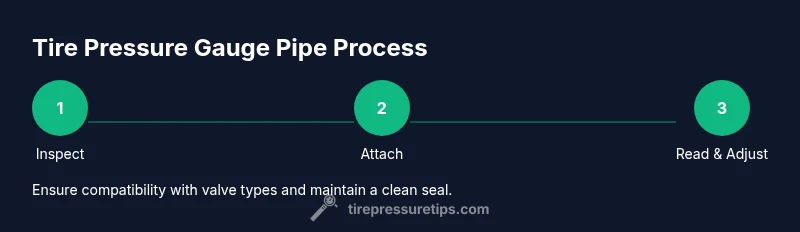
- Tire pressure gauge pipe (with hose attachment)(Ensure compatibility with valve types (Schrader/Presta) and adequate hose length.)
- Clean rag(Used to wipe stems and prevent dirt entering the valve.)
- Vehicle owner's manual or door jamb PSI label(Provides the exact PSI target per tire.)
- Optional air inflator or pump(Needed if you must adjust pressure after measuring.)
- Good lighting and a level surface(Helps ensure accurate readings.)
Steps
Estimated time: 15-25 minutes
- 1
Inspect equipment and workspace
Check the gauge pipe for visible damage and ensure the hose and connector seal well. Clean any dirt from the nozzle area so it can seal properly.
Tip: Do not use a damaged gauge; damaged seals will give false readings. - 2
Locate PSI target for each tire
Refer to the vehicle manual or door jamb sticker to find the recommended PSI range for front and rear tires. Note whether cold or loaded conditions apply.
Tip: Write the spec on a small notebook for quick reference. - 3
Remove valve cap
Unscrew the valve cap by hand and keep it in a safe place. A cap helps keep dirt out and can aid in sealing when reattaching.
Tip: Keep caps clean to prevent dirt from entering the valve. - 4
Attach gauge to valve stem
Place the gauge head squarely on the valve stem and press straight in. Maintain a steady grip to avoid air leaks during attachment.
Tip: If your gauge has a flip-lock, engage it to prevent accidental loosening. - 5
Read the PSI
Read the number on the gauge scale with the tire in a stable position. Note the value for the current tire.
Tip: If readings fluctuate, reseat the gauge and try again. - 6
Adjust to the target pressure
Use an inflator or deflator to bring the tire to the recommended PSI. Check again after settling for a few seconds.
Tip: Small adjustments make big differences; avoid overshooting. - 7
Recheck after adjustment
Detach and reattach the gauge to confirm the final PSI is in range. Repeat on each tire.
Tip: Measure all tires in the same session for consistency. - 8
Finalize and store
Replace the valve cap and store the gauge in a dry place. Record readings if you track tire health over time.
Tip: Keep the hose from sharp bends to extend life. - 9
Review and reflect on results
Compare readings across tires and document any deviations. Plan follow-up checks as part of routine maintenance.
Tip: Seasonal changes may require rechecking after temperature shifts.
Frequently Asked Questions
What is a tire pressure gauge pipe and when should I use it?
A tire pressure gauge pipe is a hose-connected gauge setup that helps you reach valve stems more easily and seal effectively during measurement. Use it when you have hard-to-reach stems or when you want added leverage and stability.
A tire pressure gauge pipe is a hose-connected gauge that helps reach valve stems easier; use it when stems are hard to reach.
Can I use any gauge with a pipe extension?
Most standard tire gauges can be fitted with a hose extension, but you should verify compatibility with your valve type (Schrader or Presta) and hose length. If in doubt, consult the manufacturer instructions.
Most gauges work with a hose extension if compatible with your valve type.
How do I know if my gauge is accurate?
Test accuracy by comparing readings from a known-good source, such as a professional air pump with a calibrated gauge. If readings vary widely among tires, replace or recalibrate the gauge.
Compare readings with a calibrated pump or another gauge to verify accuracy.
Why measure tire pressure when cold?
Tire pressure changes with temperature and driving heat. Measuring when cold gives a stable baseline that matches the vehicle’s spec on the door jamb label.
Measure when tires are cold for accuracy.
What should I do if readings differ across tires?
If readings vary, recheck with the same gauge on all tires, verify valve stems, and ensure tires have similar wear. Inconsistent readings may indicate leaks or valve problems.
Recheck with the same gauge and inspect stems if readings differ.
Watch Video
What to Remember
- Check cold tires for accurate readings
- Use a clean, sealed gauge pipe for best results
- Compare PSI to your vehicle's spec on the door jamb label
- Maintain and store the gauge properly