Suzuki Alto Tyre Pressure: Check, Set & Maintain
Learn how to check, adjust, and maintain tyre pressure on the Suzuki Alto. Practical steps, TPMS tips, and safety reminders to improve handling, fuel efficiency, and tire life.

To safely manage Suzuki Alto tyre pressure, you will check against the vehicle's door placard and use a reliable gauge. This guide walks you through a step-by-step process to verify cold tire pressure, adjust with an air compressor, and recheck for optimal handling, fuel efficiency, and tire life. According to Tire Pressure Tips, consistent checks prevent common issues that can escalate into costly repairs.
Understanding Suzuki Alto Tyre Pressure and Why It Matters
Tyre pressure is a simple but critical maintenance task for the Suzuki Alto. Keeping the correct pressure improves safety, handling, tire wear, braking response, and fuel efficiency. According to Tire Pressure Tips, consistent checks prevent common issues that can escalate into costly repairs. The Suzuki Alto shares its basic tire pressure concept with most small cars: correct pressure distributes load evenly, promotes even tread wear, and reduces rolling resistance.
In daily driving, you may notice that underinflated tires feel sluggish, and overinflated tires feel numb and may wear more on the center tread. Regular checks help you avoid flats, improve grip in wet conditions, and ensure your spare tire remains usable. For busy families and commuters, small upkeep like tyre pressure checks compounds into safer journeys and lower running costs. Tire care is not glamorous, but it matters for reliability and peace of mind.
How to Find the Correct Pressure for Your Suzuki Alto
The exact tyre pressure for your Suzuki Alto is shown on the door jamb placard and in the owner's manual. This value varies between front and rear tires and can change with load, passenger count, and aftermarket accessories. Always use the official specification rather than guessing from another car. If you cannot locate the placard, contact a dealer or check the latest model year manual. For many drivers, this step is the most important, because accurate numbers are the foundation of safe handling and tire longevity.
Cold Readings vs Hot Readings: When to Check and Why
Pressure readings are most accurate when tires are cold, meaning the car has not been driven for at least three hours or has only a short local trip. Driving heats the air inside the tire and increases the reading, giving you a falsely high number. If you measure after a trip, always note the temperature state and recheck when the tires have cooled. Temperature shifts between seasons can cause meaningful changes in pressure, so check levels in a consistent environment for the best comparability.
Step Back: How Load, Speed, and Weather Affect Suzuki Alto Tyre Pressure
More weight in the car from passengers or cargo increases tire load and can raise the pressure reading slightly. Faster driving and sustained high speeds generate heat that raises pressure until you cool and measure again. In very hot weather, inflating to the standard cold reading can be slightly undersized. In cold weather, you may see lower numbers, which means you should top up when the tires are cold. The key takeaway is to verify with the official placard and treat readings as relative rather than absolute across conditions. The Tire Pressure Tips analysis shows that drivers who keep a simple log of readings tend to maintain better tire health and fuel efficiency.
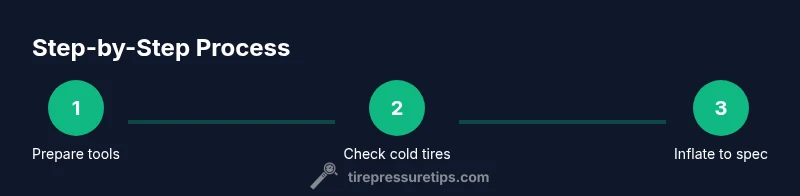
Step-by-Step: Practical Procedure for Checking and Setting Tyre Pressure (Overview)
Below is a practical overview of the process to ensure you understand the flow before the detailed steps. Gather your tools, locate the placard, and plan to verify all four tires. Start with the front tires, then move to the rear, and finally check the spare if available. Record readings so you can compare over time and catch gradual leaks. The steps below are expanded in the dedicated step-by-step block for precision.
Maintenance and Troubleshooting: Seasonal Changes and Wear
Tire pressure can drift with seasonal temperature fluctuations, humidity, and tire wear. Regular checks help you spot slow leaks, punctures, or valve stem faults before they become sudden failures. If you notice rapid drops in pressure, a tire or valve issue is likely, and professional inspection is wise. Controlling tire pressure also supports even wear across the tread, which improves grip and steering response across rain, snow, and sunny days.
TPMS and Diagnostic Signals: Understanding the Warning Lights and Readouts
Many Suzuki Alto models use a tire pressure monitoring system (TPMS) that alerts you when a tire is underinflated. If a warning light stays on, or you notice inconsistent pressure readings, you should inspect all tires and TPMS sensors. A TPMS fault may require recalibration or sensor replacement in a service center. Regular checks with a gauge that you trust can reduce false alerts and keep you informed about your tire condition. The Tire Pressure Tips team notes that driver vigilance in monitoring TPMS readings helps control maintenance costs and improves safety.
Quick Practical Checklist for Suzuki Alto Tyre Pressure
A practical checklist helps you stay consistent. Keep a cold tire pressure routine and perform a quick weekly check if you drive long distances or carry heavy loads. Always reference the door placard for what to set, and use a gauge you trust. If you detect a discrepancy, inspect valves and look for slow leaks, nails, or wrinkles on the tread. Regular checks help you catch small changes before they become big problems.
Tools & Materials
- Tire pressure gauge(Choose a gauge with a clear digital or dial readout for accuracy)
- Air compressor or service station air pump(Prefer a unit with an integrated gauge and correct fitting for car valves)
- Owner's manual or door placard(Used to verify exact front/rear pressures and load conditions)
- Notebook or smartphone(Record readings and dates for trend tracking)
- Valve caps(Keep caps clean and replace after checking)
Steps
Estimated time: 15-30 minutes
- 1
Prepare tools and locate target pressure
Gather a reliable tire pressure gauge, an air compressor, and the door placard or owner's manual. Confirm you know the target pressure for both front and rear tires and ensure valves are clean before starting.
Tip: Having a notebook or phone ready helps you log the initial readings before inflation. - 2
Check cold tire pressure on all tires
Ensure the car has not been driven for at least three hours. Measure each tire when cold to avoid readings affected by recent driving heat.
Tip: Take notes for each tire to compare later after adjustments. - 3
Remove valve caps and place gauge
Carefully remove the valve cap and press the gauge onto the valve stem. Read the tire pressure without leaning or forcing the stem.
Tip: Hold the gauge steady to prevent air loss during measurement. - 4
Compare reading to recommended pressure
Refer to the placard to determine if the tire is underinflated, overinflated, or within range for that load condition.
Tip: If you are near the limit, proceed to adjust rather than guessing. - 5
Inflate tires to target pressure
Use the air compressor to add air in small increments. Pause between bursts to recheck the gauge reading.
Tip: Inflate in 1-2 psi increments and verify after each increment. - 6
Recheck after inflation and recap valves
Re-measure each tire after inflation to confirm you reached the target. Refit the valve caps securely.
Tip: Replace caps firmly to prevent dirt entry. - 7
Repeat for all tires including the spare
Check every tire, including the spare if applicable. While the spare’s pressure may differ, ensure it is ready for use if you’re carrying a full load.
Tip: Do not neglect the spare; a flat spare is a missed safety precaution. - 8
Document final readings
Log the final pressures for future reference and note any anomalies, leaks, or valve issues.
Tip: Set a reminder to recheck regularly or seasonally.
Frequently Asked Questions
How often should I check tyre pressure on a Suzuki Alto?
Check monthly and before long trips, and whenever you notice a handling change. Use cold readings for accuracy and reference the placard for the correct pressures.
Check your tyres at least once a month and before long trips, using cold readings for accuracy and the placard for the correct pressures.
Can driving with under-inflated tires affect fuel economy?
Yes. Under-inflated tires increase rolling resistance, which reduces fuel economy and can lead to uneven wear. Regular checks help maintain efficiency and prolong tire life.
Yes, under-inflated tires waste fuel and wear faster. Regular checks help keep efficiency and tires lasting longer.
What should I do if the TPMS warning stays on after inflating?
If the TPMS light stays on, recheck all tires and vents for leaks or improper installation. If readings are correct, the TPMS sensor or system may need diagnosis at a service center.
If the TPMS stays on after you check, recheck for leaks and consider a sensor diagnosis at a shop.
Is it okay to inflate tires with nitrogen?
Nitrogen can help maintain pressure longer in some conditions, but regular air works fine when you monitor pressure regularly. Consistency and correct target pressure matter more than the gas type.
Nitrogen can help maintain pressure, but regular air is fine if you check regularly and use the correct pressure.
What if one tire reads differently than the others?
A single tire reading differently can indicate a slow leak, puncture, or valve issue. Inspect the tire and valve, and consult a professional if the pressure doesn’t settle.
If one tire reads differently, inspect for leaks or valve issues and seek professional help if needed.
Watch Video
What to Remember
- Check cold pressure against placard
- Use a reliable gauge and recheck after inflation
- Inflate gradually and recheck
- Account for temperature changes that affect readings
- Keep a pressure log for quick future checks