Tire Pressure Guide for the Harley-Davidson Sportster 883
Learn how to check, adjust, and maintain tire pressure for the Harley-Davidson Sportster 883. Practical steps, tools, and safety tips from Tire Pressure Tips to optimize grip, wear, and efficiency.

You will learn how to check, adjust, and maintain tire pressure for the Harley-Davidson Sportster 883, including TPMS considerations, cold-weather impact, and the correct pressure ranges for front and rear tires. This guide covers essential tools, step-by-step actions, and safety tips to keep your ride safe, efficient, and consistent, whether at home or on the road.
Why tire pressure matters on the Sportster 883
Maintaining accurate tire pressure on your Harley-Davidson Sportster 883 is not a cosmetic detail—it's a safety, handling, and efficiency lever. Correct pressures ensure the tire contact patch sits correctly on the road, improving grip in corners, braking stability, and even tire wear. The Tire Pressure Tips team notes that small pressure differences can alter steering response and heat buildup during a ride. Always start with the vehicle manufacturer’s cold-pressure specification, and adjust for rider weight, luggage, and riding style. Use a reliable gauge and calibrate it against known standards to avoid reading errors. By keeping the pressures within the recommended range, you can reduce the risk of flats and improve fuel economy slightly, while preserving your tire's tread life.
Reading the Sportster 883's tire pressure specifications
Most Sportster 883 models carry a placard on the swingarm or under the seat that lists the recommended cold tire pressures for front and rear tires. If the placard is missing, consult the owner's manual or the manufacturer's official site. Do not rely on the car tire charts; motorcycle tire pressures are model-specific and depend on wheel size, load, and tire type (bias-ply or radial). In practice, a typical Sportster setup uses lower pressures when the bike is unloaded and slightly higher pressures when carrying a passenger and gear. Always check both tires when you adjust; underinflation and overinflation affect grip, handling, and tire wear differently on the front and rear.
Measuring tire pressure accurately
To get an accurate reading, measure when the tires are cold (vehicle has been stationary for 3+ hours or ride less than 1 mile). Remove the valve cap, attach a gauge firmly, and write down the reading. Compare to the recommended cold pressure; if readings are off, top up or release air as needed, then recheck. If you have TPMS on your Sportster 883, use it as a secondary check but rely on the instrument gauge for an exact value. Always recheck after adjusting, as heat generated during riding can quickly change the pressure.
Effects of temperature and load on tire pressure
Temperature shifts and load changes can cause tire pressure to fluctuate by several psi. Cold mornings will show lower pressures, while riding generates heat that increases pressure. The Tire Pressure Tips guidance emphasizes adjusting for anticipated loads; for example, a solo rider vs. a fully loaded bike will require different targets. Maintain a small cushion above the minimum for warm-weather riding, and reset after a long trip or garage storage. Seasonal storage should include inspecting valves and sealing caps to prevent slow leaks.
Common mistakes and how to avoid them
Common errors include inflating with a hot tire, not checking both tires, and using a gauge that isn't calibrated. A slow leak can hide behind a puncture or a damaged valve core; inspect the stem for corrosion. Resist the urge to follow car tire pressures or to set pressures based on cosmetic wear. Always adjust pressures with the bike on a level surface and after it has cooled down, not after a ride. Document changes to track wear and performance.
Seasonal maintenance and storage tips
Before winter storage, check pressures, inspect tires for cracking, and keep tires inflated to the recommended levels to avoid flat spots. During hot seasons, monitor pressure after long rides, as heat causes expansion. Use a dedicated motorcycle gauge, as small differences can happen across devices. Carry a compact gauge and a small inflator for roadside checks.
Tools & Materials
- Tire pressure gauge (dial or digital)(Calibrated; use cold tires for baseline readings)
- Owner's manual or tire placard(Model-specific cold pressures; locate under seat or on swingarm)
- Portable air source(Compact air compressor or CO2 inflator for on-road adjustments)
- Clean cloth(Wipe valve stems before reading; prevent dirt entry)
- Notepad or app for logs(Record readings and adjustments for maintenance history)
Steps
Estimated time: 20-30 minutes
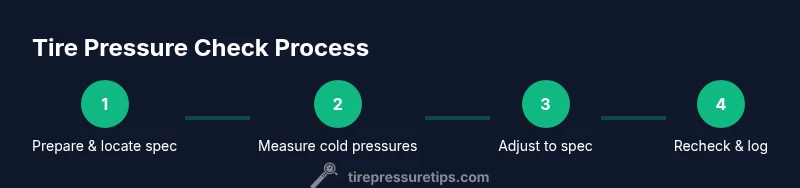
- 1
Prepare and locate the spec
Park on level ground and let tires cool for at least 3 hours. Locate the recommended cold pressures on the placard or in the owner's manual for front and rear tires. This ensures you’re aiming for the correct targets rather than basing changes on riding heat.
Tip: Having a printed spec handy avoids misreading the placard or guessing from a chart. - 2
Remove valve caps and attach gauge
Gently remove both valve caps and place them where you won’t lose them. Attach your gauge firmly to each valve stem to get a stable reading. Don’t tilt the gauge or wiggle it; a loose fit gives false readings.
Tip: Finger-tighten only—no wrench needed on motorcycle valves. - 3
Read current pressures
Read the temperature-neutral values from the gauge for both front and rear tires. Compare to the cold-pressure spec from the placard/manual. Note any difference and whether you need to add or release air.
Tip: If you’ve driven recently, wait and recheck when the tires are cold. - 4
Adjust pressures
If you need to add air, use the portable air source in small increments and recheck after each addition. If you need to release air, do so gradually and recheck. Remember: never exceed the recommended cold pressure.
Tip: Small adjustments yield accurate results; large changes can overshoot targets. - 5
Recheck and confirm
After reaching target pressures, recheck both tires once more to confirm readings are steady. Reinstall valve caps to keep dust and moisture out. If TPMS shows a warning, rely on your gauge for the final value.
Tip: Double-check after a few minutes of sitting to account for valve seal settling. - 6
Log results and review
Record the date, tire pressures, ride conditions, and any notes about load. This helps when planning trips or seasonal changes. Review your logs before long rides to ensure consistent practice.
Tip: Keep a simple notebook or digital note for easy reference.
Frequently Asked Questions
Why is correct tire pressure important for the Sportster 883?
Correct tire pressure improves grip, handling, braking stability, and even tire wear. It also helps prevent flats and optimizes fuel efficiency. Always start with the manufacturer's cold-pressure spec.
Correct tire pressure improves grip and handling, helps prevent flats, and can improve fuel efficiency. Start with the factory cold-pressure spec for safety.
Where can I find the Sportster 883's recommended pressures?
Look for the placard on the swingarm or under the seat, or consult the owner's manual or official Harley site for model-specific cold pressures for front and rear tires.
Check the swingarm placard or the owner's manual for your Sportster 883's cold-pressure specs.
Can I use a car tire gauge for motorcycle tires?
A car gauge can work in a pinch, but ensure accuracy and use a gauge designed for motorcycles when possible. Always cross-check with the TPMS reading and your manual.
A car gauge can work, but it’s better to use a motorcycle gauge and double-check with your TPMS reading.
How often should I check tire pressure on a Sportster 883?
Check at least weekly and before long trips. Recheck after long rides in hot weather when pressures tend to rise.
Check at least weekly and before trips, and after long rides in heat.
What should I do if I notice a slow leak?
Identify and patch or replace the faulty valve stem or tire. Maintain the correct pressure after repair and recheck after a short ride.
If you suspect a slow leak, inspect the valve and tire, repair as needed, and recheck the pressure after riding.
Watch Video
What to Remember
- Check tires when cold before rides.
- Use manufacturer specs for all readings.
- Check both front and rear tires consistently.
- Log pressures and adjustments for maintenance history.