Harley Sportster Tire Pressure: Check, Adjust, Maintain
Learn how to check, adjust, and maintain Harley Sportster tire pressure with practical, model-specific guidance. Find official specs, how to read TPMS, and tips for load, weather, and safe riding.

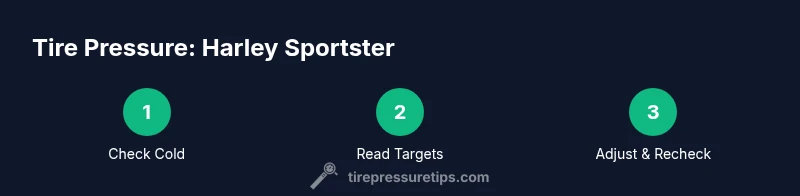
You will learn how to check, adjust, and maintain Harley Sportster tire pressure with model-specific guidance and practical, safe steps. You’ll locate the official specs on decals or in the owner's manual, understand how load or weather changes readings, and perform reliable measurements every ride. With the right approach, you can extend tire life, improve handling, and maximize safety.
Why Harley Sportster tire pressure matters
According to Tire Pressure Tips, maintaining correct tire pressure on a Harley Sportster isn’t just about avoiding flats—it directly influences handling, grip, braking, and tire longevity. A Sportster’s weight distribution, riding posture, and occasional loads (panniers, rider plus passenger, or cargo) mean that the optimal pressures may differ from one setup to another. Underinflation creates excess heat, uneven contact with the road, and faster wear, especially on the front tire during aggressive cornering. Overinflation can reduce the tire’s footprint, worsen grip on uneven pavement, and increase the risk of a harsh ride. The goal is stable, predictable feedback at the handlebars, steady tire temperatures, and even tread wear across the life of the tire. Consistency matters: check pressures on a regular schedule and after any change in load or riding conditions, so you get readings you can trust every time you roll out.
Checklist for riders: keep a cold-tire reading before riding, use a reliable gauge, and verify both front and rear pressures are aligned with model-specific specs. Tire pressures should be treated as part of a broader maintenance routine that also includes tire tread depth checks and seasonal adjustments for temperature shifts.
Understanding the official specifications
Your Harley Sportster’s official tire pressures aren’t a single number, but a set of model-specific targets for front and rear tires. The best source is the swingarm decal under the seat or near the frame, followed by the owner’s manual and service manual. These values account for typical rider weight, luggage, and clearance within the wheel wells. It’s crucial to read both tires’ targets because the front and rear may differ to optimize handling and stability. Remember: these specs are provided for cold tires; riding heats the tire, and hot readings will appear higher. Use cold readings for adjustment, and recheck after a short ride to confirm stable pressure. For Harley riders, TPMS can help monitor fluctuations, but it never replaces a manual gauge check.
Where to find the recommended pressure for your Sportster
Begin with the decal on the bike itself: most Sportsters include front and rear tire pressures printed near the swingarm, under the seat, or on the rear fender. If the decal is missing or faded, consult the official Harley-Davidson owner’s manual or the service manual for your exact model year. If you carry extra weight like saddlebags or a passenger, the recommended pressures may shift slightly; the decal or manual will indicate whether to adjust for load. For riders using aftermarket tires, check the tire manufacturer’s guidelines as well, but align them with the bike’s overall load and speed ratings. Always verify both tires’ pressures in the same cold state and ensure consistency between front and rear values for predictable handling.
Tools and prep for checking tire pressure
Before you start, gather the essentials: a reliable tire pressure gauge, an appropriate inflator or access to a gas-station air pump, and your bike’s manual or decal for model-specific targets. A rag helps wipe the valve stem and nozzle to avoid dirt entering the valve. If you ride in cold or hot weather, note that temperature affects readings; a cold-state check yields the most accurate value. Choose a gauge you trust—digital gauges can be easier to read, but have batteries ready and calibrate them occasionally. Have a plan for where you’ll perform checks (level ground, shaded area, away from traffic) and how you’ll document readings for future reference.
Step-by-step: check front tire pressure
- Park the bike on level ground and ensure it’s cold. A cold surface provides the most accurate baseline for your target pressures. 2) Remove the valve cap from the front tire and inspect the valve stem for any damage or debris. 3) Attach your gauge securely to the valve stem, ensuring a good seal, and read the pressure value. 4) Compare the reading to the front tire target in your decal or manual. If low, add air in small increments; if high, vent air in small increments. 5) Recheck after 1–2 minutes of settling to allow the tire to equalize. 6) Reinstall the valve cap and wipe away any residual moisture or debris. 7) If TPMS shows a warning, verify with the gauge and correct as needed before riding. 8) Record the final front pressure for your maintenance log.
Step-by-step: check rear tire pressure
- Repeat the same cold-tire procedure for the rear tire, noting that the rear often carries more load and can influence ride quality and stability. 2) Remove the rear valve cap, inspect the stem, and attach the gauge to obtain a reading. 3) Compare with the rear target from your manual or decal; adjust by inflating or venting in small increments. 4) Recheck after 1–2 minutes and ensure the readings are stable. 5) Replace the valve cap and clean any residue. 6) If you carry heavy loads, consult the decal for any rear-specific adjustments and consider rechecking after adding luggage. 7) Document the final rear pressure in your maintenance log. 8) If TPMS alerts persist, use a precise gauge to verify, then seek professional inspection if readings diverge significantly.
Adjusting pressure for load, passengers, and terrain
Loads, passenger weight, and terrain can shift the optimal pressures. When carrying a passenger or luggage, a typical approach is to adjust pressures upward modestly to maintain tire shape and suspension performance, while not exceeding the tire’s maximum rating. In cold weather, the air contracts and readings drop; plan for mild rises in spring or pre-season adjustments. For highway or aggressive riding, smoother reactions often come with slightly higher pressures, but avoid overinflation that reduces the tire’s contact patch and grip. Always refer to the official targets first, then adjust based on your riding style and comfort level. After any adjustment, recheck both tires to confirm alignment with the recommended values.
Common myths and mistakes to avoid
Myth: TPMS alone is enough; truth: TPMS alerts can miss small slow leaks or sensor faults. Mistake: ignoring a low reading after a ride; actual cold readings are the baseline, not the hot readings you see immediately after stopping. Myth: higher pressure improves mileage always; reality: overinflation leads to reduced grip and uneven wear. Mistake: inflating only the rear for load; the front affects steering precision and braking balance too. By sticking to model-specific targets and verifying with a gauge, you avoid these issues and maintain better control and tire longevity.
Smart habits for ongoing tire pressure maintenance
Create a simple routine: check pressures every 1–2 weeks and before long trips, especially when transporting passengers or luggage. Use a consistent gauge and log the readings in a notebook or digital note for trend tracking. Keep your gauge calibrated, and check tire pressures in the morning or after the bike has cooled down from any previous ride. Temperature awareness helps you schedule checks during favorable times of day. Finally, inspect the tires for tread wear, cracks, or embedded objects during pressure checks to catch issues early.
Tools & Materials
- Tire pressure gauge(Prefer digital for readability; ensure accuracy within 1–2 psi, and calibrate periodically)
- Air inflator or access to gas station air pump(Gauge the inflator’s accuracy; avoid over- or under-inflation from an inconsistent source)
- Owner’s manual or model-specific service manual(Use as the primary source for front/rear targets and load-adjustment guidance)
- Rag and soap/water solution(Clean valve stems and test for leaks after installation)
- Valve-core tool (optional)(Useful for addressing slow leaks or replacing valve cores)
Steps
Estimated time: 25-40 minutes
- 1
Prepare the bike and workspace
Park on level ground in a shaded area, cold tires. Gather gauge, inflator, and manual. This ensures stable readings and avoids heat-related misreads.
Tip: Keep the bike on its center stand if available for stability. - 2
Locate target pressures
Find the front and rear tire pressures from the decal or manual. Note that targets may differ by load and model year; keep a copy handy.
Tip: If decals are unreadable, use the manual’s specifications for cold tire readings. - 3
Check the front tire
Remove the valve cap, attach the gauge securely, and read the current pressure. Compare with the front target and decide to inflate or vent in small increments.
Tip: Ensure a clean seal between gauge and valve to avoid scrambled readings. - 4
Check the rear tire
Repeat the same process for the rear tire. The rear often carries more load and affects handling; verify it matches the rear target.
Tip: If you feel uneven ride quality, re-check after adjusting both tires. - 5
Adjust pressures as needed
Inflate or vent in small increments (1–2 psi) until you approach the targets. Recheck after a minute to account for settling.
Tip: Avoid overshooting; tiny increments prevent overinflation. - 6
Recheck and seal
Recheck both tires after adjustments and install valve caps. Wipe the stems and record readings in your log.
Tip: Cap the valves securely to prevent dirt ingress. - 7
Account for TPMS and leaks
If TPMS warns or readings drift, verify with a trusted gauge and inspect for leaks or damaged sensors.
Tip: Malfunctioning TPMS should prompt a diagnostic check if readings remain inconsistent. - 8
Document and review
Log your final front and rear pressures, date, load conditions, and weather. Review this over time to spot trends.
Tip: Keep the log accessible for quick checks before rides.
Frequently Asked Questions
Why is tire pressure important on a Harley Sportster?
Correct tire pressure affects handling, braking, tread life, and rider safety. For a Harley Sportster, the front and rear tires work together to maintain stability; improper pressures can cause unpredictable steering, reduced grip, and uneven wear. Regular checks help ensure predictable performance and safer rides.
Proper tire pressure is essential for safe handling and tire life on your Harley Sportster. Check front and rear regularly to maintain stability and grip.
Where can I find the recommended front and rear pressure for my Sportster?
Look at the swingarm decal under the seat or near the frame for model-specific front and rear targets. If the decal is missing, consult the official owner’s manual or service manual for your exact model year and tire size. Always use cold readings for comparisons.
Check the bike’s decal under the seat or the owner’s manual for the exact front and rear pressures. Use cold readings to verify.
Can TPMS misread or fail on a Harley Sportster?
Yes, TPMS can give false alerts or fail to register slow leaks. Always verify TPMS readings with a reliable gauge and inspect valve stems and sensors if readings are inconsistent. Don’t rely solely on TPMS for final adjustments.
TPMS can misread; verify with a gauge and inspect sensors if readings seem off.
What happens if I ride with underinflated tires on a Sportster?
Underinflated tires overheat quickly, wear unevenly, and can increase the risk of punctures or a loss of grip in cornering. It also strains suspension components. Always correct underinflation to restore stable handling and safety.
Underinflation can cause overheating, poor grip, and faster wear. Fix it promptly.
Should I adjust tire pressure when riding with a passenger or luggage?
Yes. Additional weight typically requires slight pressure adjustments according to the decal/manual. Make small changes and recheck both tires to keep even tread wear and stable handling.
Load changes mean you should adjust pressures a bit and recheck both tires.
Is it safe to ride with low tire pressure temporarily?
Riding with low pressure is unsafe for the tire’s integrity and rider safety. If you notice a drop, pull over, check the pressure, and reinflate to the recommended target as soon as possible.
No, don’t ride long with low pressure; pull over and recheck quickly.
Watch Video
What to Remember
- Check cold tires for accuracy.
- Use a reliable gauge and verify both tires.
- Follow model-specific pressures from the decal/manual.
- Adjust for load and weather with small increments.
- Log readings for ongoing maintenance.