Tire Pressure 700x38c: A Practical Guide to Safe Riding
Learn how to check and set the correct tire pressure for 700x38c tires, troubleshoot TPMS alerts, and maintain optimal performance. This guide covers tools, step-by-step actions, safety tips, and common issues for riders and cyclists in 2026.

By following this guide, you will learn how to check and set the correct tire pressure for a 700x38c tire and troubleshoot common TPMS alerts. You’ll need a reliable gauge, a pump, and your bike or vehicle’s target range from the sidewall or manual. According to Tire Pressure Tips, start from the manufacturer’s recommendation and adjust for load, temperature, and riding conditions.
Why accurate tire pressure matters for tire pressure 700x38c
For road and gravel bikes, a 700x38c tire profile sits between performance and comfort. The correct tire pressure affects rolling resistance, grip, ride quality, and the risk of pinch flats. Underinflation increases rolling resistance, causes pinch flats when hitting sharp edges, and leads to premature wear. Overinflation reduces grip, makes the ride harsher, and raises the risk of punctures on rough surfaces. With 700x38c tires, the variability in recommended pressure is higher because of load, tire construction, rim width, and riding style. The goal is to keep the tire shape rounded on the rim to maximize contact patch while avoiding excessive ballooning. Always start from the manufacturer’s recommended range and adjust gradually to test ride feedback, weather, and terrain. The Tire Pressure Tips team notes that the target can differ by tire model and setup, so confirm using the sidewall markings or the owner’s manual.
How 700x38c pressure targets vary by load and terrain
Pressure targets for 700x38c tires shift with rider weight, luggage, and terrain. A cyclist commuting with gear may need higher pressures to maintain roll efficiency on pavement, while a rider on soft off-road surfaces benefits from slightly lower pressures for better traction. The best practice is to set a baseline according to the tire maker’s range, then fine-tune after a ride based on feedback: feel in the hands, cornering confidence, and avoidance of pinch flats. For heavy loads or long rides, increase pressure within the recommended window; for light loads, you can typically go a touch lower. Always document your settings and adjust for seasonal temperature changes as needed.
Temperature and altitude: how climate changes pressure
Air expands when it warms and contracts when it cools, so tire pressure can drift with the weather. In hot conditions or after a long ride, the air inside the tire may rise, producing a higher reading than your cold baseline. Conversely, cold mornings or rides in cool climates can drop the reading. The Tire Pressure Tips team recommends checking tire pressure when tires are cold and adjusting before long trips or temperature swings. If you ride in variable climates, keep a small adjustment margin in your target range and re-check after temperature shifts.
Tools and methods for measuring tire pressure
To get reliable results, use a dedicated tire gauge (preferably digital) and a pump with a built-in gauge. Be sure to remove the valve cap, inspect the valve for damage, and ensure a tight seal when attaching the gauge. If you use a compressor, pump in small bursts and verify the reading after stabilization. Record readings and target values for each tire and keep your tools clean and calibrated. The goal is repeatable, accurate measurements that reflect your tires’ actual load and terrain conditions.
Quick-start checklist for 700x38c (pre-ride)
Before a ride, confirm that both tires are within the manufacturer’s target range, with front and rear pressures balanced to your riding needs. Check the wheel for any leaks, inspect the sidewalls for cuts or embedded debris, and ensure valve stems are not damaged. Measure the cold pressure, adjust as needed, and re-check after a few miles of riding to account for warmth. This approach reduces the chance of pinch flats and helps you ride with confidence.
Tubeless vs clincher: considerations for 700x38c
Tubeless setups can operate at different pressures than clinchers and often require a slightly lower inflation for comfort while maintaining traction. If you switch between tubeless and clincher tires, be mindful of the target range for each setup and adapter requirements for your rims. Always consult the tire manufacturer’s guidance because pressure needs can vary with bead type, rim width, and sealant use.
Common mistakes and how to fix them
Many riders inflate to a mental target they’ve used for years without rechecking the current setup. Others inflate too quickly, which can skew the gauge reading or damage the valve stem. Always use cold measurements, stick to the manufacturer’s range, and recheck after temperature changes. If you find persistent underinflation, check for slow leaks at the valve stem or bead area, and inspect the rim tape for damage.
Maintenance tips and when to replace tires or TPMS
Effective tire pressure maintenance isn’t a one-off task. Regular checks help you identify slow leaks, worn tires, and degraded TPMS sensors. If you notice persistent readings that don’t align with your target, inspect the tire bead, valve core, and TPMS sensor for faults. Replace tires that show excessive wear, sidewall cracks, or uneven tread, and service TPMS components per the vehicle or bike manufacturer’s schedule. The Tire Pressure Tips guidance emphasizes building a routine around pressure checks for safer, more efficient riding in 2026 and beyond.
Real-world scenarios and best practices for 700x38c
Consider a weekend ride with a light backpack on smooth pavement versus a gravel day with mixed terrain. Start with a baseline pressure close to the manufacturer’s range and adjust based on feel: too soft lowers efficiency and increases pinch risk; too firm reduces grip and comfort. A practical habit is to carry a compact gauge and record each session’s numbers to notice trends over time. This data helps you optimize pressure for your weight, gear, and local road conditions.
Tools & Materials
- digital tire pressure gauge(Prefer gauge with 0-120 psi range and LCD display)
- air pump or compressor with gauge(Manual, floor, or portable pump works; ensure gauge reads in psi)
- vehicle owner’s manual or tire placard(Use exact manufacturer recommended pressure ranges)
- soap solution or spray bottle(For quick leak checks if you suspect slow leaks)
- tire pressure chart or app(Reference for quick lookups and notes)
Steps
Estimated time: 15-25 minutes
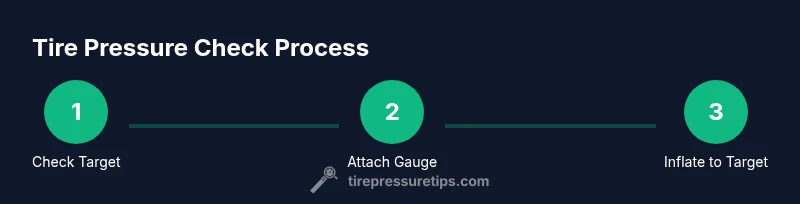
- 1
Find target pressure
Locate the recommended PSI for 700x38c tires on the sidewall or owner’s manual. Note whether the range differs by front or rear wheel and by load. Remember to use the same unit (psi) for consistency.
Tip: Double-check units and reference the correct tire when recording the target value. - 2
Prepare valve and gauge
Remove the valve cap, inspect the valve stem for damage, and attach the digital gauge securely. Ensure a tight seal to avoid deflection errors.
Tip: Wipe the valve tip clean before attaching to improve accuracy. - 3
Attach pump and inflate to target
Connect your pump or compressor to the valve and add air gradually. Stop when the gauge reads within the target range and avoid forcing air quickly, which can heat the air and skew readings.
Tip: Inflate gradually and re-check after a brief moment of stabilization. - 4
Check both tires
Repeat the measurement for the front and rear tires. Keep the pressures within the recommended range on both tires; inconsistent pressures can affect handling.
Tip: If one tire reads low, inflate that tire first to the lower required value. - 5
Recheck after a ride
Tire pressure changes as tires warm up during a ride. Recheck after 5-10 miles of riding and adjust if necessary to the target range while cold.
Tip: Record the cold reading for future reference. - 6
Document the target PSI
Note your target PSI, load, and typical riding conditions. This makes it quick to re-check before future rides.
Tip: Keep a small notebook or digital note for reference.
Frequently Asked Questions
What is the correct PSI for 700x38c tires?
The correct PSI varies by tire model, load, and tire type (clincher vs tubeless). Check the sidewall or the vehicle manual for the exact range, and adjust based on rider weight and terrain.
Check the sidewall or owner's manual for the exact range, then adjust for your weight and riding terrain.
Why does TPMS show low pressure after inflation?
TPMS can lag or be inaccurate if the tire is still warm. Recheck with a gauge after the tire has cooled and confirm within the target range.
TPMS can lag; recheck with a gauge once the tire has cooled.
Can I use nitrogen for bike tires?
Nitrogen is not necessary for bicycle tires. Regular air is fine and more accessible for most riders.
Nitrogen isn't required for bike tires; regular air works well.
Should I inflate tires when they are cold or warm?
Always measure and set tire pressure when tires are cold for the most accurate reading; warm tires read higher.
Measure when cold for accuracy; warm tires read higher.
What happens if I overinflate?
Overinflation can cause a harsher ride, reduced grip, and increased risk of punctures on rough surfaces. Bring pressure back to the recommended range.
Overinflation can worsen ride and grip; adjust to recommended range.
How often should I check tire pressure?
Check at least weekly and before long rides, especially if you carry gear or ride in varying temperatures.
Check at least weekly and before long rides.
Do tubeless tires require different pressure checks?
Tubeless setups can operate at slightly lower pressures for comfort, but always follow the tire manufacturer’s guidance.
Tubeless still follows the tire's guidance; check the label.
Watch Video
What to Remember
- Check cold tires for accurate readings
- Always reference the sidewall or manual for target PSI
- Recheck after a ride to account for temperature changes
- Use a reliable gauge and keep records for consistency