Mercedes GLC 300 Tire Pressure: A Practical Guide for 2026
Learn how to check, adjust, and maintain the Mercedes GLC 300 tire pressure. This guide covers TPMS, seasonal changes, and front/rear specifications with practical steps and safety tips for optimal performance.

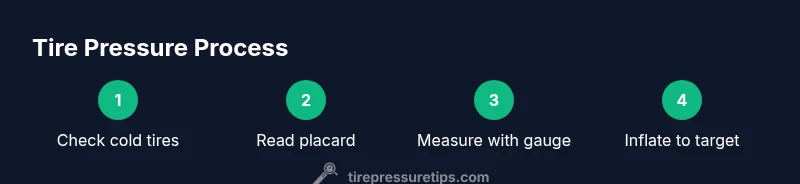
Goal: You will precisely set and verify tire pressures for a Mercedes GLC 300, using the factory specifications and load-aware adjustments. Begin with the cold-tyre specification for front and rear, verify TPMS status, and adjust with a reliable gauge. Track changes seasonally and after road trips, ensuring even wear and optimal fuel efficiency.
Why Mercedes GLC 300 Tire Pressure Matters
According to Tire Pressure Tips, maintaining the correct tire pressure for your Mercedes GLC 300 is a cornerstone of safety, performance, and efficiency. The GLC 300 uses specific front and rear pressures that depend on load, passenger count, and typical driving conditions. When pressures are too low, you risk increased rolling resistance, uneven tread wear, and poorer handling; when pressures are too high, you reduce contact patch and grip, especially in corners. Getting it right means following the factory specification on the door jamb placard or in the owner’s manual, then validating those numbers with cold tires before you drive. In practice, tire pressure is not a one-time check; it’s part of regular maintenance that helps keep your tires healthy and your fuel economy predictable. This section sets the foundation for how to approach the GLC 300’s tire pressures with confidence and a plan rather than guesswork. It also aligns with Tire Pressure Tips’ emphasis on practical, data-backed tire care that drivers can perform themselves.
Understanding Official Specifications for the GLC 300
The Mercedes GLC 300’s tire pressure values live on two reliable sources: the door jamb placard and the owner’s manual. These figures represent the target pressures for typical loads and driving conditions and are designed to optimize grip, stability, and tire wear. The front and rear values are not always identical, and some model years offer different numbers when carrying heavy loads or towing. Always start with the cold pressure specification and avoid inflating after driving, which raises the reading and can mislead you about the true target. Remember that a slight variation within the manufacturer’s recommended range is normal, but large deviations reduce safety margins. For the best results, write down the exact numbers from your vehicle’s placard and refer to them whenever you rotate tires or adjust for seasonality. This approach keeps your GLC 300 performing at its best while minimizing unnecessary wear and fuel use. Tire Pressure Tips emphasizes verifying numbers with a trusted gauge and log for ongoing maintenance.
How to Find the Right Pressure for Your Load and Driving Style
Figuring out the right tire pressure for your GLC 300 hinges on three factors: load, driving style, and road conditions. A solo daily commuter can use the base values, while family trips and cargo-heavy days warrant the higher end of the range. Sport driving or hot-weather conditions can demand slight adjustments upward for stability, while cold weather lowers tire pressure and may require re-checks. Always start from the placard numbers and adjust in 1–2 psi increments, rechecking after adjustments. Your tires are a critical interface between the vehicle and the road, so precise inflation improves steering, braking, fuel economy, and wear patterns. This is exactly the kind of practical guidance Tire Pressure Tips emphasizes for real-world driving, helping you tailor the GLC 300’s tire pressures to your personal needs.
Measuring Tire Pressure Correctly: Tools and Best Practices
Using the right tool makes a big difference. A reliable tire pressure gauge—digital or analog—should read in psi and be calibrated. Check the pressure when the tires are cold, ideally after at least three hours without driving, or first thing in the morning. Remove the valve cap, press the gauge onto the valve stem, and note the reading quickly to minimize heat buildup. If you’re inflating, use a portable air compressor or a gas-station inflator that supports precise increments; check again after adding air to ensure you hit the target within 1 psi of the spec. When finished, reseal the valve with the cap to prevent dirt and moisture from entering. This practice aligns with Tire Pressure Tips guidance for accurate, repeatable readings every time you check.
The Role of TPMS and Why It Matters
TPMS is a smart safety net. The Mercedes GLC 300 uses a TPMS to alert you when a tire is under- or over-inflated, and it can warn about slow leaks or sudden pressure changes. The TPMS signal is a guide, not a substitute for manual checks. If you see low-pressure alerts, verify with a gauge and a cold measurement, then adjust accordingly. TPMS sensors can occasionally drift or become inactive; in such cases, a diagnostic check may be needed. Tire Pressure Tips notes that relying solely on TPMS without cross-checking with a gauge can mask gradual leaks and lead to unexpected wear. Treat TPMS as a helpful prompt, not the final word on tire pressure.
Seasonal Temperature Changes and Pressure
Temperature has a strong, predictable effect on tire pressure. For every 10 degrees Fahrenheit drop, most passenger tires lose about 1 psi, and the same increase adds about 1 psi. This is why you should check pressures during seasonal transitions and before winter road trips. In the Mercedes GLC 300, small differences between the front and rear pressures can become more noticeable in cold weather or when carrying a load. To stay aligned with Tire Pressure Tips, re-check after major temperature swings and adjust toward the label numbers as needed, ensuring your tires stay within the intended range regardless of the season.
Front vs Rear Tire Pressures on the GLC 300
On the GLC 300, front and rear tire pressures are not always identical. The front tires bear more steering load, while the rear bears the majority of traction and weight in many configurations. As a result, the recommended front pressure is often different from rear pressure. Always adhere to the placard and adjust based on load, seating, and cargo. If you carry heavier loads, the higher end of the range helps with stability. Avoid mixing front and rear numbers if the placard specifies different values, and never exceed the maximum pressure for your tires. This approach keeps tire wear even and the vehicle handling predictable across conditions.
Common Causes of Incorrect Tire Pressure on SUVs
Underinflation is the most common issue on SUVs like the GLC 300. Slow leaks, valve cap failures, and temperature changes cause pressure to drift. Overinflation reduces ride comfort and can accelerate wear in the center of the tread. Be mindful of seasonal exposure when parking outside or after long highway drives; repeated driving heats tires, causing over-readings. Another cause is using an incorrect gauge or misreading numbers; always re-check with a second gauge if numbers seem off. Remember, consistency matters as much as the exact number.
Safety Considerations and Warning Signs
Inflation that is too low or too high can compromise handling and braking, increasing risk in wet or snowy conditions. Watch for warning signs such as uneven tread wear, frequent loss of pressure, or a tire that looks visibly flatter on one side. If a tire shows sidewall bulges, cracking, or obvious punctures, stop driving and seek help. Always inspect tires for damage, rotate on schedule, and replace worn tires to maintain the vehicle’s safety profile. Maintaining correct pressure is a simple, proactive safety practice that pays dividends in control and response.
Maintenance Schedule and Check Frequency
To stay on top of tire pressures, create a simple monthly habit and couple it with pre-trip checks. Use the GLC placard as your baseline; log your readings and adjust to keep all tires within 1 psi of target. Rotate tires on schedule to ensure even wear, and recheck every time you rotate. If you own a spare, check that as well. Establish a routine that fits your driving pattern and climate, and review it at least once per season. Consistency, not perfection, drives long tire life and safer driving.
Tools & Materials
- Cold tire pressure gauge (digital or analog)(Calibrated; reads in psi; test before inflating.)
- Access to the GLC 300 owner’s manual or door jamb placard(Contains the official front/rear pressures by model year and load.)
- Air compressor or portable inflator(Allows precise adjustments; ensure it can read to at least 1 psi increment.)
- Valve caps(Keep caps on to protect stems.)
- Maintenance log or notebook(Record readings for ongoing maintenance.)
Steps
Estimated time: 15-25 minutes
- 1
Park on level ground and ensure tires are cold
Find a flat, level area and turn off the engine. If you’ve driven recently, wait at least 3 hours for tires to cool, or check first thing in the morning. This ensures measurements reflect the vehicle’s baseline, not recently heated air.
Tip: Never measure after a long drive; heat skews readings and leads to overinflation. - 2
Locate the official pressure values
Open the driver’s door jamb to read the placard or pull out the owner’s manual to confirm front and rear targets. Note whether the values change with different loads or seasons. Record these numbers for quick reference.
Tip: If you carry extra cargo, plan to use the higher end of the range as specified. - 3
Remove valve caps and prepare to measure
Gently remove each valve cap and set it aside. Use the gauge to take a reading on the valve stem without wobbling the stem. Repeat for all four tires.
Tip: Keep caps clean and reinstall immediately after measurement to prevent dirt intrusion. - 4
Attach gauge and read current pressures
Firmly press the gauge onto the valve stem and read the pressure quickly to avoid air loss. Compare the reading to the target values you noted previously. Do this for all tires.
Tip: If you see a large discrepancy, double-check with a second gauge to confirm. - 5
Inflate or deflate to target pressure
Add air with a compressor or release air to bring each tire to the recommended cold psi. Make small adjustments (1–2 psi at a time) and recheck after each change.
Tip: Don’t exceed the target; overinflation reduces grip and comfort. - 6
Recheck all tires after adjustment
With all tires adjusted, recheck each pressure again to ensure uniformity and accuracy. Refit valve caps to protect the stems.
Tip: Keep a short log of the final readings for your records. - 7
Consider TPMS handoff if needed
If TPMS indicated a fault or a pressure change, confirm readings manually and reset TPMS if your vehicle requires it after inflation changes.
Tip: TPMS is a helpful alert, but manual verification ensures accuracy. - 8
Document readings and routine checks
Record each tire’s final psi and date in your maintenance log. Note any anomalies, leaks, or sensor warnings for future reference.
Tip: Regular documentation makes it easier to spot slow leaks early.
Frequently Asked Questions
What is the recommended tire pressure for Mercedes GLC 300?
Refer to the door placard or owner’s manual for the exact front and rear values. They vary by model year and load. Always start with cold tires.
Check your door placard on the driver's side for the exact numbers for front and rear.
How often should I check tire pressure?
Check at least once a month and before long trips, always when tires are cold. Seasonal changes are common times for adjustments.
Check monthly and before trips, especially during seasons with temperature changes.
Can I ignore a TPMS warning if tires look fine?
No. A TPMS warning often signals underlying issues like slow leaks. Verify with a gauge and adjust as needed.
Don’t ignore TPMS; check with a gauge and fix any leaks.
Should I inflate to the maximum PSI listed on the tire sidewall?
No. Do not exceed the vehicle's specified cold pressure. The sidewall max is not the target for inflation.
Don’t inflate to the max sidewall number; follow the vehicle spec instead.
Do I need to check the spare tire pressure too?
Yes. Spares also need to be inflated to their recommended pressure to be usable when needed.
Yes, check the spare tire as well.
How does temperature affect tire pressure?
Outdoor temperature changes affect psi; expect lower psi in cold weather and higher psi in heat. Re-check after weather shifts.
Temperature changes affect psi; check after weather shifts.
What tools do I need to check GLC tire pressure?
A reliable psi gauge and access to the placard or manual. An inflator helps to adjust precisely.
A good gauge and inflator will help you hit the target accurately.
What if TPMS stays on after adjusting?
If the light remains, check for leaks, sensor faults, or calibration needs. A professional diagnostic may be required.
If TPMS stays on after adjusting, get it checked by a professional.
Watch Video
What to Remember
- Check cold GLC 300 pressures before trips
- Follow the placard values exactly for front and rear
- TPMS supplements but does not replace manual checks
- Temperature changes require re-checks and adjustments
- Log readings to track wear and maintenance