Tire Gauge Guide: How to Check Tire Pressure Safely in 2026
Learn to use a tire gauge for accurate tire pressure readings, understand gauge types, and maintain proper tire pressure for safety, fuel efficiency, and tire longevity in 2026.

Using a tire gauge correctly ensures safe handling, better fuel efficiency, and even tire wear. In this guide, you’ll learn how to pick the right gauge, locate the recommended pressures, and perform a cold-inflation check on all four tires. We cover digital and analog options, plus common mistakes to avoid, with guidance from Tire Pressure Tips.
Why a tire gauge matters for safety and performance
A tire gauge is a simple tool, yet its impact on safety and vehicle performance can't be overstated. The correct tire pressure affects handling, braking, fuel economy, and tire wear. Underinflated tires heat up and wear on the edges, while overinflated tires ride on a smaller contact patch and wear the center of the tread. Regular checks help you catch slow leaks from nails, punctures, or degraded valves before they cause a blowout or uneven wear patterns. According to Tire Pressure Tips, the team’s 2026 analysis shows that drivers who check their pressures regularly see safer braking, more even wear, and improved fuel economy over the life of the tires. To start, know where to find the recommended pressures: look for the placard on the door jamb or consult the owner’s manual. Having a reliable tire gauge in your glove box makes it easy to stay proactive, even on busy days. In short, a small habit with a tire gauge yields big benefits for safety and cost savings over time.
Types of tire gauges and how to choose
Tire gauges come in three main families: analog dial gauges, pencil (stick) gauges, and digital gauges. Analog dial gauges feature a rotating needle on a dial that you read against a scale; they are durable and inexpensive but can be harder to read precisely in low light. Pencil gauges are compact, affordable, and rugged, but require careful alignment to read accurately. Digital gauges display a numeric reading on an LCD screen and are typically the easiest to read, with some models storing last readings. When selecting a gauge, look for accurate readings within roughly one to two pounds per square inch (psi), clear units (psi or kPa), and a sturdy nozzle that seals well on the valve stem. For most drivers, a digital gauge offers ease of use, while an analog dial gauge can thrive in more rugged environments. Ensure the gauge reads the same units as your vehicle placard and that it doesn’t leak air when you remove it. If you carry multiple gauges, keep batteries fresh in the digital model and a small brush to clean the valve stem.”,
Tools & Materials
- Tire gauge(Digital or analog; ensure it’s in good working order)
- Vehicle door jamb placard or owner's manual(Used to verify recommended pressures)
- Replacement batteries(For digital gauges; keep fresh)
- Notebook or app to log readings(Record date, tire, reading, location)
Steps
Estimated time: 20-30 minutes
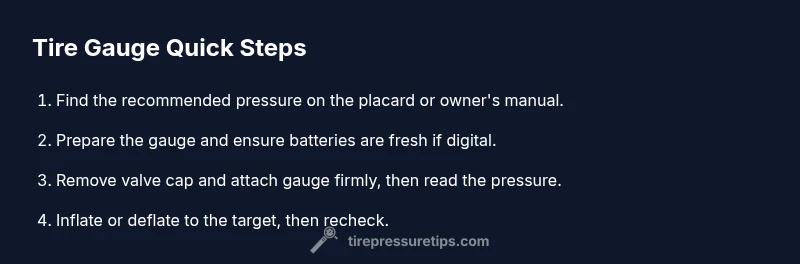
- 1
Find the recommended pressure
Locate the target pressures on the door jamb placard or in the owner's manual. Note whether the specification uses psi or kPa and whether it applies to front, rear, or spare tires. This is your target, so write it down if helpful.
Tip: Always start with the cold-tire value for accuracy. - 2
Prepare your gauge
Inspect the gauge for cleanliness and ensure it’s readable. If you use a digital model, check the battery level and test the gauge on a known pressure if you have a reference.
Tip: Keep the gauge in a clean, dry pocket of the glove box. - 3
Remove the valve cap
Unscrew the valve stem cap and set it aside where it won’t get lost. A dirty valve cap or stem can affect the seal and give an inaccurate reading.
Tip: Place the cap on your finger or in a small container to avoid losing it. - 4
Attach the gauge and take a reading
Press the gauge squarely onto the valve stem and read the measurement immediately. Avoid wiggling the gauge, which can leak air and skew the result.
Tip: Ensure the stem and valve area are clean to prevent air leaks. - 5
Interpret the reading
Compare the gauge reading to your target pressure. If underinflated, prepare to add air gradually; if overinflated, plan to release air slowly until you reach the target.
Tip: Read quickly to minimize air loss during measurement. - 6
Inflate or deflate to target
If underinflated, add air in small increments and recheck after each addition. If overinflated, release air slowly and recheck. Stop as soon as you reach the target—overcorrecting is common.
Tip: Use short bursts of air and recheck each time. - 7
Repeat on all tires
Proceed to each tire (and spare if applicable) using the same steps. Consistency across tires improves handling and wear.
Tip: Don’t skip the spare if you routinely drive with a full-size spare. - 8
Recheck after adjustments
After inflating or deflating, remeasure each tire to confirm they’re at the target pressure and that readings are stable.
Tip: If numbers drift, recheck the gauge calibration or use a second gauge to verify. - 9
Finish and log your readings
reinstall valve caps and log the readings with date, tire, pressure, and ambient temperature for future reference.
Tip: Regular logs help you spot slow leaks or changes over time.
Frequently Asked Questions
What is a tire gauge and why do I need one?
A tire gauge measures the air pressure inside a tire. It helps you ensure the tire is inflated to the recommended level, improving safety, fuel efficiency, and tire wear.
A tire gauge measures tire pressure to keep you safe and save on wear and fuel. Use it to verify the correct level on each tire.
How often should I check tire pressure?
Check tire pressure at least once a month and before long trips, preferably when tires are cold.
Check your tires at least monthly and before trips, when they’re cold.
Can I check tire pressure when tires are hot?
No. Hot tires show higher pressure readings due to heat. Wait for tires to cool before testing for accuracy.
No—check when cold for an accurate reading after the tires have cooled.
Is digital better than analog for tire gauges?
Digital gauges are often easier to read and can store readings; analog gauges are simple and durable. Either can be accurate if calibrated.
Digital is easier to read, but both can be accurate if cared for.
What if the reading is higher than recommended?
Deflate gradually using the valve stem and recheck. If readings stay high, recheck gauge calibration or try another gauge.
If it’s high, let air out slowly and recheck; if it won’t come down, test your gauge.
How do I reset TPMS after adjusting tire pressure?
Most vehicles reset TPMS automatically after driving; if not, consult the owner’s manual for a reset procedure.
Many cars reset TPMS automatically after driving; check the manual if yours doesn’t.
Watch Video
What to Remember
- Check cold tires for accuracy and consistency
- Use a tire gauge to verify pressure on all tires
- Inflate/deflate to manufacturer-recommended values
- Recheck readings after any adjustment
- Log readings to track tire health and performance