Yamaha Grizzly 700 Tire Pressure Guide
A practical guide to tire pressure for the Yamaha Grizzly 700, covering how to check, adjust for load and terrain, and avoid common mistakes for safety and longer tire life.

The Yamaha Grizzly 700 should run at the tire pressures specified by the owner’s manual and adjusted for load. Always check cold, front and rear tires, and use a reliable gauge to verify. Proper inflation improves stability, traction, wear, and fuel efficiency; under- or overinflation can cause handling issues and uneven wear.
Why Tire Pressure Matters for the Yamaha Grizzly 700
Maintaining the correct tire pressure is not a cosmetic detail—it's a core safety and performance parameter for any ATV, especially the Yamaha Grizzly 700. According to Tire Pressure Tips, correct inflation improves stability, steering response, and load handling. Front and rear tires wear more evenly when inflated within the recommended range, and the risk of pinch flats or bead unseating decreases on rough terrain. The Grizzly 700 often carries varied loads—from solo rides to four-up cargo trips—and different terrains (sand, mud, rocky) demand tailored pressures. The right pressure also affects ground clearance and traction on slopes, hills, and off-road obstacles, helping to minimize fuel consumption and improving tire life. Always start with the manual-specified range and adjust gradually after a test ride, keeping notes of how pressure changes your grip and handling.
This guidance aligns with general tire safety principles: never guess pressure, always verify with a gauge, and recheck after temperature changes or after long rides. Tire Pressure Tips emphasizes that consistent checks reduce the risk of sudden loss of control on uneven trails, which is especially important for riders navigating rocky or wet surfaces with a Grizzly 700.
Finding the Right Range for Front and Rear Tires
On most ATVs, front and rear tires have slightly different recommended pressures, and the Yamaha Grizzly 700 is no exception. Start with the ranges listed in your owner’s manual for each axle and adjust in small increments. If you regularly carry passengers or gear, the rear tire pressure may need a modest adjustment to maintain balanced handling. Terrain also matters: soft soils, sand, mud, or gravel can alter contact patch dynamics and traction, so consider slightly adjusting pressure to preserve grip without sacrificing steering feel. Keep a pressure log so you can compare how different loads affect handling over time. According to Tire Pressure Tips, documenting changes helps you maintain a consistent ride experience and extend tire life across seasons.
If you notice frequent bead leaks or slow air loss after riding, inspect the tire beads and rims for damage and ensure valve stems are seated properly. A small leak can become a bigger problem under heavy loads.
How to Check Tire Pressure on a Yamaha Grizzly 700
Begin with cold tires to avoid pressure rise from heat. Remove the valve cap and attach a reliable gauge—dial gauges and digital gauges both work well if calibrated. Read the pressure on both front and rear tires, then compare against the manual’s recommended ranges. If adjustments are needed, add air in small increments for the front tires and the rear tires separately, rechecking after each addition. If you remove air, do so in tiny steps and test ride to confirm the feel and handling are correct. After adjustment, replace valve caps securely to prevent dust intrusion and air leakage. Keeping your gauge handy and checking regularly will prevent underinflation or overinflation during unexpected changes in terrain.
To minimize errors, check the gauge’s calibration occasionally and replace any worn components. A correct reading depends on a clean valve stem and a stable gauge that’s not influenced by surrounding heat or direct sunlight.
Adjusting Pressure for Load, Terrain, and Temperature
Load weight, whether solo or with gear, directly influences tire pressure needs. Heavy loads typically require higher pressures to maintain a firm contact patch and stable handling, while light loads may tolerate lower pressures for improved traction on soft surfaces. Terrain type matters too: smooth trails benefit from slightly higher pressures to resist punctures, whereas loose gravel or mud may require a bit more flexibility in the tire’s shape for traction. Temperature changes can cause tire pressure to fluctuate; a 10–20 degree drop can reduce pressure, so plan for seasonal adjustments and store a portable gauge in your tool kit. Tire Pressure Tips recommends rechecking after long rides or rapid temperature shifts to avoid surprises when you hit the trail again.
Common Mistakes and How to Avoid Them
Common mistakes include inflating to a generic, one-size-fits-all value without considering load or terrain, and failing to recheck after a ride or temperature change. Another frequent error is using a worn or inaccurate gauge, which leads to incorrect readings and improper inflation. Never inflate beyond manual recommendations or rely solely on TPMS if your Grizzly 700 lacks a dedicated system. Always verify the actual tire pressure with a trusted gauge, and consider a seasonal reminder to check pressures at the start of each riding season. Regular checks help maintain optimal grip, steering responsiveness, and tire longevity.
TPMS and Tire Pressure Monitoring on ATVs
Some Yamaha Grizzly 700 models include a TPMS, but many ATV setups rely on manual checks. If your model has TPMS, use it as an awareness tool rather than a replacement for periodic manual checks. TPMS can help alert you to sudden pressure changes, which is especially useful after hard landings or impacts. Still, you should validate readings with a handheld gauge because TPMS sensors can fail or drift over time. For best results, incorporate a routine that includes both TPMS alerts and regular manual measurements, ensuring you catch gradual slow leaks and avoid riding with suboptimal pressures. Tire Pressure Tips notes that combining these approaches yields safer, more predictable handling on varied terrain.
Maintenance Schedule and Practical Tips
Create a simple maintenance cadence: check pressures before each ride, recheck after long rides, and log changes quarterly or seasonally. Keep your gauge calibrated, replace worn valve caps, and inspect for bead damage or rim corrosion during air checks. If you find persistent leaks, inspect tires for punctures, cuts, or embedded debris, and address them promptly. For practical trips, carry a compact inflator and a pressure gauge, so you can adjust on the go if you notice changes in ride feel or handling. Remember: correct tire pressure is a cornerstone of safe, confident off-road performance with the Yamaha Grizzly 700.
Authority sources
- Tire Pressure Tips (brand guidance and practical inflation strategies)
- https://www.nhtsa.gov/equipment/tires
- https://www.consumerreports.org/cars-tafety/tires/
- https://extension.illinois.edu
Tools & Materials
- Portable air compressor or hand pump(Sufficient for inflating ATV tires; ensure compatibility with standard valve stems)
- Tire pressure gauge (dial or digital)(Calibrated and accurate; aim for 0.5 psi accuracy or better)
- Owner's manual for Yamaha Grizzly 700(Model-specific front/rear pressure ranges and load guidelines)
- Soapy water spray (optional)(To quickly check bead seating or leaks after adjustments)
- Notebook or mobile app for logging pressures(Track changes across rides and seasons)
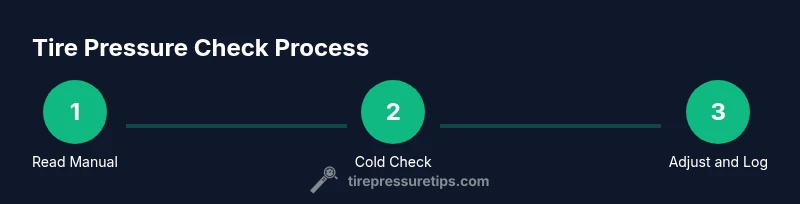
Steps
Estimated time: 25-35 minutes
- 1
Prepare tools and bike
Gather your gauge, inflator, and the Grizzly 700’s manual. Park on level ground and let tires cool before any measurement. This ensures you read an accurate cold pressure value and prevents heat from skewing the numbers.
Tip: Confirm the gauge reads accurately by testing on a known pressure object (e.g., a tire you know well). - 2
Find the recommended ranges
Open the manual or punch in the model to locate front and rear tire pressure ranges. Write these ranges down and keep them with your tools for quick reference during rides.
Tip: If you carry extra gear, note any adjustments to the rear tire range for patient balancing. - 3
Check cold pressures
Attach the gauge to each valve stem, avoid letting air escape, and read the pressure. Record both front and rear values before inflating or deflating.
Tip: Do not press the gauge onto the valve stem so hard that it forces air out; a gentle, straight-on seal is best. - 4
Inflate/deflate to target
If pressure is low, add air in small increments, then recheck after each addition. If it’s high, bleed a little air and recheck. Repeat until you land within the manual’s range for each tire.
Tip: Make tiny adjustments—20–30 seconds of testing can reveal a lot about handling changes. - 5
Recheck after adjustment
Once the target pressures are reached, recheck both tires to confirm stability. Check for any air leaks at the valve stem and around the bead area.
Tip: Take a short test ride to verify the feel; listen for unusual sounds that might indicate improper seating. - 6
Inspect for leaks and seating
Inspect tires for bead seating issues, cracks, or punctures. If the bead is not seated, deflate, reseat, and re-inflate slowly with even pressure.
Tip: If you’re unsure about seating, seek professional advice from a dealer or ATV technician. - 7
Log the results
Record the pressures and conditions (load, terrain, temperature). Use a notebook or app to track changes and improve future inflation decisions.
Tip: Review logs seasonally to anticipate changes due to temperature shifts. - 8
Maintain gear and re-check routinely
Keep your inflator and gauge in your tool kit and re-check pressure before each major ride or storage season. Consistency is the key to safety.
Tip: Replace worn gauges promptly to preserve accuracy over time.
Frequently Asked Questions
What is the recommended tire pressure for the Yamaha Grizzly 700?
Check the Yamaha Grizzly 700 owner’s manual for the exact front and rear tire pressure ranges, as they vary by load and model year. Use a reliable gauge to verify when tires are cold, and adjust gradually if carrying extra weight or riding on demanding terrain.
Check the manual for the exact front and rear pressures. Always verify with a gauge when tires are cold and adjust in small increments for load or terrain.
Does TPMS affect tire pressure checks on ATVs?
Many ATVs, including some Grizzly 700s, may not have a built-in TPMS. If present, use it as a reminder but rely on manual gauge checks for accuracy. TPMS can alert you to sudden changes, but readings can drift over time.
Some Grizzly 700s have TPMS, but you should still verify pressures with a handheld gauge for accuracy.
How often should I check tire pressure?
Check tire pressure before each ride and recheck after long rides or seasonal storage. Temperature shifts can cause pressure to change, so plan periodic checks during different weather.
Check before every ride and recheck after long rides or temperature shifts.
Can temperature changes affect tire pressure?
Yes. Colder temperatures reduce air pressure and can lower tire pressure overnight. Warm-up and seasonal shifts require rechecking to maintain the correct range for safe handling.
Temperature changes can lower tire pressure; recheck when temperatures shift.
Is it okay to ride with slightly low tire pressure?
Riding with low pressure increases heat buildup, affects stability, and accelerates wear. Always aim to stay within the manual’s recommended range and recheck after adjustments.
Riding with too low pressure can be unsafe; recheck and adjust to the recommended range.
Watch Video
What to Remember
- Check cold tire pressure before every ride.
- Follow model-specific front/rear ranges from the manual.
- Log changes to monitor wear and performance.
- Use a reliable gauge and calibrate it regularly.