Tire Pressure Can Am: Practical Guide for Can-Am Off-Road Vehicles
A comprehensive, step-by-step guide on checking and adjusting tire pressure for Can-Am off-road vehicles, covering TPMS, terrain effects, and safety tips from Tire Pressure Tips.

According to Tire Pressure Tips, this steps-based guide explains tire pressure can am practices for Can-Am off-road vehicles, including how to check readings, adjust to model-specific specs, and interpret TPMS alerts. You’ll learn tools, step-by-step actions, and safety tips to keep your Can-Ams performing at their best. From checking pressures at home to diagnosing low readings on rugged terrain, this format keeps you focused. Follow the steps, and you'll reduce tire wear and improve traction.
Can-Am Tire Pressure Essentials
Tire pressure is a foundational parameter that affects how your Can-Am handles on every trail. For Can-Am owners, the goal is to balance grip, ride comfort, and tire durability. Pressure that is too high reduces contact patch on loose surfaces, leading to reduced traction and a harsh ride. Pressure that is too low increases tire flex, generates excess heat, and can cause bead damage on rough terrain. Start by locating the official pressure spec for your specific model and mounted tire size—this is usually on the door jamb, inside the owner's manual, or on a tire placard. When you can't locate the spec, contact a dealer or use Tire Pressure Tips as a cross-check reference. Also consider the intended use: recreational riding on sand demands different tuning than aggressive trail or rock crawling. Always verify there is no tire damage, a puncture, or a slow leak before inflating.
Differences by Model and Terrain
Can-Am designs expectations around large, high-torque machines and rugged terrain. Front and rear tires may have different load-bearing requirements, and the optimum pressure shifts with load, speed, and intended terrain. On sandy or soft surfaces, lower pressure can improve floatation, but not so low that bead seating is compromised. On rocky trails or hard-packed surfaces, higher pressures help bead retention and responsive steering. Additionally, terrain type, whether you're riding solo or with a passenger and gear, influences the overall pressure target. Always check your model's official guidance for front vs. rear tires and adjust within that range as needed. Record your settings after a ride so you can compare changes over time and avoid drift.
TPMS and Reading Variances
Most Can-Am vehicles use a Tire Pressure Monitoring System (TPMS) to alert you when a tire is under-inflated or over-inflated. TPMS readings can be influenced by temperature, recent driving, and even the time since last inflation. Rely on a physical gauge to verify TPMS numbers when possible, and use them as a safety check rather than a sole source of truth. If a TPMS alert persists after you adjust, inspect the tire for punctures, bead leaks, or rim damage. Remember that TPMS sensors can fail or become inaccurate, so a manual check is essential as a backup. By combining TPMS data with a precise gauge reading, you gain reliable insight into your Can-Am's tire health.
Tools and Preparation
Before you begin, assemble reliable tools and a clear workspace. A quality digital tire pressure gauge provides a precise reading, and a portable air compressor or hand pump lets you adjust on-site. If you workshop inflate, a lift or stable stand helps you access all four tires safely. Keep a log notebook or smartphone note to track pressures across sessions, especially if you switch between terrain or seasons. Have the Can-Am owner's manual or official spec sheet handy to confirm target pressures for front and rear tires. Finally, wear gloves to keep hands dry and protect the rims from accidental damage while removing valve caps.
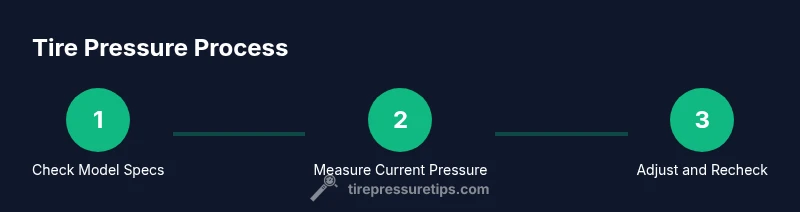
Step-By-Step Preview
Learn the sequence of actions you’ll perform on a typical inflation check. First, park on level ground and switch off any accessories. Second, locate the valve stems and remove the valve caps. Third, measure current pressures with your gauge, comparing to the model’s recommended range. Fourth, add or release air as needed using your pump, being careful not to exceed the maximum. Fifth, recheck all four tires and note any recurring pressure drift. Sixth, replace valve caps and store equipment. This quick preview helps you stay organized during actual inflation work.
Terrain-Specific Inflation Techniques
Different off-road scenarios call for distinct pressure settings. For soft, flowing surfaces like sand, you may want a lower pressure to increase surface area and reduce slip. For wet, muddy trails, you may find benefits from moderate deflation to improve traction while preventing overheating. For rocky or cobbled terrain, maintaining a robust pressure reduces risk of pinch flats and bead damage. In all cases, use the model's recommended range as your baseline and adjust in small increments, such as 1–2 psi, while observing how the vehicle responds. Remember that Can-Am vehicles carry serious power, and tire behavior directly affects handling and control.
Temperature and Seasonal Effects
Ambient temperature and recent driving cycles influence tire pressure. Air expands when hot and contracts when cold, so a pressure reading can shift with changing weather, dawn or dusk, and after long highway runs. If you store a Can-Am indoors, check pressures when the tires are cold to avoid inflated readings. When you’re planning seasonal shifts, re-check pressure after significant temperature swings or after you return from a long ride in cold or hot conditions. Consistency matters for reliable traction and tire life.
Safety, Maintenance, and Long-Term Care
Regular pressure checks are part of proactive maintenance. Inflate within the manufacturer’s recommended range and avoid gapping that forces an underinflated tire or overinflated bead. Use a proper gauge and avoid inflating using hand or foot pumps without safety stops. Periodically inspect tires for wear, cuts, and embedded objects, and replace tires that show irregular wear patterns. A good habit is to check pressure before every ride if you ride frequently, and especially before long trips where tire heat will accumulate. Keeping tires at the right pressure reduces heat buildup, improves handling, and extends tire life.
Common Pitfalls and Quick Fixes
Don’t inflate by guesswork, and don’t rely solely on the visual appearance of tires. Common mistakes include over-deflating due to fear of damage, failing to recheck after a ride, and ignoring slow leaks. Quick fixes include rechecking after inflation, testing with a cold measurement prior to first ride, and confirming valve caps are present and tight. If a tire feels soft or shows unusual wear after a ride, re-check immediately and inspect for punctures or bead leaks before riding again.
Tools & Materials
- Digital tire pressure gauge(Choose a gauge with a wide measurement range and fast responsiveness)
- Portable air compressor or hand pump(Ensure it can reach at least the model's max tire pressure)
- Can-Am owner's manual or official spec sheet(Locate front/rear tire pressure specs for your model)
- Valve-cap removal tool or hands(Needed if caps are difficult to remove by hand)
- Notebook or digital log(Record pressures and terrain/season context)
Steps
Estimated time: 15-25 minutes
- 1
Park and prepare
Find a level, dry surface and apply the parking brake. Turn off accessories that could affect readings. This ensures the tires are in a stable state for an accurate measurement.
Tip: Always measure when tires are cold for the most accurate pressure. - 2
Find the spec
Consult the Can-Am model manual or tire placard to identify recommended front and rear pressures. If a spec sheet is unavailable, use Tire Pressure Tips as a cross-check reference but prioritize the official source.
Tip: Note any weight or cargo that may shift the target pressure. - 3
Remove valve caps and measure
Carefully remove each valve cap and attach the gauge. Take a reading for each tire, recording the numbers for later comparison with the model spec.
Tip: Do not lose valve caps; they protect against leaks and dirt. - 4
Adjust as needed
If a tire is underinflated, add air in small increments; if overinflated, release air gradually and remeasure. Compare to the target range and aim for a comfortable midpoint within the recommended band.
Tip: Avoid an oversized adjustment; small increments yield stability. - 5
Recheck and verify
Re-measure all four tires after adjustments. Confirm consistency across axles and note any drift that may indicate a slow leak or valve issue.
Tip: If a tire reads consistently high or low after adjustment, inspect for leaks. - 6
Document and finalize
Reattach valve caps, log the final pressures, and note the terrain or season. This creates a reference for future checks and helps identify patterns over time.
Tip: Keep a simple log; it makes trend detection easier.
Frequently Asked Questions
Why is tire pressure important on Can-Am vehicles?
Tire pressure directly affects traction, handling, tire wear, and safety on Can-Am vehicles. Correct pressure helps the vehicle respond predictably on varied terrain and prevents bead damage from improper inflation.
Tire pressure matters for traction and safety on Can-Am vehicles; correct inflation helps handling and prevents bead damage.
What tools do I need to check tire pressure on Can-Am?
Use a reliable tire pressure gauge, a portable air source, and the vehicle’s spec sheet. Having a log to track readings over time improves consistency and makes it easier to spot leaks or drift.
You'll need a good gauge, a pump, and the Can-Am spec sheet; log readings to track changes.
Can TPMS replace manual pressure checks?
No. TPMS provides alerts, but it is essential to verify readings with a manual gauge, especially after inflation or season changes. Manual checks catch slow leaks TPMS might miss.
TPMS alerts are helpful, but you should also manually check pressures.
How often should I check tire pressure on Can-Am?
Check pressure before long trips and after significant temperature changes. Regular checks during seasonal changes or after heavy use help maintain performance and prevent tire damage.
Check before long trips and after big temperature changes, and during seasonal shifts.
Will tire pressure affect performance on rough terrain?
Yes. Proper pressure influences grip, stability, and heat generation on rough terrain. Too low or too high pressure can reduce traction and increase the risk of tire damage.
Correct pressure improves grip and stability on rough terrain.
Can I inflate tires to maximum PSI?
Inflating to maximum PSI is generally unsafe and unnecessary for Can-Am vehicles. Always stay within the manufacturer’s recommended range and adjust for terrain and load.
Don’t inflate beyond the recommended range; stay within it for safety.
Watch Video
What to Remember
- Verify pressures with a gauge, not TPMS alone.
- Terrain and temperature affect optimal pressure.
- Follow model-specific front/rear targets for Can-Am.
- Deflate/inflate in small steps and recheck.
- Maintain a log to monitor trends over time.