Tire Inflator with Digital Gauge: A Practical Guide
A complete guide to choosing, using, and maintaining a tire inflator with digital gauge. Learn how to read PSI, calibrate readings, and keep tires safe and efficient with practical tips from Tire Pressure Tips.

An inflator with a digital gauge is a handheld air compressor that displays tire pressure on a digital screen as you inflate. It combines measurement and inflation in one tool, eliminating the need for separate gauges and manual readings. With an easy-to-read display, auto shut-off options, and built-in pressure presets, it helps you inflate to the exact specification required by your vehicle.
Why a tire inflator with digital gauge matters
Maintaining correct tire pressure starts with a reliable gauge and a convenient inflator. A tire inflator with a digital gauge combines both tasks into a single handheld tool, so you can check and adjust tire pressure without fumbling with separate instruments. This integration reduces measurement errors and speeds up routine maintenance, making it easier to keep tires within the vehicle manufacturer's recommended range.
From a safety perspective, correctly inflated tires improve handling, braking, and traction in wet or icy conditions. Underinflated tires wear out faster, cause uneven tread wear, and increase fuel consumption. Overinflation can make the tires ride harsh and boost the risk of a blowout on rough roads. A digital gauge presents the pressure clearly, often with backlighting and a numeric readout that is easier to interpret than traditional analog gauges. For daily drivers and occasional road-trippers, the right inflator prevents guesswork when you spot a soft tire in the driveway or during a long commute.
According to Tire Pressure Tips, having a dedicated inflator with a digital display reduces the time spent checking pressure and minimizes the chance of inflating beyond the recommended value. The combination of speed, reliability, and user-friendly feedback supports consistent tire health, better fuel economy through proper inflation, and longer tire life. The investment pays off across seasons and driving conditions.
How to choose the right model for your needs
When shopping for a tire inflator with a digital gauge, there are several features that matter most for most drivers. First, gauge readability and unit options. Look for a multi-line LCD or backlit display that is easy to read in daylight or at night. Many models let you switch between psi, bar, and kPa, so you can match your local tire standards or a vehicle you own in another country. Second, consider the PSI range and accuracy. A wider range is helpful for larger tires or specialty equipment, while accuracy within a small tolerance matters if you inflate to precise specifications. Third, hose length and nozzle compatibility. A longer hose reduces the need to reposition the vehicle, and a universal valve nozzle fits most car tires, bikes, and some lawn equipment.
Durability matters in everyday life. If you carry the inflator in a glove box or trunk, choose a rugged case and a device that resists dust and moisture. Battery life and charging options are practical considerations for cordless models; some units ship with rechargeable batteries, charge cables, or USB power banks. Auto shut off when the target pressure is reached is a time saver and helps prevent overinflation. For families with multiple vehicles, look for shared settings and simple unit switching. Finally, compare warranties and customer reviews to gauge real world performance. A model with a clear balance of accuracy, ease of use, and durability tends to serve you well across seasons and different weather conditions.
Understanding the digital gauge: accuracy, units, and calibration
The digital gauge is the heart of these tools, translating air pressure into a numerical readout. Most devices display pressure in psi, but many models offer metric units like bar or kPa as well. If you drive different vehicles or travel in countries with different standards, unit flexibility saves you from misreading the gauge. Readability is more than digits; consider font size, contrast, and the position of the display so you can glance at the pressure without removing your gloves. Accuracy depends on the gauge's calibration and the inflator's seal to the valve stem. Some inflators include a built in calibration note or acknowledge a tolerance range; others rely on cartridge sensors. If you suspect inaccuracy, compare the reading against a trusted analogue gauge or a known good digital gauge. Regular calibration isn't always user accessible, but you can verify the device by inflating a tire to a known pressure and crosschecking with a second gauge. Temperature can affect readings during winter or in direct sun, so avoid measuring in extreme heat or cold and let the tire stabilize for a few minutes before trusting the result. In practice, aim for readings within a small margin of the target, depending on how precise you need to be for that tire type.
For most daily driving, a close reading plus a quick verification with a backup gauge is sufficient, but professional applications may demand tighter tolerances. Using a digital gauge consistently helps you establish a reliable personal baseline, which makes future checks faster and more accurate.
Practical use workflow: topping up a typical sedan tire
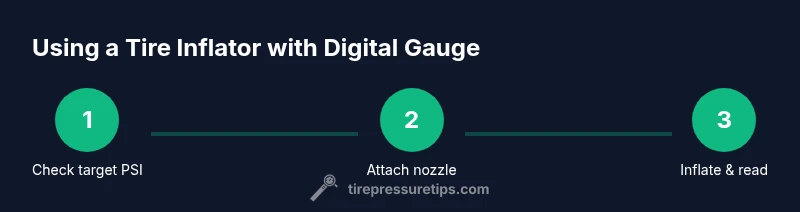
A practical workflow shows how quick and repeatable the process is with a digital gauge inflator. Start by ensuring the car is parked on a flat surface and the engine is off. Remove any visible dirt from the valve stem and wheel rim so the nozzle seals properly. Power on the inflator, select the unit you prefer, and set the target pressure to the vehicle manufacturer specification found on the door placard or manual. Attach the nozzle straight onto the valve stem and secure a tight seal. If your inflator has auto shut-off, gently approach the target pressure and allow the device to stop automatically. If not, monitor the readout and stop just short of the target, then recheck after the tire stabilizes. Repeat the same steps for the remaining tires, using the same target pressure for symmetry. When finished, disconnect all nozzles, check each tire one final time, and store the inflator in its case. For seasonal changes, re-check tires after a few days of driving to confirm stability. If you notice rapid pressure loss, inspect for leaks around the valve stem or tire bead. This workflow minimizes guesswork and keeps your tires in the best possible condition.
Tools & Materials
- tire inflator with digital gauge(Choose one with auto shut-off and backlit display; ensure a reasonable hose length)
- backup analogue tire pressure gauge(Useful to cross-check readings for accuracy)
- owner's manual or recommended tire pressures(Reference target PSI per tire on placard or manual)
- spare batteries or USB charger(Power source for cordless models)
- clean cloth(Wipe valve stems and nozzle seals prior to use)
Steps
Estimated time: 15-25 minutes
- 1
Prepare the setup
Park on a level surface, engine off, and remove any dirt from the valve stems. Gather the inflator, backup gauge, and the vehicle's tire pressure specification. This reduces leaks and ensures you read accurate values.
Tip: Double-check that you have the correct target pressure for each tire before starting. - 2
Attach the inflator to the valve stem
Place the nozzle squarely on the valve stem and secure a tight seal. If the connection feels loose, wipe both surfaces and reseat. A good seal prevents air leaks during inflation.
Tip: A wobbling nozzle will give false readings; ensure full contact with the valve stem. - 3
Set the target PSI and units
Choose the unit you prefer (psi, bar, or kPa) and input the vehicle-recommended pressure. If your inflator lacks a preset, pre-select the target and use the manual as a guide. This step sets the inflation endpoint.
Tip: Always start slightly below target if your gauge lacks auto shut-off. - 4
Inflate while monitoring the digital readout
Inflate gradually and watch the display. Stop inflation when the target is reached. If your device doesn’t auto shut off, pause to recheck frequently to avoid overshooting.
Tip: Keep the inflator heading straight to the valve to prevent leaks. - 5
Re-check pressure and adjust
Disconnect the nozzle and re-check each tire with the digital readout or a backup gauge. If any tire shows a deviation, top up or release air as needed and re-measure after a brief settle.
Tip: Check tires again after driving a few miles; tires heat up and may rise in pressure slightly. - 6
Store and maintain
Turn off the inflator, detach all parts, and store in a dry place. Keep spare batteries charged and the nozzles clean. Regular storage discipline preserves accuracy and readiness.
Tip: Wipe moisture and dust from the gauge before storage to extend display life.
Frequently Asked Questions
What is a tire inflator with a digital gauge?
A tire inflator with a digital gauge is a handheld device that inflates tires and shows the current pressure on a digital display. It combines measurement and inflation, letting you reach exact targets quickly and accurately.
A tire inflator with a digital gauge is a handheld tool that inflates and shows tire pressure on a display, making it easy to reach the exact target.
Why use a digital gauge instead of a traditional gauge?
Digital gauges provide a clear numeric readout and often unit flexibility, reducing guesswork. They are faster to read and typically easier to interpret than many analogue gauges.
Digital gauges are easier to read and faster, giving a clear numeric readout and flexible units.
How do I calibrate or verify the accuracy of my digital gauge?
If the gauge seems off, compare its readouts with a trusted analogue gauge or another digital gauge. Use a known reference tire pressure as a test. Regular cross-checks help confirm accuracy.
Compare the readings with a trusted gauge and use a known reference tire pressure to verify accuracy.
Can I use these inflators for bicycles or other inflatables?
Many inflators with digital gauges are compatible with bicycle tires and other inflatables, but check the nozzle types and maximum pressure to ensure compatibility.
Yes, many can be used on bikes and other inflatables, just check the nozzle and pressure limits.
What maintenance does a digital inflator require?
Keep the nozzle and gauge clean, replace batteries as needed, and store in a dry place. Periodic checks against a known gauge help maintain accuracy.
Keep it clean, change batteries when needed, and store dry. Periodically verify accuracy.
How long do batteries last in a digital inflator?
Battery life varies by model and usage, but most units provide many inflations per charge and can be topped up with a USB charger or replaceable batteries.
Battery life varies by model, but many inflators hold a charge for multiple inflations and can be USB charged or have replaceable batteries.
Watch Video
What to Remember
- Choose a model with auto shut-off and a clear display
- Always verify target PSI from the vehicle manual or placard
- Use a backup gauge to cross-check readings
- Store the inflator in a cool, dry place
- Regularly check tire pressures to improve safety and efficiency