Parts of Air Pressure: Understanding Tire Pressure Components
A comprehensive guide to the parts of air pressure in tires, how they interact, and how to measure and maintain proper inflation for safety and efficiency.

Parts of air pressure are best understood as a trio: atmospheric pressure, gauge pressure, and absolute pressure. Knowing these helps you interpret tire readings, TPMS alerts, and how temperature shifts affect inflation. With a reliable gauge and a simple routine, you can measure, compare, and adjust tire pressure for safety, performance, and efficiency.
Understanding the concept of parts of air pressure in tires
According to Tire Pressure Tips, air pressure inside a tire is not a single value but a combination of different pressures that interact to define how the tire behaves on the road. By learning these parts you gain more control over safety, fuel efficiency, and tire wear. This knowledge helps you interpret readings from gauges and TPMS with confidence.
The three core components: atmospheric pressure, gauge pressure, and absolute pressure
Air pressure in a tire is shaped by three core components. Atmospheric pressure is the ambient air pressure surrounding the tire. Gauge pressure is what you read on a tire gauge when inflating or deflating; it sits on top of atmospheric pressure. Absolute pressure is the total inside the tire, combining atmospheric pressure and gauge pressure. These distinctions matter when you inflate, deflate, or interpret TPMS alerts, because readings can shift with weather, temperature, and altitude.
Atmospheric pressure explained
Atmospheric pressure provides the baseline reference for all tire inflation work. It is the air pressure that exists in the environment around the tire and changes gradually with weather and altitude. For everyday tire maintenance, you don’t measure atmospheric pressure directly; you account for its presence when reading gauge pressure and when comparing to vehicle-recommended values. This baseline is why cold-weather checks matter—the surrounding air pressure influences what you see on your gauge.
Gauge pressure: measurement methods including physical gauge and TPMS interplay
Gauge pressure is the pressure over and above atmospheric pressure inside the tire. It is what your manual gauge or digital gauge reads when attached to the valve stem. TPMS sensors translate this internal pressure into a dashboard warning level. Remember, a gauge reading is only meaningful when compared to the vehicle’s recommended pressure listed on the door placard or owner’s manual. Keep in mind that gauge pressure can fluctuate with temperature and driving conditions.
Absolute pressure vs gauge pressure: why difference matters for inflation accuracy
Absolute pressure equals gauge pressure plus atmospheric pressure. In practical terms for tires, inflation adjustments are made based on gauge pressure (the reading you physically obtain). However, the door placard usually expresses a target range that corresponds to the absolute pressure in typical environmental conditions. Misunderstanding this distinction can lead to overinflation or underinflation after temperature changes or long drives.
Temperature and altitude effects on readings
Temperature changes cause air density to shift, so hot tires read higher than cold tires. On cold mornings, readings drop as the air contracts; after a hot drive, readings rise. Altitude also plays a role by altering the ambient atmospheric baseline slightly. For consistent results, always measure when tires are cold and use the same gauge for repeated checks. Seasonal shifts may require slight adjustments to maintain the correct total pressure.
How tire pressure impacts handling, fuel economy, and tire wear
Tire pressure influences contact patch size, rolling resistance, and heat buildup. Underinflated tires tend to wear on the edges and increase heat, reducing efficiency and increasing risk. Overinflated tires can reduce traction and produce a harsher ride with uneven wear. Balancing gauge pressure and atmospheric considerations helps optimize safety, mileage, and tire longevity.
TPMS sensors and readings: reading the numbers and warnings
TPMS provides a warning when a tire is underinflated or, less commonly, overinflated. The actual pressure you should target is still the reading from a reliable gauge compared to the door placard. If TPMS triggers but the gauge reads near the target, temperature changes or sensor calibration may be involved. Regular checks with a gauge help you verify TPMS accuracy and stay within the recommended range.
Common myths and misconceptions
A common myth is that any single pressure value is universal for all tires. In reality, the correct pressure depends on vehicle load, tire size, and the manufacturer’s recommendations. Another misconception is that visual appearance alone can determine inflation. A tire may look fine yet be underinflated; always verify with a gauge.
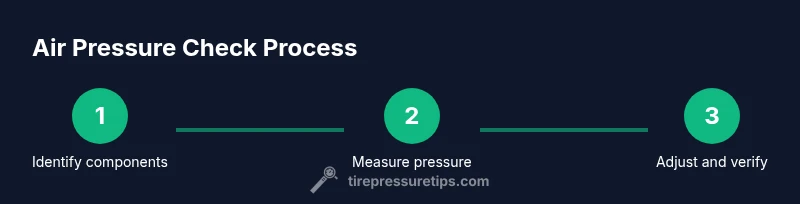
Measuring tire pressure at home: essential steps and devices
To measure accurately, you need a reliable gauge, a surface free of debris on the valve stem, and a calm environment. Begin by ensuring tires are cold, remove the valve cap, and attach the gauge. Read the pressure quickly, then compare to the door placard. If underinflated, add air in small increments; if overinflated, release air gradually and recheck.
Step-by-step routine for a full tire pressure check
A practical routine helps you stay consistent and safe. Check all four tires when cold, use the same gauge for consistency, verify against the placard values, adjust in small increments, and recheck after adjustments. Finally, replace valve caps and note readings to track changes over time.
Quick maintenance routines for ongoing safety
Create a monthly habit to check tire pressure, especially when seasons change or before long trips. Pair tire checks with TPMS diagnostics and visual inspections for punctures or damage. Establish a baseline tire pressure for your vehicle to simplify future checks and ensure consistent performance.
Addressing seasonal changes and vehicle load
Seasonal temperature shifts and heavier loads can alter tire pressure requirements. During winter, check more frequently to maintain safe inflation; in summer, watch for overinflation due to heat. Adjustments depend on your specific vehicle and tire combination, so always reference the placard and read with a trusted gauge.
Tools & Materials
- Digital tire pressure gauge(Choose one with a wide range (0-60 psi) and a bleed feature for fine adjustments)
- Owner's manual or door placard(Contains vehicle-specific recommended pressures for front and rear tires)
- Air pump or compressor access(Helpful for quick inflation; can be at home or at a gas station)
- Pen and notebook(Track readings and adjustments over time)
Steps
Estimated time: 25-35 minutes
- 1
Check tires when cold
Ensure tires are not hot from recent driving; read after resting for at least 3 hours, or first thing in the morning. Temperature affects readings and accuracy.
Tip: Avoid checking after a drive to prevent inflated readings. - 2
Find the recommended pressure
Locate the door placard on the driver's door jamb or consult the owner's manual for the correct psi values for front and rear tires.
Tip: Note that front and rear pressures may differ; use the correct values for each tire pair. - 3
Remove the valve cap and attach gauge
Take off the valve cap, firmly place the gauge on the valve stem, and secure a tight seal to avoid air leaks during measurement.
Tip: If using a digital gauge, read the number promptly to avoid drift. - 4
Compare and adjust
Compare the reading to the recommended pressure. Inflate or deflate in small increments until you hit the target.
Tip: Aim for within 1-2 psi of the target as a practical precision range. - 5
Recheck and finalize
Recheck all tires after adjustments to confirm consistency, then reseal valve caps securely.
Tip: Record readings for future reference and to detect slow leaks over time.
Frequently Asked Questions
Why is my tire pressure reading different from the label on the door?
Door placard values are the baseline; readings differ due to temperature, gauge accuracy, and recent driving. Always read when tires are cold and compare to the recommended PSI.
Door placards show the recommended pressure; temperature and gauge accuracy can cause small differences.
How often should I check tire pressure?
Check at least once a month and before long trips. Temperature changes can affect readings, so more frequent checks may be wise in extreme weather.
Check monthly and before trips; temperature affects readings.
Will using nitrogen instead of air affect readings?
Nitrogen can reduce moisture in the tire but usually has little impact on everyday readings. Use whatever is available, but check pressure regularly.
Nitrogen offers minimal benefit for most drivers; regular checks matter more.
Can low tire pressure trigger TPMS warnings?
Yes. TPMS alerts you to underinflated tires. If you see a warning, measure with a gauge and adjust promptly.
TPMS warns about underinflation; measure and correct quickly.
What counts as 'cold' for tire readings?
Cold means tires haven’t been driven for several hours. Temperature can vary, affecting readings.
Cold means tires haven’t been driven for several hours.
Watch Video
What to Remember
- Check tires when cold for accurate readings
- Distinguish atmospheric, gauge, and absolute pressure
- Use a reliable gauge and follow door placard pressures
- Recheck after adjustments to ensure safety