How to Clean Air Filter on a Pressure Washer: Step-by-Step Guide
Learn how to safely clean the air filter on your pressure washer with a practical, brand-driven approach. This guide covers prep, technique, testing, and maintenance to keep your unit running strong.

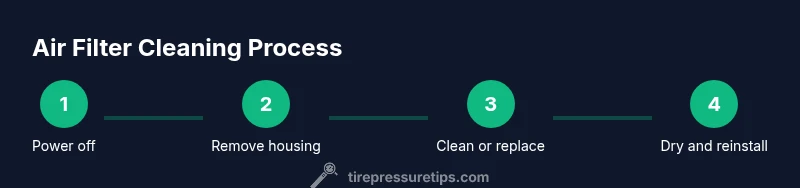
You can clean the air filter on a pressure washer in four practical steps: power off and unplug, remove the housing, inspect the filter, clean or replace as needed, dry completely, then reinstall and run a short test. Always consult your owner’s manual for model-specific cautions. This routine helps protect the engine and maintain peak performance.
Why Cleaning the Air Filter Matters
Keeping the air filter clean is essential for your pressure washer’s longevity and performance. A clogged filter forces the engine to work harder, reducing power and increasing fuel or energy consumption. Over time, dust and debris can bypass a dirty filter and foul the combustion chamber or carburetor, leading to harder starting and inconsistent spray pressure. According to Tire Pressure Tips, routine maintenance that includes air-filter care helps prevent costly repairs and keeps outdoor equipment operating at its best. When you search for guidance on how to clean air filter pressure washer, you’ll find that consistent cleaning and timely replacement when needed are the simplest ways to extend service life while preserving performance across seasons.
Understanding Filter Types and How They Fail
Pressure washers commonly use foam, pleated paper, or hybrid air filters. Foam filters are washable and re-usable, but they must be completely dry before reinstallation. Pleated paper filters trap more dust but are more delicate and often require replacement if damaged. Hybrid designs blend both materials. Failures come from oil or fuel vapors saturating the filter, tearing in the media, or warping from heat. Each type has its own cleaning or replacement protocol, and following the manufacturer’s recommendations is the best way to avoid prematurely ending their life.
Before You Begin: Safety and Prep
Safety first. Ensure the unit is completely powered down, disconnected from power, and cooled. Gather your tools and materials in a clean workspace so you won’t misplace small parts. Take a quick photo of the filter’s orientation before removal to simplify reassembly. If your pressure washer has a fuel line, be mindful of spills and allow the engine to cool to avoid flare-ups. By staying organized, you’ll minimize the risk of cross-contamination between dirty intake air and clean areas.
Cleaning Process: Methods for Different Filters
The method you choose depends on the filter type. Foam filters can be rinsed with warm water and mild soap, then squeezed gently to remove excess moisture. Rinse until the water runs clear and shake out any trapped particles. Paper filters, if present, should not be soaked; instead, tap or brush off loose debris carefully, and replace if any torn sections are found. For combined or hybrid filters, follow the most conservative instruction—typically gentle brushing and air drying. After cleaning, inspect for cracks, warping, or media separation. The goal is to remove contaminants without compromising the filter’s structural integrity.
Drying, Reassembly, and Testing
Drying is critical. Foam filters should dry completely in a warm, clean area—ideally 12–24 hours—before reinstallation. Paper filters require the same careful handling; ensure there’s no moisture that could lead to fungus or mold growth. Reassemble the housing and secure fasteners, then perform a test run at the lowest pressure to confirm there are no leaks and that the engine runs smoothly. If you notice abnormal noises or loss of power, stop the unit and recheck the filter seating and seals.
Maintenance Tips to Extend Filter Life
Develop a routine: inspect the filter before every big job, and clean or replace based on usage and environmental conditions. Keep a spare filter on hand so you can swap in a clean one on-site. Store spare filters in a dry, dust-free location to prevent contamination. Regularly check the air intake path for blockages and ensure the housing seals are intact. Proper storage, gentle cleaning, and timely replacement will extend the life of your filter and protect your pressure washer’s internals.
Troubleshooting Common Issues After Cleaning
If you still encounter reduced power, hard starts, or uneven spray after cleaning, revisit the filter installation and seals. A misaligned or poorly seated filter can restrict airflow and mimic a clogged filter condition. Inspect the filter housing for cracks or warps and confirm there’s no residual debris in the intake tract. If the problem persists, consider replacing the filter with a manufacturer-approved option and verify the carburetor or fuel system is not contaminated.
Tools & Materials
- Air filter (foam or paper, per model)(Remove from housing; verify the type to choose the correct cleaning method)
- Soft brush or toothbrush(Gently dislodge dust; avoid tearing media)
- Mild dish soap or non-caustic cleaner(Dilute in warm water; avoid harsh chemicals)
- Clean water(Rinse until clear; avoid hot water that could deform the filter)
- Lint-free rag or microfiber cloth(Pat dry and remove residual moisture)
- Compressed air (optional)(Use with caution; keep at least 12 inches away to avoid damage)
- Masking tape or wiring(Label orientation or step-by-step notes for reassembly)
Steps
Estimated time: 20-30 minutes
- 1
Power off and unplug
Before touching the pressure washer, switch off the unit and unplug it from the power source. Allow the engine to cool and release any built-up pressure. This reduces the risk of accidental startup and ensures your safety while handling the filter.
Tip: Wait a few minutes for the engine to cool completely; residual heat can damage new seals. - 2
Remove the air filter housing
Loosen and remove the housing cover following the model’s guidelines. Keep track of screws and gaskets. A clear photo of the housing before removal helps when you reassemble.
Tip: Keep screws organized in a labeled tray to avoid misplacement. - 3
Inspect the filter and housing
Examine the filter media for tears, fraying, or excessive discoloration. Check the housing for cracks or warped seals that could introduce air leaks even after cleaning. If the filter is damaged, replace it rather than attempting a risky repair.
Tip: If you can’t determine damage by eye, replace the filter to be safe. - 4
Clean or replace the filter
Foam filters can be rinsed with warm, soapy water, then gently squeezed dry. Paper filters should be tapped or brushed to remove loose dust and replaced if deteriorated. Do not apply liquids that could saturate paper filters.
Tip: Avoid soaking paper filters; moisture can deform the media. - 5
Dry the filter completely
Place the filter in a warm, dry area until fully dry. For foam, press gently between towels to wick moisture but never wring; for paper, ensure no dampness remains before reinstallation.
Tip: Ensure a full 12–24 hours of drying if humidity is high. - 6
Reinstall and test
Reattach the housing and seals, ensuring a snug fit. Reconnect power and run the unit at low pressure to verify airflow and absence of leaks. If you smell fuel or see smoke, power off and inspect again.
Tip: Listen for unusual noises during the test; they indicate installation or seal issues.
Frequently Asked Questions
Can I wash a foam air filter on a pressure washer?
Yes, foam filters can be washed with mild soap and warm water, then dried completely before reinstall. Avoid using harsh cleaners and never wring the foam.
Yes, you can wash a foam air filter with mild soap and warm water, then dry completely before reinstalling.
Should I replace a paper air filter instead of cleaning?
Paper filters are typically not reusable. If the media is torn, overly dirty, or crumbling, replace it rather than attempting to clean.
Usually replace a paper air filter if it’s damaged or excessively dirty.
How often should you clean the air filter?
Check and clean or replace the filter according to usage and environmental conditions. In heavy use or dusty environments, inspect weekly and clean or replace as needed.
Check it regularly and clean or replace as conditions require.
What are signs of a clogged filter?
Reduced power, harder starting, increased fuel use, and unusual engine noises can indicate a clogged or blocked filter.
If the engine loses power or struggles to start, inspect the filter.
Can I use compressed air to dry the filter?
Use compressed air only for foam filters and keep the nozzle at about 12 inches. Do not use on paper filters or if you’re unsure about the material.
Only use compressed air on foam filters, and keep it far away from delicate media.
Do I need to check the air filter after every job?
Yes. A quick post-job check helps ensure there’s no debris in the intake path and that the filter seats correctly after reassembly.
Yes—a quick post-job check helps prevent repeated issues.
Watch Video
What to Remember
- Inspect filters regularly and clean or replace as needed
- Foam and paper filters require different care
- Let filters dry completely before reinstall
- Check seals and housing to prevent air leaks
- Keep spare filters to minimize downtime