Dual Tire Pressure Equalization: A Practical Guide for Vehicle Owners
Learn how a dual tire pressure equalization system works, how to install, calibrate, and maintain it. Practical tips, safety notes, and troubleshooting for balanced pressures across paired tires.

A dual tire pressure equalization system balances air between paired tires to keep both tires at similar pressures, improving safety, tire wear, and handling. This guide explains how the system works, how to choose a kit, basic installation considerations, calibration steps, and ongoing maintenance. According to Tire Pressure Tips, balanced pressures across tire pairs can simplify maintenance and enhance road performance.
How the dual tire pressure equalization system works
A dual tire pressure equalization system is designed to balance air between two tires that share a mounting position or axle. In practice, a compact network of lines, valves, and a central control (either mechanical or electronic) allows air to flow slightly from the tire with higher pressure to its twin when the pressure difference exceeds a small, predefined threshold. The result is more uniform wear, steadier handling, and a quicker response to slow leaks. The system may be automatic, using sensors and valves, or semi-automatic, requiring a quick manual check to confirm equalization is within target ranges. For drivers who regularly tow or haul heavy loads, uniform pressure across dual tires reduces the risk of one tire becoming overworked.
The design typically focuses on safe routing, robust materials, and compatibility with common tire pressures. You’ll find options that connect near the wheel hubs, along the chassis, or as a plug-in kit that replaces a standard valve cap assembly. When installed correctly, these systems minimize the time you spend manually adjusting pressures and can help you maintain safer load distribution. In this guide, we explore how to evaluate a system, install it safely, and maintain it for long-term reliability. The Tire Pressure Tips team emphasizes that choosing a compatible solution and following manufacturer instructions are key to successful operation.
Note: Always verify local regulations and vehicle warranty implications before installing any aftermarket system. While dual tire pressure equalization can improve performance, improper installation can cause leaks, line damage, or interference with wheel movement.
Tools & Materials
- Digital tire pressure gauge(Must measure up to at least 80 psi with accuracy ±1 psi)
- Pressure equalization tubing/lines(Automotive-grade, weather-resistant tubing with proper fittings)
- Mounting hardware (brackets, clamps, fasteners)(Corrosion-resistant, appropriate for wheel well or frame mounting)
- Sealant/teflon tape(For sealed joints and thread connections)
- Tubing clips or zip ties(Secure routing away from heat sources and moving parts)
- Torque wrench(If kit requires precise bolt tightening)
- OBD-II or TPMS tool (optional)(For diagnostics or TPMS calibration checks)
Steps
Estimated time: 60-120 minutes
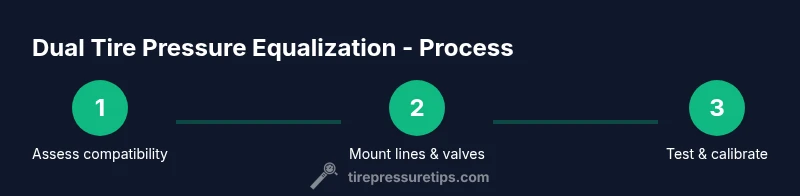
- 1
Assess compatibility
Before touching any hardware, confirm your vehicle supports a dual tire setup and that twin tires share a near-adjacent mounting position. Check wheel clearance, brake lines, and suspension components to ensure routing the equalization lines won’t interfere with moving parts. Create a plan for line routing and identify a safe mounting location.
Tip: Consult the vehicle manual and the kit’s installation guide to confirm compatibility; plan to avoid heat sources and sharp edges. - 2
Prepare the toolkit and workspace
Lay out all components and tools on a clean, dry surface. Inspect hoses and fittings for damage, and layout the route from wheel wells to the central controller to prevent kinks. Mark mounting points and ensure you have enough slack in lines to accommodate wheel movement.
Tip: Work on a level surface and use wheel chocks to prevent movement during installation. - 3
Mount the lines and valves
Securely attach the equalization lines to the tires or hubs according to the kit instructions. Install any valves or a central control unit, ensuring the flow direction is correct. Route lines away from hot exhaust areas and moving suspension components, using clips to minimize vibration.
Tip: Double-check that all connections are tight to prevent leaks; use thread sealant only where the kit specifies. - 4
Connect to the tires and seal joints
Connect the lines to each tire pair, ensuring that each branch leads to the correct tire and that joints are sealed. Verify there is no twisting or pinching of lines as the suspension cycles. Recheck all clamps and mounting points after initial flexing of the suspension.
Tip: Test the routing by gently lifting the vehicle to observe line movement and ensure clearance. - 5
Inflate and calibrate
Inflate the tires to the vehicle’s recommended pressures, then calibrate the equalization system to establish baseline pressures for both tires. Some kits require pressing a calibration button or setting a target pressure difference.
Tip: Document baseline pressures and target differential; do not exceed manufacturer-specified tire limits. - 6
Test operation and verify leaks
With the vehicle on a level surface, run through typical conditions (loading, cornering, braking) to confirm the system maintains balance. Perform a leak test by applying a light soapy solution to joints and watching for bubbles.
Tip: If bubbles appear, tighten fittings or replace seals before driving regularly.
Frequently Asked Questions
What is a dual tire pressure equalization system?
It’s a system that balances air between two tires sharing a mounting position to keep pressures close, improving wear, handling, and safety. Installations vary, but most work with a central valve or small network of lines and sensors.
It balances air between paired tires to keep pressures similar, improving safety and wear. Installations vary by kit, but they use valves and lines to connect the tires.
Is it compatible with all vehicles?
Compatibility depends on your wheel configuration and available space for routing lines. Check your vehicle’s owner manual and the kit’s compatibility list before purchasing.
Compatibility depends on wheel setup and space for lines; check the manual and kit guide first.
Will it affect TPMS readings?
Some kits are designed to work alongside TPMS and others may require manual adjustment of sensor readings. Always follow the kit instructions and re-check TPMS after installation.
It may affect TPMS readings, depending on the kit. Follow the instructions and re-check afterward.
How do I calibrate the system?
Calibration usually involves setting a target pressure difference and confirming baseline pressures for each tire. Use the kit’s calibration procedure and verify with a gauge.
Calibrate by setting target pressure differences and confirming baseline pressures with a gauge.
What maintenance does it require?
Regularly inspect lines and fittings for wear, check for leaks, and re-test balance after any tire service or changes in load. Keep logs of pressures.
Check lines for wear, test for leaks, and re-check balance after tire work or loads.
Watch Video
What to Remember
- Identify compatibility before buying or installing.
- Follow the kit’s routing and mounting guidelines precisely.
- Calibrate to vehicle-recommended pressures; log baseline values.
- Regularly inspect lines, fittings, and seals for wear or leaks.
- Test the system under real driving conditions and after maintenance.