Hyundai Eon Tyre Pressure Guide: Check, Set, and Maintain
A practical, step-by-step guide to checking and maintaining Hyundai Eon tyre pressure for safety, fuel efficiency, and tire life. Learn where to find the recommended pressure, how to measure accurately, and how to adjust for load and seasons.

Learn how to check and set the Hyundai Eon tyre pressure correctly. This guide covers where to find the recommended pressure, how to use a gauge, the impact of TPMS, and seasonal considerations to improve safety, fuel efficiency, and tire life. Follow these steps to keep your Eon running smoothly.
Hyundai Eon tyre pressure basics
Maintaining correct tyre pressure is a simple, high-impact habit for any driver, and it matters especially on the Hyundai Eon where small changes in load or temperature can affect handling. Proper pressure helps even wear, improves fuel efficiency, and keeps your TPMS alert responsive. The door jamb placard shows the recommended pressure for the front and rear tires; those numbers are baseline targets, not maximums. Do not rely on the feel of the tire or a guess; use a trusted gauge. Always start with cold tires, because driving heats up the air and raises the numbers you read. If you regularly carry heavy loads or people, the required pressure can differ between axles. In practice, check pressure at least once a month and before long trips. Consistency is the easiest path to consistent performance, better grip, and longer tire life. For best results, inflate to the recommended value on the placard, then re-check after 5-10 minutes of driving to settle the tire.
Finding your Hyundai Eon's recommended tyre pressure
The Hyundai Eon's tire pressure is specified by the manufacturer and is typically listed on a placard attached to the driver's door pillar. This placard shows separate numbers for front and rear tires and for different load conditions. Use these numbers as your target rather than any number you see on the tire sidewall. The sidewall maximum pressure indicates the limit, not the target. If your vehicle has a TPMS, the system uses sensors to indicate underinflation before it becomes dangerous, but it does not measure the exact recommended pressure. Always verify with the placard and owner's manual, especially after changing tire sizes or wheel configurations.
Tools and preparations before inflating
Before you start, gather a few reliable tools: a digital tire pressure gauge with small measurement increments, a compressor or access to an air pump, and a clean cloth to wipe the valve stem. Check the gauge accuracy by comparing with a known-good reading, and calibrate if necessary. Have the vehicle's owner manual handy for model-specific notes. If you do not know where to look, the door placard is your first stop. For cold tires, avoid inflating after a drive; pressure readings rise with heat and you may over-inflate.
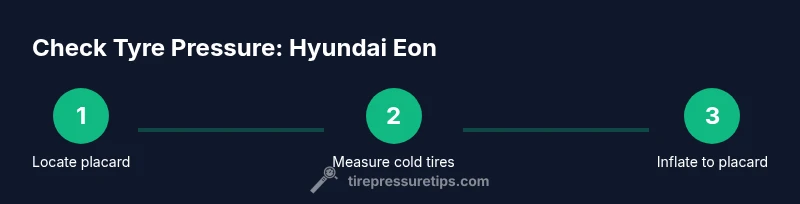
Step-by-step method to check cold tyre pressure
- Park on level ground and turn off the engine. 2) Locate and remove the valve cap from the tyre you are checking. 3) Use a reliable gauge to measure the pressure reading on a cold tire. 4) Compare the reading to the placard value; if it’s too low, add air in small increments until you reach the target. 5) If overinflated, release air until you reach the target. 6) Replace the valve cap and wipe away any dust. Check all four tyres and recheck after a short drive to settle.
Adjusting pressure safely and correctly
Inflate or deflate tires only to the manufacturer’s recommended pressure. Use the gauge in small steps (usually 1-2 psi per adjustment) and recheck after each adjustment. Avoid inflating beyond the tire’s maximum rating printed on the sidewall. After adjusting, drive a short distance and recheck to ensure the tires settled at the correct value. If you notice inconsistent readings, consider checking the gauge calibration or using a second gauge for confirmation.
Seasonal considerations and load changes
Seasonal temperature changes affect tyre pressure; colder weather reduces internal pressure, while hot weather increases it. If you regularly carry heavy loads or have passengers, you may need to adjust pressures more frequently to maintain even wear and predictable handling. Always recheck after a weather change or trip with a full car. For vehicles like the Hyundai Eon, ensure that you follow the placard values rather than relying on generic “one-size-fits-all” targets.
Common mistakes and maintenance routine
Common mistakes include inflating to comfort rather than to the placard, neglecting to recheck after driving, and overlooking the spare tire. Develop a simple maintenance routine: check tyre pressures monthly, check before long trips, and inspect tires for wear or damage alongside pressure checks. Keep a small gauge in the vehicle, and consider downloading the Hyundai Eon owner’s manual or your service manual for model-specific notes. Regular checks can prevent uneven wear and improve fuel efficiency.
Tools & Materials
- digital tire pressure gauge(Choose a gauge with 0.5 psi (0.05 bar) resolution for accuracy.)
- air compressor or access to a pump(Prefer a compressor with a built-in gauge for convenience.)
- owner's manual and door placard(Reference the exact front/rear values and load conditions.)
- clean cloth(Wipe valve stems and caps after measuring.)
- valve caps(Keep caps tight to prevent dust and moisture entry.)
Steps
Estimated time: Total time: 12-20 minutes
- 1
Find the recommended pressure
Locate the door placard and confirm the target pressure for your Hyundai Eon’s front and rear tires. Note any load-specific values. This sets your goal before you touch the air.
Tip: Pro tip: always start with cold tires for an accurate reading. - 2
Prepare the tires
Park on level ground and ensure tires are cold. Remove the valve caps to access the stems and verify you have your gauge ready.
Tip: Pro tip: check all four tires to keep handling balanced. - 3
Measure the current pressure
Press the gauge onto the valve stem firmly and read the display. Compare to the placard values to determine if you need to inflate or deflate.
Tip: Pro tip: avoid topping up with the engine running or after a long drive. - 4
Adjust in small increments
If underinflated, add air in small increments (1–2 psi). If overinflated, release air gradually until you match the target.
Tip: Pro tip: recheck after each adjustment to prevent overshooting. - 5
Re-check and seal
Re-measure after adjustments and re-cap the valve stems securely. Clean up any moisture or dirt.
Tip: Pro tip: reset the gauge by re-reading from a known reference to confirm accuracy. - 6
Record and maintain
Document the readings and planned checks for future reference, especially before seasonal changes or long trips.
Tip: Pro tip: include load conditions (passengers, cargo) when noting target pressures.
Frequently Asked Questions
Where can I find Hyundai Eon's tyre pressure specification?
The specification is on the door placard and in the owner's manual. Use those numbers as your target.
You can find the Hyundai Eon tyre pressure specification on the door placard or in the owner's manual. Use those numbers as your target.
Is TPMS reliable for Hyundai Eon tyres?
TPMS provides an alert when pressures are too low, but it does not replace manual checks of the recommended values.
TPMS alerts you to low pressure, but you should still verify with a gauge against the manufacturer’s recommended values.
Can I drive with underinflated tyres on an Hyundai Eon?
You should avoid driving long distances with underinflated tires. Reduced grip and increased wear can occur; inflate to the recommended pressure as soon as possible.
Driving on underinflated tires is not ideal; stop and inflate to the recommended pressure when safe.
How often should I check tyre pressure?
Check at least monthly and before long trips, and whenever you notice a temperature change or load variation.
Check at least once a month and before trips, especially when temperatures change or you carry extra load.
Why do front and rear tyre pressures sometimes differ?
Differences reflect load distribution and tire design. Always follow the placard for each axle rather than guessing.
Front and rear pressures can differ due to load; follow the placard values for each axle.
What should I do if TPMS stays on after inflation?
If the light remains on, check for leaks, a faulty sensor, or a temperature change that caused initial readings. Seek service if unresolved.
If the TPMS light stays on after inflating, check for leaks or sensor issues and get it checked if it doesn’t go away.
Watch Video
What to Remember
- Check the placard first before inflating
- Use a reliable gauge and read cold tires
- Inflate to the manufacturer’s recommended value
- Recheck after adjustments and driving settles the tire