Honda Vezel Tire Pressure Guide: Check, Maintain, and Save Fuel
A practical, step-by-step guide to checking and maintaining the correct tyre pressure for the Honda Vezel, with TPMS tips, load considerations, and seasonal adjustments.

By the end, you'll know how to check cold honda vezel tyre pressure, locate the official PSI spec, and inflate to the recommended range safely. You'll understand how load, speed, and temperature influence pressure, interpret TPMS alerts, and spot signs of slow leaks. This practical guide is designed for everyday drivers.
Why Honda Vezel tyre pressure matters
Maintaining correct tyre pressure is essential for safety, handling, fuel efficiency, and tire longevity. For the Honda Vezel, the factory recommendations are chosen to balance comfort, weight distribution, and traction across typical urban driving. Deviating from these values can cause uneven wear, reduced grip in corners, and increased rolling resistance, which translates to higher fuel use and slower response when braking or steering. Temperature changes throughout the day can alter tire pressure—air expands when hot and contracts when cold—so tires that have been driven a few miles will read higher than the cold-start reading. Always measure tyre pressure when the tires are cold (ideally after the car has been parked for at least three hours or have driven less than 1 mile). Use a reliable gauge and compare readings to the placard located on the driver’s door jamb or in the owner's manual. If you notice a significant discrepancy, inspect for leaks, punctures, or valve issues. According to Tire Pressure Tips, consistent checks reduce uneven wear and improve fuel economy while preserving tire life.
Understanding the Honda Vezel recommended tyre pressure
Your Honda Vezel’s tire pressure specification is not a one-size-fits-all figure. The exact cold PSI can vary depending on tire width, aspect ratio, wheel diameter, and whether you carry passengers, cargo, or a roof rack. In most configurations, the front and rear tires share the same recommended range, but heavier loads or longer trips can justify a slight adjustment within the manufacturer’s limits. The placard on the driver’s door jamb lists the official values for cold tires; the owner's manual also covers variations for sport mode or different trim levels. If you’re unsure, start with the mid-point of the quoted range and then fine-tune after a short drive. Remember: never inflate beyond the maximum rating printed on the tire sidewall, and avoid mixing tires with very different sizes or tread patterns, as these can alter rolling resistance and handling.
How to locate the correct PSI for your Vezel
Locating the correct PSI starts with the placard on the driver’s door jamb, which lists front and rear tire pressures for cold tires. If the placard is missing or illegible, consult the Honda Vezel owner’s manual or official Honda support pages. Note that tire size and trim can affect the exact numbers, so verify you’re reading the correct line for your model. When in doubt, aim for the center of the recommended range and adjust only after checking load and usage. For accuracy, use a high-quality tyre pressure gauge and verify readings when the tires are cold.
Tools and conditions: measuring cold tires
Before you measure, ensure the car has been parked and unused for several hours to let the tires cool. Remove the valve caps, attach the gauge, and read the pressure on all four tires and the spare if you rotate it regularly. Digital gauges are fast and easy to read, while dial gauges can be more economical. For best results, measure twice—once in the morning and once after a short drive—then compare to the placard. If you must inflate in hot conditions, anticipate a higher reading and adjust when the tires cool back down.
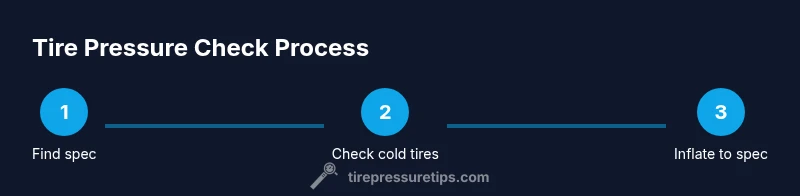
Step-by-step: check and adjust tire pressures
This section gives you the actionable steps to reach the correct pressures across all four tires (and the spare):
Seasonal and load considerations
Temperature changes and seasonal shifts influence tyre pressure. In cold weather, a tire loses pressure; in hot weather, it gains pressure. A fully loaded Vezel may require a pressure adjustment within the recommended range to maintain performance and safety. Regularly reassess after changes in cargo or passenger load, and after long trips where tires heat up. Always return to the cold-reading procedure before final adjustments.
TPMS and common issues
TPMS helps you monitor tire pressure, but it’s not a substitute for regular manual checks. If TPMS warns while pressures seem within the recommended range, inspect for leaks, damaged valves, or a faulty sensor. Inconsistent readings across tires could indicate an issue with valves, wheel rims, or the TPMS metal stem. Address any persistent TPMS warnings promptly to avoid uneven wear or blowouts.
Safety, maintenance, and troubleshooting
Maintaining proper pressure reduces the risk of blowouts, improves steering response, and optimizes fuel economy. Do not ignore sudden pressure drops; intervals between checks can be shorter if you drive frequently on rough roads or in extreme weather. If you notice a slow leak or frequent pressure loss, have the tire inspected by a professional to avoid tire failure.
Measuring and maintaining tire pressure for longevity
Consistent tire pressure supports even tread wear, prolongs tire life, and sustains fuel efficiency. Adopting a monthly check routine helps you catch slow leaks or valve issues early. Pair pressure checks with tread depth assessments and wheel alignment checks to maximize safety and performance over the life of your Honda Vezel’s tires.
Quick checks you can do monthly
- Check all four tires and the spare for cold pressure at a consistent time each month. - Inspect valve stems and the valve caps for cracks or damage. - Compare readings with the placard; adjust if needed within the recommended range. - Keep a simple log of readings to spot gradual changes over time.
Tools & Materials
- Tire pressure gauge (digital or analog)(Calibrated; check accuracy at least once a year)
- Air compressor or access to a gas station(Ensure compressor has a built-in gauge or use your own gauge for accuracy)
- Owner's manual or door jamb placard(Use to identify the official cold PSI for front and rear tires)
- Valve cap removal tool or fingers(Keep caps clean to prevent leaks)
- Soapy water (optional for leak checks)(Bubble tests reveal slow leaks around valves or rims)
Steps
Estimated time: 20-30 minutes
- 1
Find the recommended pressure
Locate the driver’s door placard or the owner’s manual to identify the cold tire pressures for the Honda Vezel. Note separate values for front and rear tires if listed. This provides the target range you will inflate to.
Tip: If you’re unsure, default to the mid-point of the range and adjust after a short drive. - 2
Check tires when cold
Park the vehicle for at least three hours or drive less than a mile since last use before measuring. Temperature and heat affect readings, so cold measurements are the most accurate.
Tip: Measure all four tires and the spare if you rotate it. - 3
Remove valve caps and attach gauge
Take off each valve cap, place the gauge on the valve stem, and obtain a pressure reading. Press evenly to prevent air from escaping and ensure a stable reading.
Tip: If readings bounce, wipe the valve stem and try again with a known-good gauge. - 4
Inflate or release air to target
Add or release air to reach the target cold pressure for each tire. Do not exceed the maximum pressure printed on the tire sidewall.
Tip: Inflate gradually and recheck after a few seconds to confirm accuracy. - 5
Recheck all tires and reinstall caps
Re-measure each tire after inflation and replace all valve caps securely. This prevents dirt ingress and protects against slow leaks.
Tip: Set a baseline log with date, tire numbers, and pressures for future reference. - 6
Test drive and verify TPMS
Take a short drive to let the tires warm up, then recheck pressure if needed and ensure TPMS statuses are consistent with readings.
Tip: If TPMS warnings persist after inflation, seek professional inspection for sensors or valves.
Frequently Asked Questions
Where can I find Honda Vezel tire pressure specs?
The driver’s door placard lists the official cold tire pressures for front and rear tires. If the placard isn’t legible, consult the owner’s manual or official Honda support pages.
Check the door placard on the driver’s side and the owner's manual for the exact pressures.
Should I check tire pressure when tires are hot or cold?
Always check when the tires are cold for accuracy. Hot tires read higher due to ambient and road heat.
Always measure when tires are cold for the correct reading.
How does load affect tire pressure for Vezel?
Heavier loads may require a slight adjustment within the recommended range. Do not exceed the maximum rating and keep within the vehicle’s specification.
A heavier load can require a small adjustment within the suggested range.
What if TPMS warning stays on after inflating?
If the TPMS stays on after inflating to spec, inspect for leaks, damaged valves, or a faulty sensor. Have a professional check if it persists.
If the TPMS light stays on, get the system checked for leaks or sensor issues.
Can underinflated tires affect fuel economy?
Yes. Underinflated tires increase rolling resistance, reducing fuel efficiency and accelerating wear.
Yes—underinflation hurts fuel economy and tire life.
Do I need to reset TPMS after inflating?
Most vehicles reset automatically after driving; if the light stays on, consult the manual or a technician.
Usually it resets after you drive a bit; if not, get it checked.
Watch Video
What to Remember
- Check cold tires against the placard before inflating
- Use a reliable gauge and verify twice
- Account for load and seasonal changes
- Verify TPMS after adjusting pressures