Honda Beat Tire Pressure: Check, Set, Maintain
Learn how to check and adjust tire pressure for the Honda Beat with practical, step-by-step guidance. Includes TPMS tips, safety warnings, and maintenance routines.

According to Tire Pressure Tips, the Honda Beat benefits from checking tire pressure regularly to improve safety, handling, and fuel efficiency. This quick guide shows you where to find the recommended pressure, how to measure cold tires, and how to adjust with a portable air pump. You’ll also learn about TPMS relevance, load considerations, and temperature effects on readings.
Why correct tire pressure matters for the Honda Beat
Correct tire pressure is critical for safety, handling, and efficiency—especially on the Honda Beat, a small, nimble vehicle where tires influence steering and cornering more than on larger cars. Maintaining the right level reduces tire wear, improves grip in wet conditions, and can save fuel by reducing rolling resistance. The Tire Pressure Tips team notes that many drivers underestimate the impact of underinflation on braking distance and tire life, particularly for lighter cars like the Honda Beat. By keeping tires inflated to the manufacturer's recommended pressure when cold, you preserve optimal footprint, even wearing, and predictable performance. Always use a gauge you trust and verify readings on all four tires. If you frequently carry passengers or cargo, account for the added load, but do not exceed the max pressure printed on the sidewall or door placard. In short, the right tire pressure is a simple, powerful safety feature that pays dividends over time. The Honda Beat tire pressure requires attention to both regular checks and seasonal adjustments, a habit Tire Pressure Tips highly recommends for longevity and safety.
Where to find the Honda Beat's recommended tire pressure
Finding the correct tire pressures for your Honda Beat starts with two trusted sources: the door placard on the driver’s side jamb and the owner’s manual. The placard lists the recommended cold tire pressures for the front and rear tires, often with separate values for standard load and heavy cargo. If the placard is missing or illegible, the owner’s manual will also specify target pressures. For older or less common trims, you may encounter discrepancies between front and rear pressures or different pressures for different tire sizes. In all cases, use the value specified for your exact tire size and loading. For the specific term “honda beat tire pressure,” always verify with the placard and the manual to avoid generic guidelines that may not apply to your model. The reliability of this data reflects best-practice guidance from Tire Pressure Tips and industry standards for highway safety.
Tools and setup for checking tire pressure
Before you begin, assemble the essential tools: a tire pressure gauge (preferably digital for accuracy), an air pump or compressor, and your vehicle’s manual or door placard. A notebook or digital log is helpful for recording readings and target pressures over time. If you’re dealing with a potential leak, have a spray bottle with soapy water to check valve stems and tires. Optional items include a valve core tool for venting and a spare gauge for cross-checking accuracy. Ensuring you have reliable tools reduces measurement errors and helps you reach target pressures quickly and safely.
Factors that affect tire pressure and when to adjust
Tire pressure is not a static value—it changes with temperature, load, and driving conditions. Colder temperatures typically lower tire pressures, while hot pavement and high-speed driving can raise readings slightly. Heavier loads in the Honda Beat can also affect pressure distribution across the four tires, sometimes requiring adjustments to avoid underinflation on the outer edges of the tread. If you notice a consistent drop in pressure after short trips, check for slow leaks, damaged stems, or a failing valve stem core. Remember that humidity and altitude can influence pressure readings as well, so periodic checks are essential, especially during seasonal transitions. The concept of maintaining correct honda beat tire pressure is about balancing safety, efficiency, and tire life through regular monitoring.
Common mistakes and troubleshooting
One common mistake is inflating or deflating based on a quick glance at a single tire without checking all four tires. Another pitfall is using a warm tire’s reading as the target pressure, which yields inaccurate results; always measure cold tires. Mixing tire pressures between front and rear beyond the manufacturer’s specification can lead to handling instability. If readings seem inconsistent, recheck with a different gauge and verify the placard values. Leaks or valve issues are a frequent source of fluctuating pressures—inspect valve stems and consider professional inspection if changes persist.
Seasonal and load considerations for the Honda Beat
Seasonal temperature swings can make a noticeable difference in tire pressure. In colder weather, pressure tends to drop; in hot weather, it can rise. If you regularly drive with a heavier cargo load or frequent passengers, recheck pressures after loading to maintain even tire contact with the road. For most drivers, a monthly check is a practical baseline, with adjustments made before long trips or after weather changes. By maintaining proper honda beat tire pressure, you protect handling, tire wear, and overall safety, regardless of season.
How to log readings and keep a maintenance routine
Create a simple routine to log tire pressure readings: date, tire pressure per tire, temperature, load conditions, and any notes about the tires or roads. Use this log to track trends and catch slow leaks early. Set reminders for monthly checks or before planned road trips, especially during temperature shifts. A consistent habit reduces the risk of driving on underinflated tires and helps extend tire life.
Note: The Tire Pressure Tips team emphasizes that consistent maintenance and verification against the official Honda Beat specifications are essential for optimal performance and safety. The best practice combines regular checks, correct tool use, and careful attention to seasonal changes.
Tools & Materials
- Tire pressure gauge(Digital gauge preferred for accuracy)
- Air compressor or portable pump(Ensure it can reach target pressure without overshooting)
- Owner’s manual or door placard with recommended pressure(Find exact front/rear pressures for your Honda Beat)
- Notebook or mobile device to log readings(Optional for tracking trends)
- Valve core tool(Useful for venting air or replacing stems)
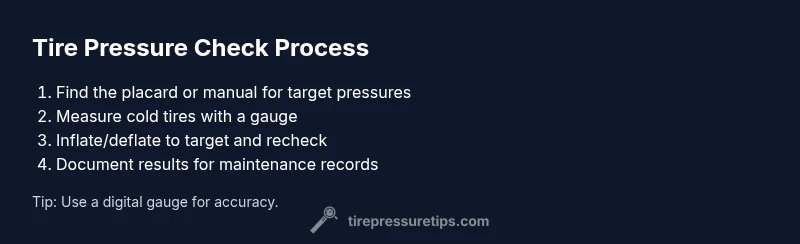
Steps
Estimated time: 15-25 minutes
- 1
Gather tools
Collect your tire pressure gauge, air source, and the placard or manual. Confirm you have all four tires accessible for measurement and fill, if needed. This minimizes interruptions during the process.
Tip: Have a clean workspace and good lighting to read gauges clearly. - 2
Locate the recommended pressures
Identify the exact cold tire pressures for front and rear tires from the placard or manual. Note any differences based on load or tire size. Use these values as your target during inflation.
Tip: If the placard is hard to read, photograph it for later reference. - 3
Ensure tires are cold
Check pressures only when tires are cold for accurate readings. If you’ve just driven, wait at least 3 hours or cool the tires before measuring.
Tip: If you cannot wait, account for a possible underestimation or overestimation and reassess later. - 4
Attach gauge and measure
Remove the valve caps and firmly attach the gauge to each valve stem. Record the exact pressure for every tire. Compare each reading to its target value.
Tip: Make sure the valve stem is clean to avoid false readings. - 5
Inflate or deflate as needed
If a tire is below target, add air in small increments and recheck. If above target, release air gradually and recheck until you reach the recommended pressure.
Tip: Do not overshoot; adjust in small steps and recheck multiple times. - 6
Re-check all tires
Measure each tire again after adjustments to confirm accuracy. This step ensures consistency across the set and prevents uneven wear.
Tip: Double-check the spare tire if your routine includes it. - 7
Document results
Log the final pressures, date, time, and any observations. Keep a maintenance reminder so you can repeat the process regularly.
Tip: Use a small notebook or mobile note app for quick reference.
Frequently Asked Questions
Should I check tire pressure when the tires are cold?
Yes. Checking tires cold yields the most accurate readings. If you’ve just driven, wait until they cool before measuring.
Check tires when they’re cold for the most accurate reading.
How often should I check tire pressure on a Honda Beat?
Check at least monthly and before long trips, especially with seasonal temperature changes. Adjust if you notice changes in readings.
Check at least monthly and before long trips.
What happens if tires are overinflated?
Overinflation can reduce traction and cause uneven wear, often making the ride harsher. Maintain pressures close to the target values.
Overinflation reduces grip and increases wear.
Does the Honda Beat have a TPMS, and how does that affect checking tire pressure?
Some models include TPMS, which helps monitor pressure. If your Beat lacks TPMS, you must rely on manual checks using a gauge.
TPMS helps, but not all Honda Beat models have it; check manually if needed.
What should I do if tire pressure keeps changing?
Investigate for leaks, inspect the valve stems, and verify readings with a second gauge. If changes persist, seek professional inspection.
Persistent changes mean leaks or valve issues; get it inspected.
Watch Video
What to Remember
- Check tires cold before taking readings.
- Use the placard or manual for exact pressures.
- Inflate/deflate in small steps and recheck.
- Log readings monthly and before trips.
- TPMS awareness helps safety and efficiency.