GLC Tyre Pressure: Check, Adjust, and Maintain
Learn how to check, adjust, and maintain tyre pressure for the Mercedes GLC. Practical steps, TPMS insights, and maintenance tips from Tire Pressure Tips to improve safety, handling, and fuel efficiency.

Learn how to check and set the GLC tyre pressure accurately. Start by locating the official GLC tire pressure spec on the door placard or owner’s manual. Measure all four tires when cold with a reliable gauge, then adjust each tire to the recommended PSI. Maintaining correct pressure improves safety, fuel efficiency, handling, and tire longevity.
Why accurate tyre pressure matters for the GLC
Maintaining correct tyre pressure on your Mercedes GLC is not just about avoiding a flat tire; it affects safety, handling, and efficiency. Incorrect pressure changes the contact patch, reduces grip in corners, and increases rolling resistance, which can decrease fuel economy. For drivers seeking practical guidance, properly inflated tires help distribute weight evenly, reduce wear, and improve braking performance across wet and dry surfaces. According to Tire Pressure Tips, the first step is to locate the official GLC tyre pressure spec from the door placard or owner’s manual, because the recommended values depend on tire size, load, and driving conditions. When you dial in the right pressure, you’re protecting the tire structure and the wheel rims, while also smoothing ride quality. In this guide, you’ll learn how to verify, adjust, and maintain tire pressure specifically for the GLC, with attention to the differences between front and rear tires, temperature effects, and common TPMS considerations.
Understanding the factory-recommended tyre pressures for the GLC
The Mercedes GLC does not have a single universal tyre pressure value. The recommended PSI varies by model year, tire width, and whether you carry passengers, cargo, or a full load. The primary source of truth is the placard on the driver’s door jamb and the owner's manual, which show separate values for front and rear tires and sometimes for the spare. In practice, most GLC configurations fall within a broad range, but you should never assume a value from another vehicle. For accurate numbers, locate the exact spec for your tires, note the units (psi or kPa), and use that target as your inflation goal. If you replace tires with a different size, recheck the recommended pressure and adjust accordingly. Remember, maintaining the correct pressure helps preserve tread life and improves steering response, braking distance, and fuel efficiency—key reasons drivers rely on the GLC tyre pressure guidance.
How to check tyre pressure when the tires are cold
To get an accurate reading for the GLC tyre pressure, check when the tires are cold. A warm tire can read higher pressure and give you a false sense of overinflation. Plan checks before you’ve driven, or wait at least three hours after last driving, parking in the shade if possible. Remove the valve cap and press the gauge onto the valve stem firmly, avoiding air leaks. Note the reading on all four tires and compare with the manufacturer’s target. If your readings deviate, you’ll know which tires need adjustment. The process is quick: you can complete all four readings in under 10 minutes with a quality gauge.
How to use a tire pressure gauge
Different gauge types exist: digital, dial, and stick gauges. Digital gauges are fast and easy to read, but require battery power. Dial gauges provide a traditional needle display, which some drivers find easier to track. Stick gauges are compact but less precise. For a GLC tyre pressure check, use a gauge that can display your target in psi (or kPa) clearly. Steps: remove the valve cap, place the gauge, press straight to avoid air leaks, and read the value. Repeat on all tires to confirm accuracy. If you see inconsistent readings, check for valve core leaks or a slow puncture. After you finish, replace the valve caps to protect the stems and prevent dirt from entering.
Adjusting pressure for load, speed, and temperature
Your GLC’s tyre pressures should adjust when you’re carrying extra weight, planning a long highway drive, or facing temperature changes. Heavier loads generally require slightly higher pressures to maintain the same contact patch. However, never exceed the maximum pressure recommended on the tire sidewall. If you regularly drive with heavy cargo, consult the owner's manual for a load-compensation value. Temperature changes also affect pressure; in cold weather, pressure drops, while hot weather increases it. The rule of thumb is to check the pressure when tires are cold and adjust to the specified target, then recheck after a few miles of driving. This helps prevent excessive wear on the outer edges of the tire and helps stabilize braking performance.
TPMS: what you need to know about the GLC sensors
Mercedes GLC is equipped with a TPMS that warns when a tire falls significantly below its target pressure. TPMS readings can be influenced by temperature and sensor accuracy; they are not a replacement for regular manual checks. If you see a TPMS warning, stop and verify each tire’s pressure with a gauge, then adjust as needed. If the TPMS persists after proper inflation, you may have a faulty sensor, a slow leak, or a need for reprogramming. Always reset or calibrate the TPMS after adjusting tire pressures per the owner's manual.
Common mistakes and how to avoid them
Common mistakes include checking when tires are warm, using the wrong target pressure, inflating too quickly, and ignoring the spare tire. Another frequent error is failing to recheck after a drive, which can hide slow leaks. Always verify units (psi vs kPa) and ensure the gauge reads accurately. Keep valve caps installed and clean to prevent dirt ingress that can cause slow leaks or misreadings. Finally, do not rely solely on TPMS; use manual checks for validation.
Seasonal changes and tire pressure
Seasonal temperature changes significantly impact tyre pressure. In winter, cold temperatures cause pressure loss; in summer, higher ambient temperatures raise readings. For the GLC, this means you may need to adjust more frequently during seasonal transitions. It's wise to check monthly and before cold-weather trips. When you fill, ensure the reading is at the spec; if climate changes, recalibrate. Remember that your tire pressure targets assume cold tires, so plan adjustments accordingly.
Practical maintenance routine for the GLC's tyre pressure
A simple monthly routine keeps you in control: 1) Check the door placard for the exact GLC tyre pressure values. 2) Measure all four tires when cold using a reliable gauge. 3) Inflate or deflate each tire to the recommended pressure. 4) Inspect the spare tire pressure and condition. 5) Recheck all readings after a quick drive of 5-10 miles to settle the tires. 6) Refit valve caps and document readings for future reference. 7) If a reading seems anomalous, inspect for leaks or damage and consult a professional if needed.
Tools & Materials
- Tire pressure gauge (digital or analog)(Prefer a gauge with a tight seal and clear readout; calibrate occasionally.)
- Air compressor or access to a gas station air pump(Needed to adjust pressures to the recommended target.)
- Owner's manual and door placard for GLC tyre pressures(Medical values vary by tire size and load; verify the exact figures.)
- Valve cap tool or clean cloth(Helpful for reinstalling valve caps and keeping stems clean.)
- Backup pressure gauge(Useful if the primary gauge readings seem inconsistent.)
Steps
Estimated time: 20-30 minutes
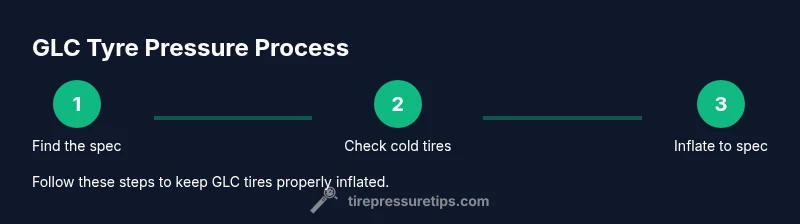
- 1
Find the official GLC pressure spec
Locate the exact target pressure on the driver’s door placard and in the owner’s manual. Note differences between front and rear tires and any variations for load or tire size. This is your inflation goal and foundation for all subsequent steps.
Tip: Cross-check front/rear specs and ensure you’re reading the correct unit (psi or kPa). - 2
Prepare your tools and area
Choose a flat, shaded area away from direct sun. Gather a reliable gauge, the air source, and a notebook or device to record readings. Remove any dirt from valve stems to prevent leaks during measurement.
Tip: A small flashlight helps you see the valve stems clearly in dim light. - 3
Measure tires when cold
Ensure tires have not been driven for at least 3 hours. Remove valve caps, press the gauge straight onto the valve stem, and note each reading. Compare all four tires to the target pressures and identify underinflated tires.
Tip: If readings vary widely, recheck after a few minutes to confirm accuracy. - 4
Inflate or deflate to target pressure
If underinflated, add air gradually in small increments; if overinflated, release air slowly until you hit the target. Re-measure after adjustment to confirm accuracy. Ensure you’re using the correct front/rear targets.
Tip: Make increments of 1-2 psi at a time and recheck before adding more. - 5
Check all tires and the spare
Repeat measurement for all four tires, and if your GLC uses a full-size spare, check its pressure too. Uneven tire pressures can affect handling and wear patterns.
Tip: Record readings for each tire to track changes over time. - 6
Reinstall caps and document readings
Reinstall valve caps to protect stems and seal leaks. Write down or store the final figures so future checks are quicker and consistent.
Tip: Take a quick photo of the gauge readings for reference. - 7
Verify TPMS status after adjustment
If the TPMS warned earlier, drive a short distance and recheck the readings. If the TPMS warning persists after correct inflation, check for leaks or sensor issues.
Tip: Consult the manual for TPMS reset procedures after inflation changes.
Frequently Asked Questions
What is the correct tyre pressure for the GLC?
There isn’t a single universal value for all GLCs. Check the door placard or owner's manual for the exact front and rear tire pressures based on tire size and load. If you replace tires, re-check the spec for the new size.
Use the door placard and manual for the exact GLC pressures, and adjust if you change tire size.
How often should I check tyre pressure?
Check at least once a month and before long trips. Always measure when tires are cold to avoid readings altered by recent driving.
Check monthly and before trips, when tires are cold.
Can TPMS replace manual tyre pressure checks?
TPMS warns about significant pressure loss but isn’t a substitute for manual checks. Use gauge measurements to confirm and address slow leaks or sensor issues as needed.
TPMS helps, but you should still measure with a gauge.
Does temperature affect tyre pressure?
Yes. Colder temperatures reduce pressure, while heat can raise it. Check and adjust when tires are cold, especially during seasonal changes.
Temperature changes affect pressure; check when cold.
Should I check pressures with cold or warm tires?
Always check the pressure with cold tires for accuracy. Warm tires read higher and can mislead adjustments.
Check when cold for accuracy.
What if the gauge and placard values don’t match?
Rely on the official value from the placard or manual. If the gauge reads differently, recheck the tire, ensure the gauge is calibrated, and use the placard values as the target.
Trust the placard; recheck with a calibrated gauge if in doubt.
Watch Video
What to Remember
- Find the exact GLC pressure spec before inflating
- Check tires cold and adjust with a reliable gauge
- Inflate all tires to target pressure; recheck after driving
- Use TPMS as a guide, not the sole source