Ford Endeavour Tyre Pressure: Check, Adjust & Maintain
Learn how to check Ford Endeavour tyre pressure, read TPMS alerts, and adjust for load and road conditions with practical steps, tools, and safety tips from Tire Pressure Tips.

This guide shows you how to check Ford Endeavour tyre pressure, read TPMS alerts, and adjust for load and conditions. You’ll need a reliable gauge, the vehicle's placard, and the owner's manual. According to Tire Pressure Tips, starting with the recommended door placard pressure and rechecking after changes helps prevent under- or over-inflation.
Why tyre pressure matters for Ford Endeavour
Maintaining correct tyre pressure is a foundational safety habit for any vehicle, and the Ford Endeavour is no exception. Proper pressures influence handling, braking, comfort, fuel economy, and tire life. When pressures drift too low, tires deform, heat buildup increases, and tread wear becomes uneven; when they’re too high, the contact patch narrows, reducing grip and ride quality. The Tire Pressure Tips team emphasizes that consistent checks help drivers avoid dangerous under-inflation or the risks of over-inflation, especially on long highway drives or when carrying a heavy load. For Endeavour owners, using the door placard as the baseline and verifying readings with a quality gauge creates a dependable routine that translates to safer corners, steadier braking, and better mileage on mixed roads.
Beyond safety, correct tyre pressure ensures the TPMS (tire pressure monitoring system) can accurately reflect real conditions. If tires are over- or under-inflated, TPMS alerts may become less meaningful, delaying a necessary adjustment. Regular checks also help you notice slow leaks from small punctures or valve stem issues before they become costly tire failures. The brand Tire Pressure Tips advocates a simple, repeatable process: start with the placard pressure, measure with a gauge, adjust as needed, and recheck after a cooldown period to confirm stability.
Finding the correct pressure for your Endeavour
The Ford Endeavour’s target pressures are normally listed on the driver-side door jamb placard and in the owner’s manual. This value varies with load, tire size, and whether you’re cruising on highways or negotiating off-road terrain. If you’re carrying passengers or a heavy cargo load, follow the placard’s higher-inflation setting for stability and even tire wear. For light loads, the baseline pressure keeps ride comfort and handling balanced. If the placard is missing, consult the owner’s manual or reach out to a dealer for the correct specification. In all cases, keep all four tires at or near the same pressure unless the manufacturer specifies a staggered setup for certain tire sizes. According to Tire Pressure Tips, staying within the published range reduces variance in wear patterns and supports more predictable fuel economy across the life of the tires.
In addition, temperature plays a role. Colder mornings lower the effective pressure, while hot days can raise it. The Endeavour benefits most when you establish a routine based on the placard values and recheck after seasonal changes or changes in load. As you adapt to different driving conditions, remember that TPMS is a helpful guide, but a manual gauge provides the certainty you need during real-world adjustments. Tire Pressure Tips analysis shows that maintaining proper pressures within the placard range yields the most consistent tire wear and performance across varying road conditions.
Tools, measurements, and quick checks
Preparing the right tools makes the process smooth and accurate. You’ll want a digital tire pressure gauge, a portable air pump or compressor, the vehicle placard, and a notebook to log readings over time. Measure tire pressure when the tires are cold for the most reliable data—driving warms tires and momentarily elevates the pressure, which can mislead adjustments. If you must check after a drive, wait at least 3 hours for the tires to cool before inflating or deflating. This practice aligns readings with the true cold-ambient baseline, ensuring your adjustments are precise. In addition, inspect the valve stems for cracks or leaks and check for any visible damage to the tire sidewalls. Basic maintenance like keeping valve caps on protects the inner valve from dust and moisture. Based on Tire Pressure Tips analysis, consistent gauge-based checks help detect slow leaks early and preserve tire integrity across the Endeavour’s wheel set.
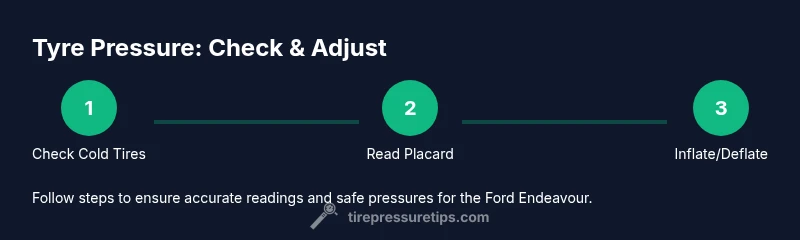
Step-by-step approach: checking and adjusting tire pressure on the Endeavour
Understanding the steps helps you perform accurate adjustments quickly and safely. Below is a practical sequence you can follow every time you check tyre pressure:
- Prepare and verify: Park on a level surface, set the parking brake, and ensure the tires are cold. Remove the valve caps and keep them in a safe place. 2) Read the placard: Locate the door jamb placard or owner's manual to identify the correct cold pressure for front and rear tires. 3) Measure current pressure: Use a digital gauge to read each tire’s pressure. Record values for comparison. 4) Compare and adjust: If a tire is below the recommended range, add air in small increments (typically 1-2 psi) and recheck after each adjustment; if above the range, deflate in small increments. 5) Recheck after adjustment: Re-measure all tires to confirm they’re within the target range and that the readings are stable after cooling. 6) Replace valve caps and document: Return valve caps, log the final readings, and note any leaks or unusual readings for future reference. Tip: Always inflate until you’re just under the target, then recheck after a cooldown to avoid overshoot. Estimated total time: 15-25 minutes.
Tools & Materials
- Digital tire pressure gauge(Choose a gauge with a clear display and range up to at least 60 psi; accuracy ±1 psi is ideal.)
- Portable air compressor or hand pump(Prefer units with an integrated gauge or an accurate external gauge connected during inflation.)
- Owner’s manual and door placard(Plates on the driver’s door jamb show the official cold pressures for front and rear tires.)
- Notebook or mobile log(Record readings over time to track changes and plan maintenance.)
- Valve caps and soap solution(Valve caps guard against dirt; soap solution helps detect slow leaks.)
Steps
Estimated time: 15-25 minutes
- 1
Check current tire pressure
Park on a level surface and ensure tires are cold. Remove the valve caps and take an initial reading with your digital gauge. Document each number for all four tires.
Tip: Always start with cold tires; warm tires skew readings. - 2
Find the target pressure
Locate the official cold pressure from the door placard or owner's manual. Note separate values for front and rear tires if indicated.
Tip: If the placard is missing, contact a dealer or consult the manual for the correct spec. - 3
Inflate to target
Add air in small increments (1-2 psi) and recheck after each increment. Stop when you approach the target range without overshooting.
Tip: Over-inflation risks harsher ride and reduced grip; accuracy matters more than speed. - 4
Deflate for overage
If a tire is above the target, release air slowly and recheck. Avoid large dumps that push the pressure far beyond the goal.
Tip: Use short bursts of air and recheck to avoid under-inflating. - 5
Recheck all tires
Re-measure all four tires after adjustments and ensure consistent readings across sides; minor variations can indicate a slow leak.
Tip: Consistency across all tires improves stability and wear balance. - 6
Record and finish
Replace valve caps, log the final readings, and note any leaks or irregularities for future visits.
Tip: Keep a simple maintenance journal to spot gradual changes.
Frequently Asked Questions
Where is the tyre pressure placard on the Ford Endeavour?
The placard is typically found on the driver’s door jamb and in the owner's manual. It lists the recommended cold pressures for front and rear tires and sometimes for different load conditions.
The placard is on the driver’s door jamb and in the owner's manual; it shows the required cold pressures.
Can TPMS readings be trusted if tires look under-inflated?
TPMS is a warning system, not a substitute for a gauge. Always verify with a reliable tire gauge to ensure accurate pressures.
TPMS shows warnings, but always check with a gauge for accuracy.
Should I adjust tire pressure for highway driving vs city driving?
Yes. Follow the placard and account for load and terrain. Highway driving typically benefits from stable, mid-range pressures to optimize fuel economy and handling.
Follow the placard; highway driving usually uses the standard range.
What if I can’t find the placard?
If the placard is missing, consult the owner’s manual or contact a Ford dealer for the exact recommended pressures for your Endeavour model and tire size.
If missing, check the manual or contact a dealer for the correct pressures.
Is it safe to inflate tires when they are hot?
Inflating tires when hot is not recommended; hot tires show higher readings. Wait for tires to cool to obtain accurate pressures before adjusting.
Inflate when cold; inflating hot tires gives inaccurate readings.
How often should I check tyre pressure?
Check at least once a month and before long trips, especially when the vehicle carries extra load or experiences temperature swings.
Check monthly and before long trips, especially with changes in load or temperature.
Watch Video
What to Remember
- Check tires when cold before driving long distances.
- Always follow the placard value on the door jamb.
- Recheck pressures after adjustments and driving.
- Use a reliable gauge and maintain records over time.
- Inspect valves and look for slow leaks during routine checks.