Dial a Tyre: A Complete How-To on Checking Tire Pressure with a Dial Gauge
Learn how to accurately check and dial tyre pressure using a dial gauge. Practical, safety-focused guidance from Tire Pressure Tips with tips for seasonal changes and common mistakes.

Dial a tyre means using a dial-style tyre pressure gauge to measure and adjust air in each tyre. This guide covers how to pick a gauge, how to read readings on cold tyres for accuracy, and how to adjust pressure safely. You’ll learn best practices, common mistakes, and how temperature and load affect the numbers for safer driving.
Why a Tire Dial Gauge Matters
Maintaining correct tyre pressure is a foundational part of vehicle safety and efficiency. A dial tyre gauge gives you a clear, analog readout of pressure, which helps you verify that each tyre sits within the manufacturer’s recommended range. The Tire Pressure Tips team emphasizes that consistent, accurate readings can prevent underinflation or overinflation, reducing wear and improving fuel economy. According to Tire Pressure Tips, even small pressure deviations can alter handling, braking distance, and ride comfort. By using a dial gauge, you gain tactile feedback and a reliable check against dashboard TPMS alerts, especially in seasons with temperature swings or heavy loads that push tyres out of spec.
Regular checks with a dial gauge empower you to catch slow leaks early and plan maintenance before a tyre issue becomes costly. This practice also supports longer tyre life and safer road trips. Do not skip cold-t tyre checks, as hot tyres show inflated numbers that mask the true pressure. The habit pays off in safer driving and better mileage, a core principle we stand by at Tire Pressure Tips.
Understanding Dial Gauge Types
Dial tyre pressure gauges come in several styles: simple mechanical dial gauges, dual-head gauges, and combination gauges with a built-in chuck. A basic mechanical dial gauge offers a clear circular scale and a needle that points to the pressure. Dual-head gauges can fit both Schrader valves and some valve types, which is handy if you drive older or newer cars. When choosing a gauge, look for a large, easy-to-read dial, a sturdy body, and a range that covers typical passenger-car pressures. For most drivers, a single, well-calibrated dial gauge is all you need for accurate readings. If you switch between metric and imperial units, ensure the gauge can switch modes without error. A good gauge should also have a protective cap and a comfortable grip to encourage regular use.
In practice, a high-quality dial gauge gives you consistent results across checks. Avoid any gauge with a fluttering needle or ambiguous calibration marks, as these signals can lead to misreads and improper inflations. The right tool reduces guesswork and helps you maintain optimal performance, safety, and comfort on the road.
Preparing for a Tyre Pressure Check
Before you check, ensure the car is parked on a flat surface and the tyres are cold (at least 3 hours since last drive). Remove the valve cap, inspect for damage or dirt around the valve stem and cap threads, and wipe the stem if needed. Have your dial gauge ready, plus a source of air if you need to top up after checking. If you’re checking multiple tyres, keep track of each reading with a quick note. Document the readings so you can monitor changes over time and detect slow leaks.
It’s also wise to check the spare tyre capacity if you carry a full load or travel long distances. A common mistake is inflating tyres to a pressure that’s comfortable rather than the manufacturer’s specification. Always verify the target pressure in your owner’s manual or the door placard, and use the same gauge for consistency. Consistency is key when diagnosing issues and planning maintenance intervals—this is a core message from Tire Pressure Tips.
Step-by-Step: Using a Dial Tyre Gauge
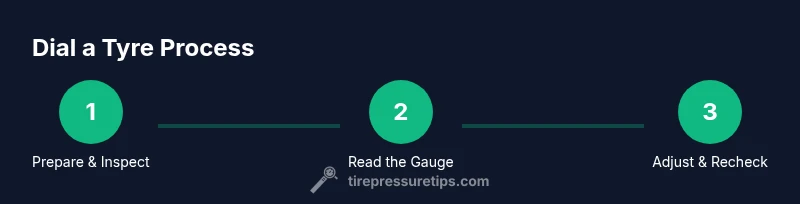
- Prepare the car and gauge: Park on a level surface, turn off the engine, and keep all wheels free from debris. 2) Remove the valve cap and clean the valve stem. 3) Attach the dial gauge firmly to the valve stem and ensure a seal; wiggle slightly to secure. 4) Read the dial scale straight on, avoiding parallax error. 5) Compare the reading to the manufacturer’s specification on the door placard or owner’s manual. 6) If underinflated, add air in small increments and recheck. 7) If overinflated, release air gradually and recheck until you reach the target. 8) Replace the valve caps and record the reading.
Tip: Take multiple readings, especially if the first result seems off. If you find inconsistent readings, re-check the valve core and consider replacing the gauge after a few checks. This step-by-step approach minimizes guessing and supports safe tyre pressures. Total time for a full round of checks is typically 15–25 minutes depending on the number of tyres, tools on hand, and whether top-ups are necessary.
Common Mistakes and How to Avoid Them
Common mistakes include checking pressure when tyres are hot, using an inaccurate gauge, or inflating to a rough guess rather than the manufacturer’s spec. Temperature and recent driving can skew readings, leading to over- or under-inflation. Always check cold tyres for accuracy, and use the gauge consistently across checks. Don’t mix gauge types mid-check; if you switch, the readings may no longer be comparable. Lastly, avoid deflating tyres below the minimum recommended pressure, which can compromise handling and tyre wear. By sticking to the manufacturer’s guidance and using a dial gauge properly, you reduce risk and extend tyre life. The Tire Pressure Tips team recommends documenting each reading as a daily maintenance practice.
Temperature and Seasonal Effects on Tyre Pressure
Ambient temperature directly affects tyre pressure. In colder weather, air contracts and tyre pressures drop; in hot weather, pressures rise as air expands. This means a reading taken in cool morning conditions may be different from a reading after a long highway drive in the afternoon. For accurate comparisons, always measure in similar conditions and adjust for seasonal changes as needed. Many drivers forget that tyre pressures can change with a full load or towing, so re-check after changing load or routing conditions. Tire Pressure Tips analysis shows that failing to account for temperature shifts can lead to chronic underinflation or overinflation, degrading safety and fuel economy.
Daily Maintenance: Routine Checks and Records
Make tyre pressure checks part of your regular maintenance routine. Schedule checks every two to four weeks and before long trips or seasonal transitions. Keep a small notebook or digital log of readings by tyre position and date to monitor trends and catch slow leaks early. When you replace or rotate tyres, reassess the recommended pressures for each position; front and rear pressures can differ on many vehicles. By maintaining a log, you’ll spot gradual changes and be proactive about repairs or replacements. The Tire Pressure Tips team emphasizes that routine checks are a simple yet powerful habit that protects you and your passengers. Consistency matters as much as accuracy, and a dial gauge makes this process reliable and approachable.
Authority sources
For further reading and official guidance, see:
- https://www.nhtsa.gov/road-safety/tires
- https://www.consumerreports.org/cars-t-driving/how-to-check-tire-pressure/
- https://www.nist.gov/transportation
Tools & Materials
- dial tyre pressure gauge(Choose a mechanical dial gauge with a clear, large dial and a robust build)
- air compressor or portable air pump(Ability to add air in small increments; ensure compatibility with your valve type)
- valve cap remover (optional)(Useful if caps are tightly stuck or dirty)
- clean cloth(Wipe the valve stem and gauge fittings for a good seal)
- notepad or digital log(Record readings for trend tracking and maintenance planning)
- spare valve core kit (optional)(Useful if leaks are suspected from the valve stem)
Steps
Estimated time: Total time: 15-25 minutes for a full four-wheel check
- 1
Gather tools and prepare
Set out your dial tyre pressure gauge, air supply, and log material. Park on a flat surface with the engine off and tyres cold. This ensures accurate readings and prevents heat-related inflation errors.
Tip: Check that the gauge reads in the same unit (psi or kPa) and is calibrated. - 2
Remove valve cap and inspect
Unscrew the valve cap and inspect the valve stem for dirt, damage, or corrosion. Wipe lightly if needed. A clean stem helps achieve a good seal with the gauge.
Tip: If the valve is hard to access, use a flashlight to inspect and avoid bending the stem. - 3
Attach the dial gauge securely
Place the gauge onto the valve stem firmly, engaging the seal. Do not wiggle wildly—steady contact produces an accurate reading and avoids air leaks.
Tip: Ensure the gauge face is perpendicular to your line of sight to avoid parallax error. - 4
Read and compare
Read the dial gauge and compare with the vehicle’s recommended pressure. Record the value and position (FL, FR, RL, RR).
Tip: Take two readings to confirm accuracy; slight variation is normal but large swings mean a leak or gauge issue. - 5
Adjust air as needed
If underinflated, add air in small increments and recheck after each addition. If overinflated, release air gradually and recheck until you reach target.
Tip: Avoid letting air escape in big bursts; go slow to prevent overcorrection. - 6
Recheck and record
Recheck all tyres, replace valve caps, and log the final readings. A consistent record helps you monitor changes and spot slow leaks.
Tip: Note load, temperature, and trip conditions that day to interpret readings accurately.
Frequently Asked Questions
What is a dial tyre gauge and why should I use one?
A dial tyre gauge is an analog instrument that shows tyre pressure on a circular dial. It’s valued for its clear readout and reliability, especially when TPMS alarms are present or for checking a spare. Regular use helps ensure tyres run at the manufacturer’s recommended pressure for safety and efficiency.
A dial tyre gauge is a round readout tool that shows your tyre pressure. It’s reliable and easy to read, making it great for regular checks.
How do I know the correct tyre pressure for my car?
The right pressure is listed on the vehicle’s door placard or in the owner’s manual. It’s not the same for every tyre. Follow the manufacturer’s specification for each axle, and adjust for load or driving conditions as needed.
Check the door placard or manual for the exact pressure per tyre and axle.
Can temperature affect tyre pressure readings?
Yes. Cold readings reflect the pressure inside tyres at ambient temperature. Warmer temperatures raise pressure slightly. Track changes with the season and after long trips to maintain accuracy.
Temperature changes can change tyre pressure; read while tyres are cold for best accuracy.
What should I do if readings keep fluctuating?
Recheck with the gauge, inspect the valve stem for leaks, and consider a faulty gauge. If the issue persists, have the system checked by a professional.
If readings keep changing, recheck the gauge and the valve for leaks.
Is it safe to adjust tyre pressure while the car is running?
No. Inflating or deflating should be done with the car stopped and on a flat surface to avoid injury and ensure accurate readings.
Never adjust tyre pressure while the car is running or moving.
How often should I check tyre pressure?
Check tyres at least every two to four weeks, before long trips, and after seasonal changes. More frequent checks are wise in extreme temperatures or when carrying heavy loads.
Check tyres regularly—every 2-4 weeks and before long trips.
What if I have a slow leak?
If you notice persistent drops in pressure, inspect for punctures, valve leaks, or bead damage. A mechanic can diagnose and repair leaks properly to prevent flats.
A slow leak often means a puncture or valve issue—get it checked.
Watch Video
What to Remember
- Check cold tyres for accuracy
- Use a reliable dial gauge and be consistent
- Inflate in small increments and recheck
- Record readings to spot trends
- Account for temperature and load effects