Tyre Pressure Guide for V-Strom 250
Learn how to check and maintain tyre pressure for the V-Strom 250 with practical steps, TPMS guidance, and load-based adjustments.

In this guide you will learn how to check and set tyre pressure for the V-Strom 250, including the front and rear pressures, how to account for loads and riding conditions, and how to use a gauge or TPMS. You’ll also learn safety tips and when to adjust for temperature.
Why tyre pressure accuracy matters for the V-Strom 250
Proper tyre pressure is essential for safe handling and tire longevity on a motorcycle as capable as the V-Strom 250. When pressures are too low, the bike feels sluggish, the tires overheat, and the sidewalls flex excessively; when too high, contact patch reduces and grip suffers in corners. According to Tire Pressure Tips, maintaining correct tyre pressure reduces heat buildup, improves stability, and extends tire life. For a small adventure-styled bike like the V-Strom 250, riding at the correct pressures helps preserve suspension geometry and enables predictable steering, especially when you’re riding with a passenger or fully loaded panniers. In this section we’ll explore the why behind the numbers, the signs you’re off, and how to set up a solid baseline before long trips.
Manufacturer specs and load considerations
Manufacturer specifications for motorcycle tyres are published by the bike maker and are usually shown on a tire placard under the seat or on the frame near the swingarm. Always start with the official numbers from the owner’s manual and the placard for your exact model and tyre type. Load greatly affects the numbers: solo riding uses a different baseline than two-up with luggage. If you regularly ride with a passenger, or carry top cases, you’ll want to evaluate how your load shifts the contact patch. Remember that tyre type (tubeless versus tubed, and the rear tyre width) can also influence the recommended pressure.
Tools and gauges you’ll need
To measure tyre pressure accurately, you’ll want a reliable gauge and a place to inflate if needed. A digital gauge is quick and easy, while a dial gauge can be very steady once you get used to it. Keep the bike on a level, stable surface and use the valve stem caps as you take readings. Having the owner’s manual handy helps you cross-check front vs rear pressures and any model-specific notes. If you don’t have easy access to a good gauge, consider visiting a reputable gas station or Motorrad shop that offers accurate pressure checks.
Temperature effects and seasonal adjustments
Ambient temperature can subtly shift tyre pressures. Cold weather typically lowers the reading slightly, while post-ride heat can temporarily raise numbers as the tyre warms. To maintain accuracy, check pressures when tyres are cold, ideally before riding, and plan adjustments during temperature changes. If you store the bike in a garage that’s much colder than the riding environment, re-check once the bike is reached its typical operating temperature.
Tire Pressure and TPMS on motorcycles
Some motorcycles include a Tire Pressure Monitoring System (TPMS), but not all. If your V-Strom 250 has TPMS, use the dashboard readings as a guide, then verify with a physical gauge to confirm accuracy. If your bike doesn’t have TPMS, rely on a quality gauge and the manufacturer’s cold pressure values. In either case, remember that a consistent routine of checks—especially after long rides or highway speeds—helps you catch slow leaks and punctures early.
Common mistakes and best practices
Avoid inconsistencies by always checking tyres when they are cold, using a trusted gauge, and avoiding the temptation to over-inflate to maximize speed. Do not mix tyre pressures for front and rear without a manufacturer recommendation. Always re-check after adjusting to confirm the reading. Finally, document your baseline readings so you can detect gradual changes over time.
Tools & Materials
- Tyre pressure gauge(Prefer digital or dial gauge; check cold tyres for accuracy)
- Owner's manual(Find the official cold pressures and load recommendations for your model)
- Air pump or compressor(Useful if you don’t have access to an air nozzle with a gauge)
- Valve-cap tool or small wrench(Helpful to remove caps without cross-threading)
- Notebook or app(Record readings, conditions, and any adjustments)
Steps
Estimated time: 15-20 minutes
- 1
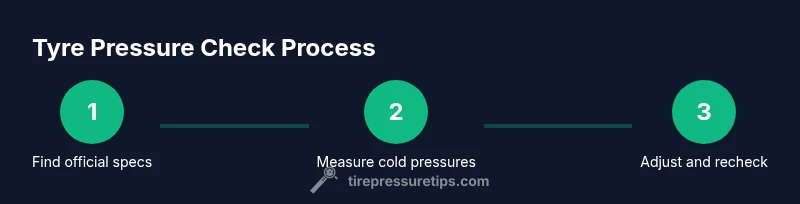
Prepare and locate the official specs
Set the bike on a level stand and locate the pressures for front and rear tyres in the owner’s manual or on the factory placard. Confirm whether those specs vary with solo riding, two-up, or luggage. This is your baseline before measurements.
Tip: Always start with the cold-reading baseline before any ride. - 2
Warm-up and safety checks
If you’ve just finished a ride, allow tyres to cool for at least 10 minutes before checking. Ensure you’re on a flat surface, the stand is stable, and there are no wheel or brake issues.
Tip: Never measure tyres while the bike is warm or in motion. - 3
Remove valve caps and prepare gauge
Take off the valve caps and keep them in a safe place. Hold your gauge close to the valve stem without forcing air out of the tyre. Prepare to read a steady, accurate measurement.
Tip: If you hear air escaping murmur from the valve, stop and inspect the valve first for leaks. - 4
Read the pressures
Attach the gauge to the valve stem and read the pressure for both front and rear tyres. Record these readings in your notebook or app.
Tip: If readings are inconsistent between two gauges, use a third gauge to confirm. - 5
Inflate or deflate to spec
Using your air source, bring each tyre to its specified cold pressure. Do not exceed the maximum printed on the tyre sidewall; adjust gradually and recheck after adjusting.
Tip: If you don’t know the exact number, aim for the lower end of the recommended range and test ride lightly. - 6
Recheck the readings
After adjustments, re-measure both tyres to confirm they are at the target pressures. Replace valve caps, and tidy up any tools.
Tip: Small changes can shift quickly; always recheck after every adjustment. - 7
Check TPMS status (if equipped)
If your V-Strom 250 has TPMS, compare dashboard alerts with the actual gauge reading. Calibrate or consult the manual if readings diverge.
Tip: TPMS is a guide, not a substitute for direct measurement with a gauge. - 8
Road test and confirm
Take a short test ride, then recheck pressures again to ensure no leakage occurred during the ride. If readings drift, inspect for punctures or valve leaks.
Tip: Document any drift so you can seek professional service if the leak persists.
Frequently Asked Questions
What is the recommended tyre pressure for V-Strom 250 front and rear?
Consult the owner’s manual or the tyre placard on the bike; pressures vary with load and tyre type. Use the cold-reading method for accuracy.
Check the bike’s manual or placard for the exact front and rear pressures; use a cold measurement for accuracy.
Can I check tyre pressure when tires are warm?
No. Tyre pressure rises with temperature; for accuracy measure when tyres are cold.
Do it when the tires are cold to get an accurate reading.
What should I do if the TPMS shows low pressure while riding?
Safely pull over and inspect for punctures or leaks; verify readings with a gauge after cooling the tyre.
Pull over safely, check for leaks, and confirm with a gauge.
How often should I check tyre pressure?
At least once a month and before long trips, especially after temperature shifts or loads.
Check monthly and before road trips.
What tools do I need to measure tyre pressure?
A precise tyre pressure gauge, access to air, and your bike’s manual for pressures.
Use a good gauge and your manual for pressures.
Should I adjust tyre pressure for carrying luggage?
Yes. Extra load often requires a higher pressure within the manufacturer’s spec; consult the placard and adjust gradually.
Increase pressure a bit based on load, within the recommended range.
What if I can’t read the placard on my bike?
Refer to the owner’s manual for the model’s default cold pressures and consider contacting the manufacturer or dealer.
Check the manual or contact the dealer for the exact numbers.
Watch Video
What to Remember
- Check cold pressures before rides
- Use the correct gauge and follow manufacturer specs
- Account for load and riding conditions
- Recheck after inflation and road test