Emergency Line Air Pressure Troubleshooting: Causes and Fixes
Urgent, step-by-step troubleshooting for air pressure issues in the emergency line. Learn common causes, diagnostic flow, and safe repair steps to restore reliable pressure and prevent failures.

Most likely, a leak, loose fitting, or faulty regulator is causing pressure loss in the emergency air line. Start by inspecting all fittings for tightness and obvious cracks, then apply soapy water to identify leaks. If there’s no leak, test the regulator and compressor; replace worn components and re-test. Do not drive with significant pressure loss.
Understanding the emergency air line and why pressure changes matter
The list of air pressure in the emergency line causes can seem long, but the core issues usually come down to how the line is sealed, connected, and powered. In many vehicle systems, the emergency line is a dedicated conduit that carries pressurized air to safety-critical components. Maintaining consistent pressure is essential for reliable operation, predictable TPMS behavior, and safe driving. According to Tire Pressure Tips, most pressure fluctuations arise from simple, addressable faults rather than complex failures. In this guide we outline practical checks you can perform safely and quickly, and we highlight where professional service is advised.
Before you begin, ensure the vehicle is on a level surface, the ignition is off, and the system is depressurized if applicable. Wear eye protection and gloves when inspecting lines or using leak-detection methods. If you’re ever unsure, err on the side of professional diagnostics rather than attempting risky repairs yourself.
Common causes of pressure loss in the emergency line
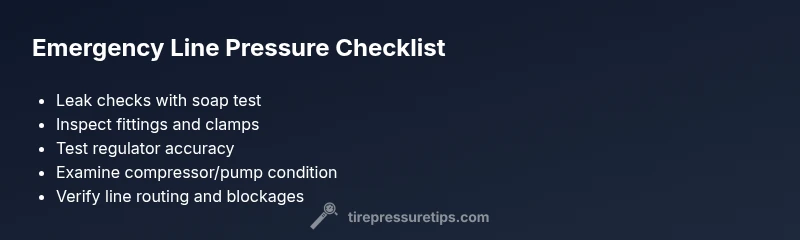
Common causes fall into a few broad categories. First, leaks are by far the most frequent culprit: a pinhole, crack, or loose hose clamp can silently drain pressure. Second, fittings and connectors that are not tight or have worn seals can permit slow leaks or intermittent pressure drops. Third, faulty regulators or relief valves can fail to regulate or hold pressure accurately, leading to fluctuations or failure to build pressure. Fourth, the line itself can be blocked or kinked, restricting flow and preventing the system from reaching proper pressure. Fifth, the drive or shop environment can introduce moisture or contaminants that corrode components over time. Finally, the compressor or pump associated with the emergency line may underperform, especially if it runs hot, is old, or lacks adequate power. If you notice erratic pressure changes along with strange noises, assume multiple factors could be contributing and work through the diagnostic flow.
- Leaks in line or fittings
- Loose or cracked fittings
- Defective regulator or relief valve
- Blocked or kinked line
- Faulty compressor or pump
- Moisture or contaminants in the line
How to diagnose pressure loss
Begin with a systematic check that starts simple and avoids unnecessary disassembly. First verify gauge accuracy: calibrate or compare with a known-good gauge to ensure readings aren’t misinterpreted. Next, visually inspect the entire emergency line for obvious signs of damage, wear, or looseness. A soap solution applied to joints, clamps, and connectors can reveal fast leaks via visible bubbles. If no leak is detected, test the regulator by observing whether pressure stabilizes at the intended setpoint and whether it drops when the system is idle. Finally, inspect the compressor or pump for proper operation: listen for abnormal noises, verify air intake cleanliness, and ensure the motor is receiving appropriate power. If a drop occurs only during system cycling, the regulator or relief valve is a prime suspect. Tire Pressure Tips emphasizes following safety protocols and seeking professional assessment if you’re unsure about any step.
Step-by-step fixes for the most likely causes
When you identify a likely root cause, follow these practical fixes in order:
- Tighten or replace loose fittings: Power down, relieve pressure, and snug clamps using appropriate tools. Check for damaged seals and replace as needed. Tip: Always replace worn O-rings with compatible parts.
- Repair or replace the leaking line: If a pinhole or crack is found, replace the affected hose or section. Use manufacturer-approved hoses to maintain system integrity. Tip: After replacement, recheck all connections for tightness.
- Replace faulty seals and regulators: If the regulator shows signs of wear or fails to hold pressure, install a new regulator and reseat any relief valves. Tip: Do not attempt a regulator repair in the field unless you have the exact replacement and the right tools.
- Clear blockages and address line restrictions: Remove any obstructions and ensure the line route avoids sharp bends that could pinch the hose. Tip: Inspect for temperature-related expansion that may cause pinch points.
- Inspect the compressor/pump: Clean air filters, verify electrical supply, and measure output against spec. If the unit overheats or runs continuously, consider replacement.
- Confirm system integrity: Refill to nominal pressure and monitor for stability over a set period. If pressure still fluctuates, professional diagnostics are advised. Tip: Document readings and symptoms to speed up intake evaluation.
Safety tips and warnings
Always depressurize and disconnect power before touching any line or component. Wear eye protection and gloves; pressurized air can cause severe injury. Never bypass safety valves or disable warning indicators. If you hear persistent hissing, smell unusual air odors, or observe rapid pressure changes while operating the vehicle, stop immediately and seek professional service. Checking and servicing high-pressure lines is best handled by trained technicians to avoid personal injury and vehicle damage.
Steps
Estimated time: 45-60 minutes
- 1
Power down and safety check
Ensure the vehicle and any equipment are powered down. Put on PPE and depressurize the system if applicable. This prevents accidental release of air and protects you from injury.
Tip: Double-check that no tools are left in or near the line before proceeding. - 2
Visually inspect for obvious issues
Look for damaged hoses, cracked fittings, or loose clamps along the entire length of the emergency line. A quick walk-around can reveal obvious faults before you start disassembly.
Tip: Pay attention to areas where the line passes through rigid mounts that could rub and wear the hose. - 3
Perform a leak test
With the system back pressurized at a safe level, apply a soap solution to joints, clamps, and connectors. Watch for bubbles that indicate a leak. Document any leaking points for repair.
Tip: If you see bubbles at multiple points, consider replacing the line assembly. - 4
Test the regulator and relief valve
Measure pressure at the regulator’s output and compare with the setpoint. If pressure falls when the system is idle, the regulator or relief valve may be faulty and require replacement.
Tip: Keep the system off and depressurized during regulator testing. - 5
Inspect the compressor/pump
Check electrical connections, clean or replace air filters, and verify the unit produces expected airflow. Listen for abnormal sounds that may indicate wear or mechanical failure.
Tip: If the compressor overheats or stalls, allow it to cool and re-test; persistent issues warrant replacement. - 6
Rebuild and re-test
Reassemble any components you replaced, re-pressurize to normal operating range, and monitor for stability over a defined period. Verify all gauges read consistently.
Tip: Document readings and ensure no new leaks appear after the first 10 minutes of operation.
Diagnosis: Air pressure in the emergency line fluctuates or drops unexpectedly
Possible Causes
- highAir leak along the line or at fittings
- highLoose or cracked fittings
- mediumFaulty regulator or relief valve
- mediumBlocked or kinked line
- lowFaulty compressor or pump
Fixes
- easyTighten clamps and fittings and replace worn seals
- mediumReplace damaged hose sections or entire line
- mediumTest and replace regulator/relief valve if readings are erratic
- easyUnblock line and correct routing to avoid pinching
- hardService or replace the emergency-line compressor/pump if underperforming
Frequently Asked Questions
What is the emergency air line in a vehicle system?
The emergency air line is a dedicated conduit that carries pressurized air to safety-critical components. If it loses pressure, systems can fail. Regular checks help prevent sudden malfunctions.
The emergency air line carries pressurized air for safety features. Check for leaks and test components regularly.
Can I drive if the emergency line leaks?
No. A leak can compromise safety; pull over safely and arrange for diagnostics or a professional repair.
Don’t drive with a leak. Get the system checked before continuing your trip.
How do I know if the regulator is faulty?
Look for fluctuating or inability to hold pressure. If readings vary despite a steady input, test with a known gauge and compare.
If pressure won’t stay constant, the regulator could be the issue.
What safety steps should I take before repairs?
Relieve pressure, disconnect power, and wear PPE. Ensure you’re in a well-ventilated area and follow manufacturer guidelines.
Relieve pressure and wear protection before starting repairs.
When should I call a professional?
If leaks persist after basic checks, or you’re unsure about testing a regulator or pump, seek professional diagnostics.
If unresolved, it’s best to call a technician for a safe, thorough diagnosis.
Watch Video
What to Remember
- Inspect for leaks first and foremost.
- Tighten or replace faulty fittings to stop most pressure loss.
- Test regulator and compressor if leaks aren’t found.
- Always follow safety protocols and seek professional help for complex issues.