Air Pressure Test for Water Lines: Step-by-Step Guide
Learn how to safely perform an air pressure test for water lines, with setup steps, safety tips, and how to interpret results for leaks.

An air pressure test for water lines is a method used by plumbers to locate leaks by pressurizing a closed water line with air and monitoring pressure stability. This technique can reveal weak joints, cracks, and improper fittings before you fill the system with water. Always follow local codes and safety guidelines.
What is an air pressure test for water lines?
An air pressure test for water lines involves sealing off a portion of the plumbing and introducing air using a regulated source while monitoring pressure stability. This non-destructive method is used to identify leaks, weak joints, or defective fittings before the system is pressurized with water. The test is commonly applied during new installations, after repairs, or when upgrading pipe runs. While the technique can be effective, it requires careful preparation and adherence to safety guidelines to prevent pipe damage or personal injury. In many jurisdictions, codes specify how much pressure may be applied and for how long, and some systems may require a hydrostatic (water) test instead. Regardless of the method, the goal is to confirm the integrity of the lines without creating new hazards. This article explains the procedure, safety considerations, and interpretation of results for the air pressure test for water lines.
When to use an air pressure test
You would typically use an air pressure test when you need to verify the integrity of sealed pipe runs before installing fixtures or before filling the system with water. It is especially common in irrigation lines, under-slab plumbing, or areas where water-filled tests could be impractical due to scheduling constraints. The air test can speed up the construction schedule, but it must not replace a hydrostatic test where codes require water exposure. Always check local building codes and manufacturer recommendations, and choose the test method that minimizes risk to pipes and occupants. If joints or fittings show any sign of leakage during the test, plan to repair and retest before proceeding.
Safety and code considerations
Working with pressurized air in plumbing carries notable hazards. A small leak can produce a loud hiss, while over-pressurizing can cause pipe joints to fail or cause water hammer when liquid enters the system later. Always wear eye protection and gloves, and keep bystanders away from open trenches or fixtures during testing. Ensure the area has adequate ventilation and that you disable active water sources to isolate the test section. Verify that your test pressure aligns with local codes and equipment manufacturer guidance; never exceed recommended limits. When in doubt, consult a licensed plumber or building official to confirm the approved testing protocol.
Tools, materials, and setup
Before starting, assemble a basic kit tailored for air pressure testing. Essential items include an air compressor or regulated air source, a pressure gauge or digital manometer, compatible hoses and adapters, end plugs or caps to seal untested ends, shut-off valves to isolate sections, and personal protective equipment like safety glasses. You may also want a pressure relief device to quickly vent the line after testing, and a water source or dampening container for purging air if needed. Label sections clearly to prevent accidental re-pressurization, and keep a written log of pressure readings during the test.
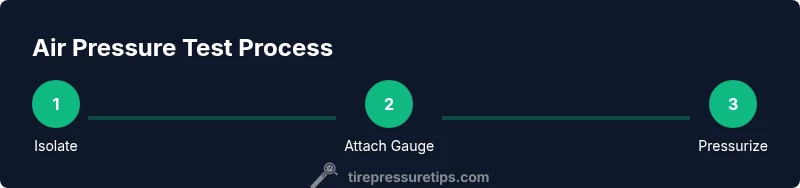
Step-by-step overview
The air pressure test for water lines is a controlled process that hinges on careful isolation, gradual pressurization, and close observation. Start by isolating the section to be tested, then attach the gauge and regulator, and ensure all openings are capped. Introduce air slowly while watching the gauge rise; keep it within the permitted range and remain alert for leakage sounds or visible seeps. Maintain the pressurized state for a sufficient period to confirm stability, then carefully vent and restore the system. Document the findings and plan any repairs if leaks are detected.
Common issues and troubleshooting
Leaking joints, damaged fittings, and improperly seated gaskets are the most frequent sources of failure during air pressure tests. Poorly sealed ends or adapters can create false readings, so double-check every seal before drawing conclusions. If pressure drops unexpectedly, search for leaks along the line using soapy water or acoustic inspection methods. Debris in fittings, cross-threading, or rust can also compromise connections. After any fix, re-test the affected section to ensure stability before proceeding.
Interpreting results and next steps
If the pressure holds steady without a drop and without audible leaks, the section passes the test and can be prepared for hydrostatic or final water fill per code. If you see or hear a leak, identify its location, tighten or replace the relevant fitting, and re-test. Persistent leaks indicate damaged pipe sections or incorrect installation that may require cutting and replacing piping. Always document reading stability and time, and escalate to a licensed plumber if leaks persist or if pressure requirements exceed the system’s design.
Safety alternatives and when to avoid air tests
In some situations, hydrostatic or dye-testing with water may be safer and more reliable, especially for larger diameter pipes or systems carrying drinking water. Air testing is less recommended in lines with fragile materials, older pipes, or when occupancy is present under pressure-sensitive areas. If you are unsure about the appropriate test, consult the building official or a licensed plumber. In all cases, never perform tests without appropriate PPE and a clear plan for pressure release.
Maintenance after testing and long-term considerations
After the test, inspect all seals and joints during normal operation and monitor pressure variations with a reliable gauge. Schedule periodic checks, particularly after repairs or major weather events that can affect pipe integrity. Keep documentation of test conditions and outcomes for future reference and code compliance. With a cautious approach, an air pressure test for water lines can help catch leaks early and save expensive water damage over the life of the system.
Tools & Materials
- Air compressor or regulated air source(Set to a safe pressure range per local codes)
- Pressure gauge or digital manometer(Prefer a gauge with accuracy ±1 psi)
- Test hoses and adapters(Use hose liners to prevent leaks)
- Pipe plugs/end caps(Seal untested ends securely)
- Shut-off valves to isolate sections(Enable clean isolation of test area)
- Safety gear (goggles, gloves)(Protect eyes and hands)
- Pressure relief valve or vent(Safely vent line after test)
- Water source or dampening container(For purging air if needed)
Steps
Estimated time: 60-90 minutes
- 1
Prepare and isolate
Inspect the planned test area and ensure the section to be tested is isolated, drained, and free of debris. Verify that the test plan complies with codes and manufacturer guidance. This step reduces the risk of unexpected withdrawal or pressure surges.
Tip: Wear PPE and confirm the area is clear of bystanders. - 2
Seal untested ends
Close valves or install end caps to create a sealed test loop. Ensure all openings are reachable for inspection and that seals are compatible with air pressure.
Tip: Use end caps rated for the expected pressure. - 3
Attach measurement gear
Connect the pressure gauge and regulator to the test point, ensuring all connections are tight and leak-free. Check for wobble or gaps that could skew readings.
Tip: Avoid adapters that reduce gauge accuracy. - 4
Introduce air gradually
Begin adding air slowly, watching the gauge rise to the target pressure. If you notice leaks, pause and address them before continuing to pressurize.
Tip: Open a bleed valve slowly to prevent a sudden surge. - 5
Hold and observe
Maintain pressure for a defined period while monitoring for any drop or hiss. If stable, proceed; if it dips, locate leaks and document.
Tip: Use soapy water on joints to reveal slow leaks. - 6
Depressurize and restore
Carefully vent the line and remove test gear. Restore water supply and reopen lines, then perform necessary repairs as needed.
Tip: Release pressure gradually to avoid water hammer when water is introduced.
Frequently Asked Questions
What is the purpose of an air pressure test for water lines?
The purpose is to identify leaks, weak joints, and improper fittings by pressurizing a sealed water line with air and observing stability. It helps catch problems before water is introduced.
An air pressure test helps you find leaks by pressurizing a sealed line and watching for drops or hiss sounds.
Is it safer to test with air or water for plumbing lines?
Air tests can be quicker but carry a higher risk of pipe damage if not controlled. Water (hydrostatic) tests are often required by code for larger systems and potable lines.
Air tests are fast but riskier if not controlled; hydrostatic tests may be required by code for larger systems.
Can I perform an air pressure test on existing potable water lines?
Air testing of potable lines is often discouraged by codes and manufacturers. Verify local requirements and consider a water-based test for safety and accuracy.
Air testing potable lines is usually discouraged; check local rules and consider water-based testing for safety.
What should I do if leaks are found during the test?
Identify leak locations, secure or replace faulty fittings, and re-test the affected sections. If leaks persist, consult a licensed plumber.
If leaks show up, fix or replace the fittings and re-test. If they keep leaking, call a pro.
Do local codes permit air pressure testing for water lines?
Code requirements vary by jurisdiction. Always consult the building official or plumber to confirm whether an air pressure test is allowed for your project.
Check with the local authorities or a plumber to confirm if air tests are allowed where you live.
Watch Video
What to Remember
- Inspect and isolate sections before testing
- Use proper seals and calibrated gauges
- Monitor for leaks and document findings
- Follow local codes and safety protocols