Honda Dio Tyre Pressure: How to Check, Set, and Maintain
Learn how to check and maintain proper tyre pressure on the Honda Dio scooter. This step-by-step guide covers locating specs, using gauges, and adjusting front and rear tires for safety, performance, and fuel efficiency. Tire Pressure Tips provides practical guidance for riders.

Prepare to check and set Honda Dio tyre pressure accurately. You’ll locate the manufacturer’s specs on the bike placard or in the manual, then use a reliable gauge and pump to adjust each tire. According to Tire Pressure Tips, precise tyre pressure improves safety, handling, and fuel efficiency, while extending tire life. Front and rear pressures matter, and temperature changes can affect readings on daily rides.
Why correct tyre pressure matters on the Honda Dio
Maintaining the correct tyre pressure on the Honda Dio is essential for safety, handling, tire longevity, and fuel efficiency. When pressures are too low, the tire's contact patch increases, generating extra heat and accelerating wear; when too high, the ride becomes harsh and the tire can lose grip in cornering. For riders, correct Honda Dio tyre pressure translates to improved braking response, more predictable steering, and better mileage over time.
According to Tire Pressure Tips, keeping tires near the manufacturer’s recommended baseline helps your scooter maintain optimal contact with the road, distributes load evenly, and reduces heat buildup. Your front and rear tires may have different targets, and temperature changes can shift readings throughout a day of riding. The goal is to start with the cold reading, adjust to the spec, and recheck after a short ride to confirm stability. This approach helps prevent uneven wear and supports safer emergency maneuvers.
In practice, a small, consistent routine can save you from big issues. Set a reminder to check once a month and before long trips, especially when you’re carrying extra cargo or riding in hot climates. By staying proactive, you protect the tire carcass and improve overall ride quality on every street and highway segment.
This article uses a practical, rider-focused approach to honda dio tyre pressure, with clear steps, safety tips, and data-backed guidance from Tire Pressure Tips. The goal is simple: you ride with confidence, knowing your tyres are performing as they should.
vendorNotesCountWordsForSeoAnalysisRemoveNoteOnlyIfNeededFromThisParagraphOthersNotIncluded
Tools & Materials
- Digital tire pressure gauge(Prefer a gauge with a clear digital readout and a stable seal on the valve stem.)
- Scooter air pump or portable inflator(Ensure compatibility with schrader valves; a built-in gauge is helpful.)
- Honda Dio owner’s manual or placard(Use as the authoritative spec source for front and rear pressures.)
- Valve-cap removal tool or clean cloth(Keep valve caps safe during measurement.)
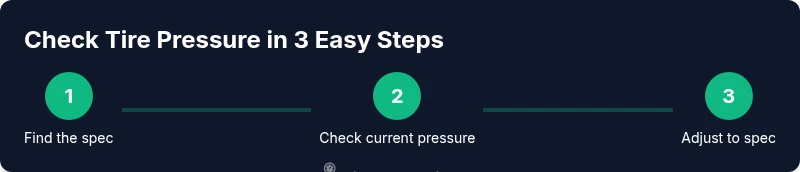
Steps
Estimated time: 15-25 minutes
- 1
Locate official tyre pressure specs
Inspect the Honda Dio placard under the seat or near the VIN to find the official front and rear tyre pressures. If the placard is missing, consult the owner’s manual or official Honda support Portal. Write down both values and the units (psi or kPa) you should use.
Tip: Always verify units and ensure you’re comparing to the same measurement system you’ll inflate with. - 2
Prepare tools and scooter for measurement
Park on a level surface and switch off the engine. Remove the valve caps and keep them in a safe place. Gather your gauge and inflator, and ensure the gauge reads accurately by testing it on a known reference if available.
Tip: Stabilize the scooter so you can stand it securely while taking readings. - 3
Check front tyre pressure (cold)
Attach the gauge to the front valve stem firmly and take a cold reading. If the reading is below the recommended value, prepare to inflate. If it’s too high, release air gradually until you approach the target.
Tip: Use slow, controlled inflations and keep the gauge attached until the pressure stabilizes. - 4
Check rear tyre pressure (cold)
Repeat the measurement process on the rear valve stem. Remember that the rear tyre may have a different target than the front. Compare with the manual/placard and note any discrepancy.
Tip: Rear tires often wear differently; store readings in a small notebook for trend tracking. - 5
Adjust front pressure to spec
If needed, inflate or deflate the front tire to the manufacturer’s recommended target. Make tiny adjustments (1–2 psi or 7–14 kPa at a time) and recheck after changes.
Tip: Avoid overshooting the target; it’s easier to add air in small steps than to release air later. - 6
Adjust rear pressure to spec
Apply the same careful adjustment process to the rear tire, ensuring it also matches the spec. Recheck both tires after adjustments are complete.
Tip: Consistency matters; use the same gauge for both tires. - 7
Final verification and documentation
Recheck both readings once the tires have cooled for a few minutes, and record the final pressures. Inspect tires for wear or damage and ensure valve caps are replaced.
Tip: Document readings to monitor changes over time and after seasonal shifts.
Frequently Asked Questions
What is the recommended tyre pressure for the Honda Dio?
The exact front and rear pressures are published by the manufacturer and can vary by model and tire size. Always start with the spec found on the placard under the seat or in the owner’s manual and adjust only to those targets. If in doubt, consult a dealer.
Check the placard under the seat or the manual for the exact numbers, and adjust only to those targets.
How often should I check tyre pressure on a Honda Dio?
Check tires at least once a month and before long trips. Pressure can change with temperature, load, and riding conditions, so regular checks help prevent under- or over-inflation.
Check monthly and before long rides to stay on target.
Do Honda Dio models have TPMS?
Most Honda Dio scooters do not come with a tire pressure monitoring system (TPMS). Rely on manual checks with a gauge and a good inflator. If your model includes TPMS, follow the manual for sensor care.
Most DIO models don’t have TPMS; rely on regular gauge checks.
What happens if I ride with under-inflated tyres?
Under-inflation increases tire flex, causes faster wear, and can reduce fuel efficiency and braking performance. It also raises the risk of pinch flats and heat buildup in the tire.
Under-inflation can hurt grip and wear; fix it soon.
Can I use a car tire gauge on a scooter?
Yes, but ensure the gauge fits scooter valve stems and reads in the same units as your target. Digital gauges with a tight seal work well for small scooter tires.
A good, small gauge works fine on scooter tires.
Watch Video
What to Remember
- Check the Dio’s official pressures for front and rear tires
- Use a reliable gauge and a stable inflator
- Check tires cold and recheck after riding to confirm accuracy
- Document readings and monitor wear for safer riding