Harley Street Glide Tire Pressure Guide
Learn how to check, adjust, and maintain tire pressure on your Harley Street Glide with TPMS, manufacturer specs, and a simple maintenance routine from Tire Pressure Tips.

In this guide you will learn how to check and maintain proper tire pressure for a Harley Street Glide, using the bike’s TPMS, rider weight, and riding conditions. You’ll confirm the manufacturer’s recommended PSI, adjust air as needed, and troubleshoot common causes of pressure loss. Follow the steps to keep tires safe, efficient, and durable.
Understanding Harley Street Glide Tire Pressure Basics
Tire pressure is a critical safety parameter for any motorcycle, and the Harley Street Glide is no exception. Proper pressure affects grip, braking, and tire wear, and it also influences ride quality and fuel efficiency. According to Tire Pressure Tips, a consistent approach to checking cold PSI, accounting for temperature, and respecting load conditions helps riders avoid handling problems and flats. In this section you’ll learn the core concepts: cold vs hot readings, front vs rear pressures, and how TPMS readings relate to the sticker specifications. We also cover common misconceptions, such as assuming the same pressure for all tires or ignoring TPMS warnings. Understanding these basics sets the stage for accurate measurements and reliable maintenance across all Harley-Davidson models.
Finding the Manufacturer's Spec for Your Street Glide
Every Harley Street Glide model has a prescribed tire pressure range, usually listed on the frame sticker near the swingarm and in the owner’s manual. The exact values can vary between front and rear tires, and they may change with loads (solo vs two-up), rider weight, and riding conditions. Start by locating the official front and rear PSI values from the bike’s sticker or the manual. If you’re unsure, contact a dealer or consult the tire manufacturer’s guidelines for your tire size. Remember: using the correct spec matters more than chasing a higher or lower number, especially on long highway rides where stability and tire wear are on the line. This is one of the most important steps in the Harley Street Glide tire pressure routine.
Tools, TPMS, and How They Help Your Harley Street Glide Tire Pressure
You don’t need fancy equipment to check tire pressure, but having the right tools ensures accuracy and safety. A reliable tire pressure gauge (digital is preferred for consistency), a pump or compressor compatible with motorcycle tires, and a copy of the manufacturer’s spec are essential. TPMS provides continuous readings, but you should still verify with a stand-alone gauge when diagnosing leaks or slow pressure loss. Battery checks for the TPMS sensors, valve stems, and the condition of tires themselves are also important. In addition, keeping a notebook or digital log helps you track readings over time and notice gradual changes that could indicate a slow leak or a faulty sensor. For Weather and Temperature considerations, you’ll want to note ambient conditions when you record readings; temperature shifts can mimic or exaggerate pressure changes.
How to Measure Tire Pressure on a Harley Street Glide (cold readings)
The first step is to ensure the tires are cold, meaning they haven’t been driven for at least a few hours or cooled after a ride. Remove any dust from the valve stem, and attach your gauge to the valve; take note of both front and rear readings. Hybrid or analog gauges can work, but digital gauges reduce user error. Compare each reading to the manufacturer’s spec; if you’re significantly below, you’ll need to inflate; if above, deflate gradually. Do not chase a single exact number; aim to land within the recommended range. If your Street Glide uses a TPMS, cross-check the dashboard reading with the gauge to confirm accuracy and scan for any sensor alerts. After you adjust, re-check the pressures to confirm stability.
Adjusting Tire Pressure: When and How Much (Harley Street Glide tire pressure)
Adjustments should always bring you into the manufacturer’s recommended range. Inflate with slow, controlled bursts and re-check frequently to avoid over-inflation. After adjusting, take a short ride and re-measure once the tires have cooled for a consistent reading. If you frequently ride two-up or carry heavy loads, consult the manual for load-adjusted PSI and consider checking more often during hot weather when tires heat up quickly. Remember to secure the pump properly and avoid leaks from damaged hoses.
Temperature, Load, and Riding Style: What Affects Pressure on the Street Glide
Ambient temperature, altitude, and riding style all influence tire pressure. Warmer days can raise pressure; cold mornings can lower it. A two-up ride or heavy luggage can raise the tire’s load, changing the ideal PSI. If you ride aggressively on winding roads, your tires may heat up and show higher pressures when measured after a ride. These factors don’t require completely new specs; instead, they emphasize the importance of checking pressures regularly and adjusting within the recommended window. For Harley Street Glide tire pressure, a consistent habit of measurement helps you catch slow leaks and sensor faults early.
Maintenance Routine: Build a Simple Schedule for Harley Street Glide tire pressure
Create a straightforward schedule you can follow. Check tire pressures before long trips, after seasonal temperature changes, and at least once a month when riding locally. Maintain a small log with date, ambient temperature, front and rear readings, and any notes about loads or riding conditions. If you replace tires or change tire sizes, revisit the spec and recheck. Also inspect valve stems and TPMS sensors during each check for signs of wear or damage. A simple checklist can be printed and kept in your motorcycle’s tool kit so you don’t skip the routine.
Common Pitfalls and Troubleshooting for Harley Street Glide Tire Pressure
Common mistakes include ignoring the cold-reading rule, inflating to a guess, or using an inappropriate gauge. Leaks from valve stems or damaged TPMS sensors are frequent culprits of gradual pressure loss. Temperature swings are another factor; in extreme seasons you may need to adjust your PSI within the allowed range to maintain safe handling. If TPMS warnings persist, verify sensor batteries and inspect wheel hardware. When in doubt, consult a trained motorcycle technician who can diagnose slow leaks with specialized tools.
Tools & Materials
- Quality motorcycle tire pressure gauge(Digital gauge preferred for repeatable accuracy)
- Air pump or compressor compatible with motorcycle tires(Ensure gauge on pump is accurate)
- Owner's manual or official sticker with PSI specs(Front vs rear and load conditions)
- Notebook or digital log for readings(Optional but recommended for tracking)
- Marker or tape to label tires after adjustment(Helpful when listing multiple measurements)
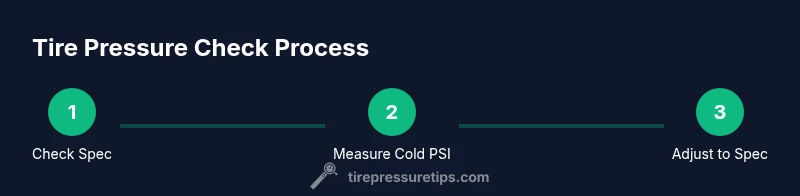
Steps
Estimated time: 20-40 minutes
- 1
Find the correct PSI for your Harley Street Glide
Locate the official front and rear tire pressures from the owner's manual or frame sticker. Note that values vary by model, load, and conditions. The goal is to start from the manufacturer’s recommended range rather than guessing.
Tip: If in doubt, contact a dealer or tire manufacturer for your exact tire size. - 2
Check cold tire pressures using a reliable gauge
Before any riding, with tires cold, attach the gauge to each valve stem and record front and rear readings. Use consistent units and write down ambient temperature for context.
Tip: Digital gauges reduce user error compared to analog ones. - 3
Inflate or deflate to reach the spec
If readings are outside the recommended range, add or release air in small increments, then re-check. Do not chase an exact number; aim for within the manufacturer’s window.
Tip: Inflate in small bursts and re-check—over-inflation is just as risky as under-inflation. - 4
Re-check after a short ride
Ride 5–10 minutes to warm the tires, then stop and re-check. Readings can rise with heat, so ensure you measure after tires cool again to confirm stability.
Tip: Let tires cool for a few minutes before re-reading for accuracy. - 5
Document the reading and adjust as needed
Log the readings, ambient temperature, and load conditions. Use this history to spot gradual changes or slow leaks before they become safety issues.
Tip: Keep the log in a place you’ll use before trips. - 6
Store equipment and maintain a tire pressure log
Regularly inspect gauges, hoses, and valve stems. Replace any worn parts and update the log whenever you change tires or get a different load setup.
Tip: Carry a compact gauge kit for on-the-road checks.
Frequently Asked Questions
What is the recommended tire pressure for a Harley Street Glide?
Check the owner’s manual or frame sticker for front and rear PSI specific to your model. Pressures vary by model, load, and tires, so follow the official spec rather than guessing.
Check the manual or sticker on your Street Glide for the exact front and rear pressures, since they vary by model and load.
How often should I check tire pressure on a Harley Street Glide?
Check before long trips, after temperature changes, and at least monthly. Keep a log to notice slow changes over time.
Check before trips, after weather changes, and at least monthly, keeping a log for changes.
Why is my TPMS warning light on even though tires look fine?
TPMS can trigger from temperature changes, slow leaks, or sensor faults. Inspect sensors, valve stems, and consider professional diagnosis if readings are inconsistent.
TPMS can warn due to temperature shifts or small leaks; inspect sensors and valves and recheck readings.
Can riding with low tire pressure be dangerous?
Yes. Under-inflated tires can affect handling, braking, and tire life. Always bring tires into the recommended range before riding.
Yes, low pressure affects handling and safety—inflate to the recommended range before riding.
How do load and two-up riding affect tire pressure?
Heavier loads may require higher PSI within the spec. Check the manual’s load guidance and adjust accordingly, especially for hot weather.
Heavier loads can change the needed PSI; consult the load guidelines in your manual.
What if I installed non-OE tires on my Street Glide?
Consult the tire maker’s recommended pressures for your tire size and model. Ensure compatibility with your bike and TPMS.
If you installed non-OE tires, follow the tire maker’s pressure guidance for that tire.
Watch Video
What to Remember
- Check cold PSI using a reliable gauge before rides.
- Always follow the manufacturer’s tire pressure specs.
- Use TPMS readings as a supplementary check, not a replacement for gauge verification.
- Maintain a simple log to track changes over time.